> This is part 1 of 2 of the full documentation (pages 1–100 of 121).
> The content is paginated: fetch every part to see all of it.
> Next part: https://docs.substreams.dev/llms-full.txt/1
> Page index: https://docs.substreams.dev/llms.txt
# Introduction
Substreams is a powerful indexing technology, which allows you to:
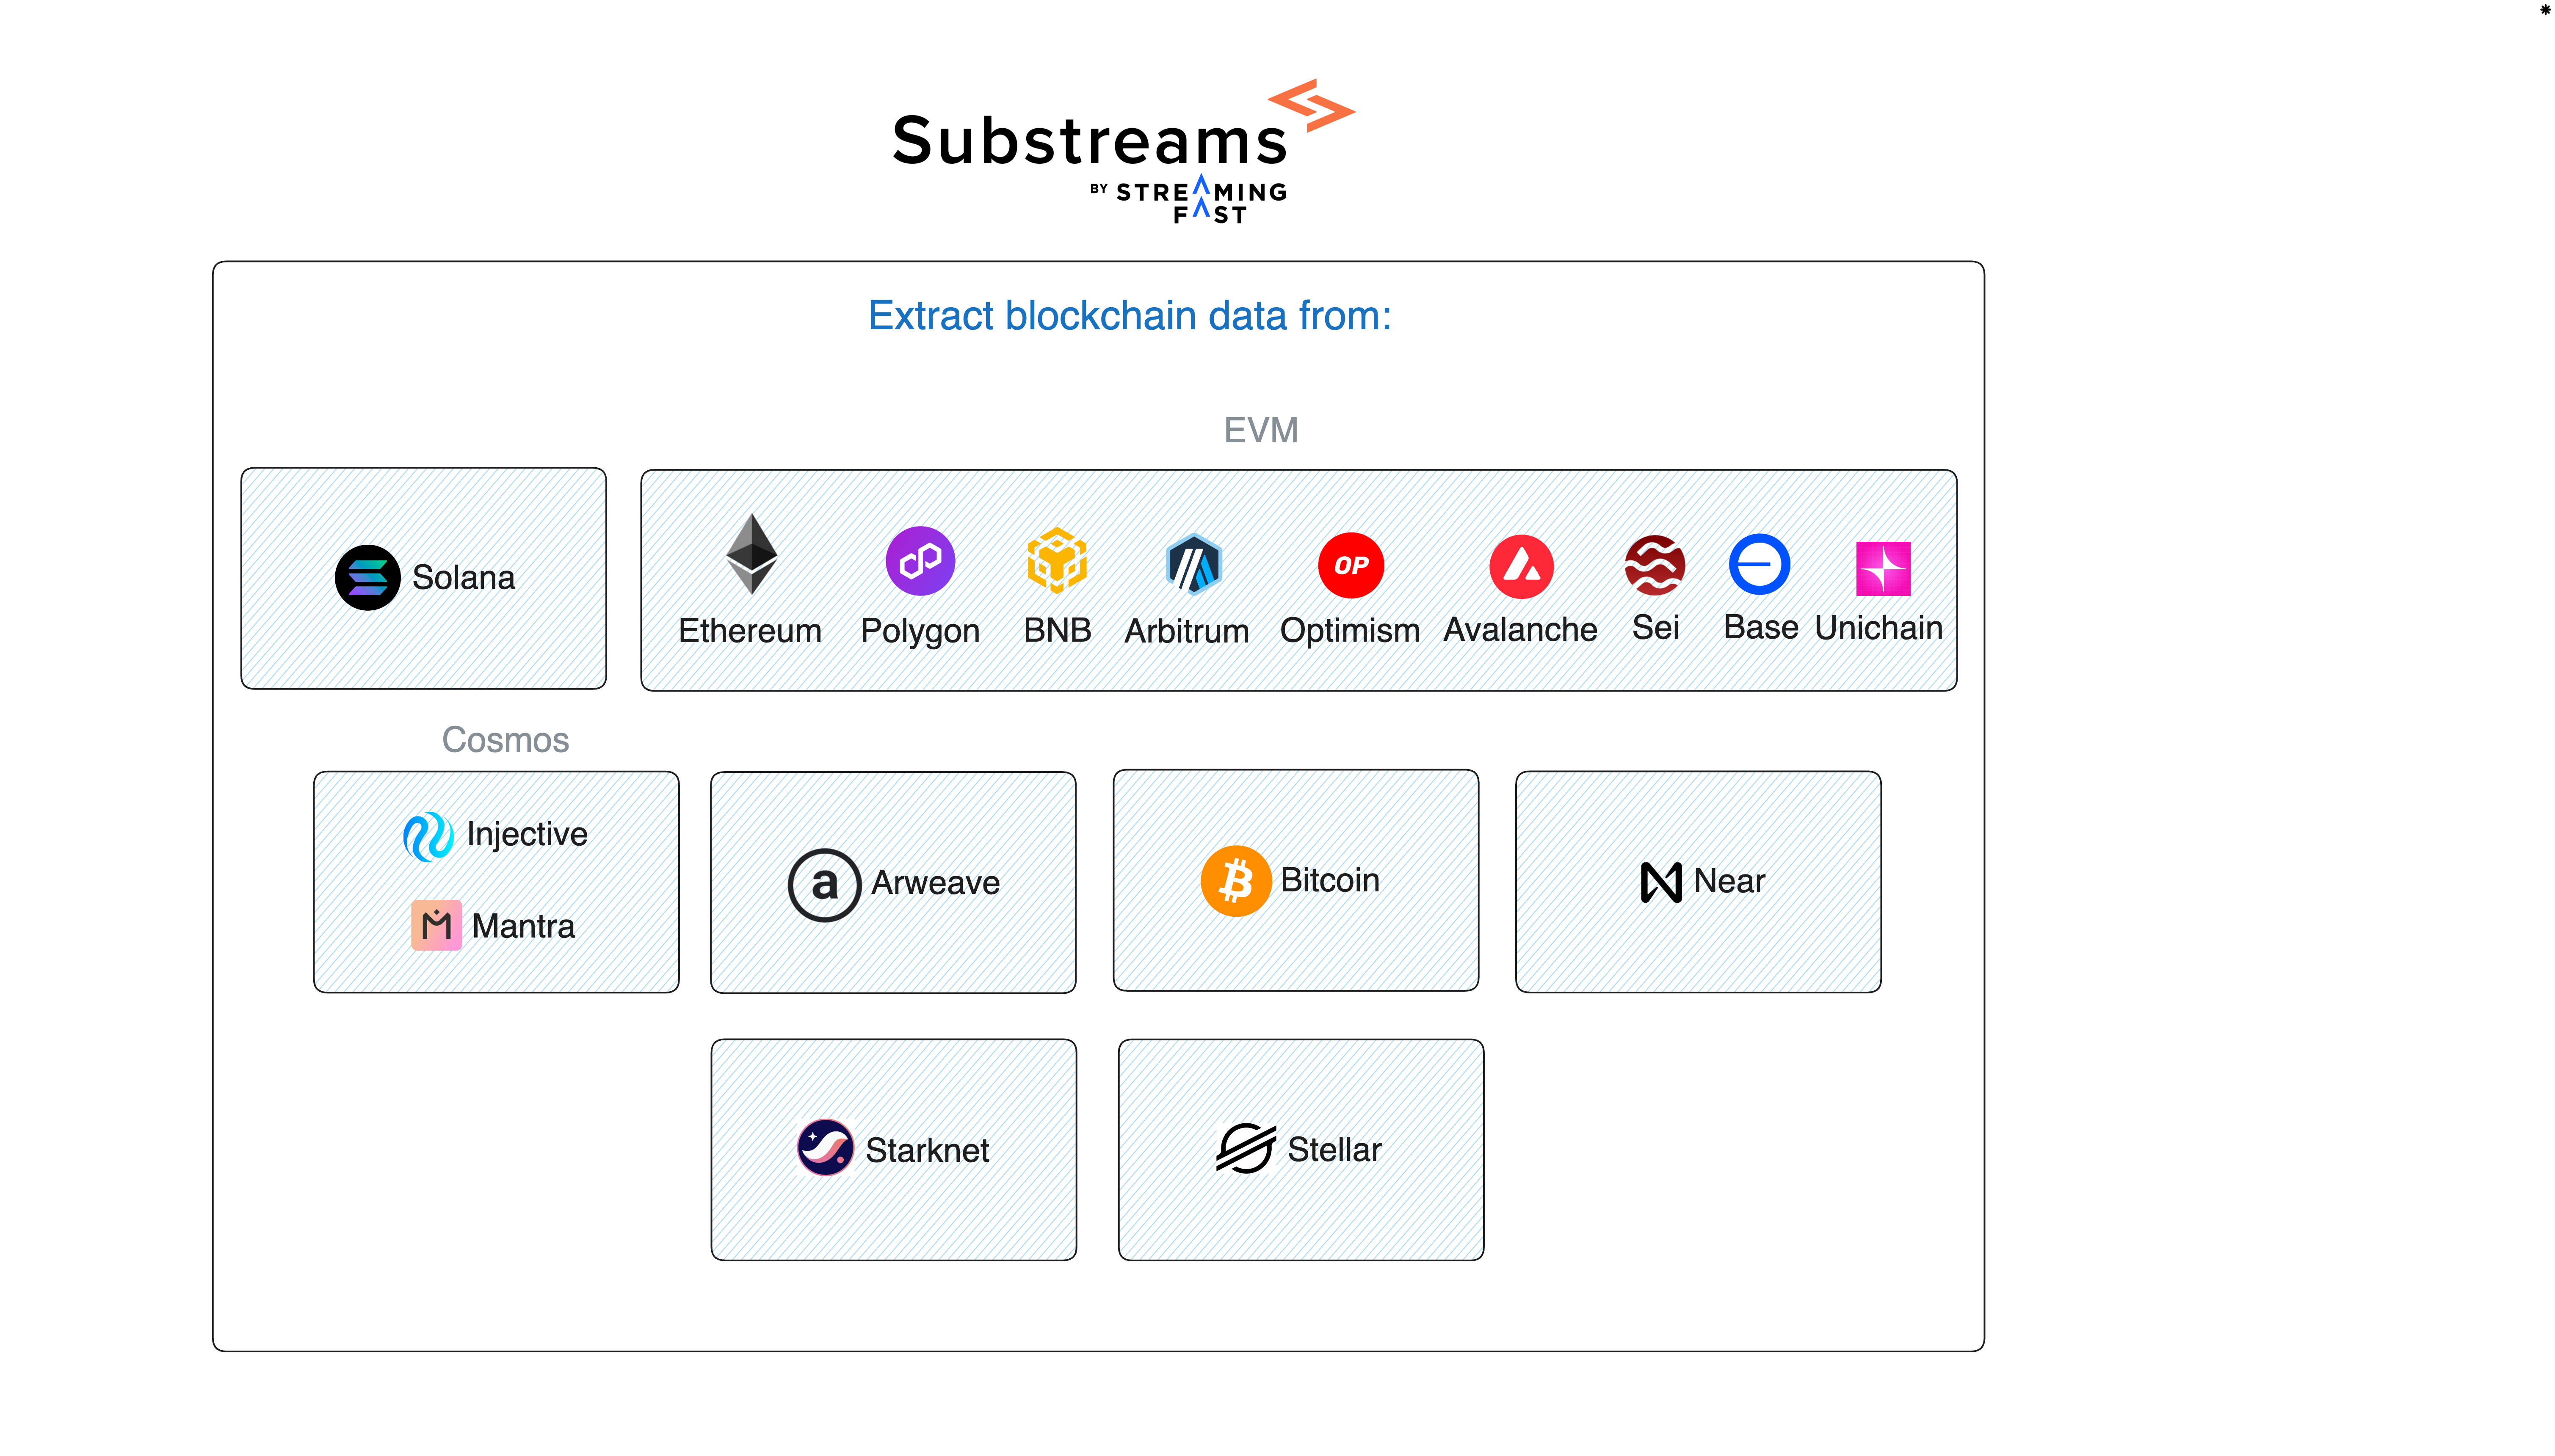
* Extract data from several blockchains (Solana, Ethereum, Polygon, BNB...).
* Apply custom transformations to the data.
* Send the data to a place of your choice (for example, a Postgres database or a file).
**You can use Substreams packages to define which specific data you want to extract from the blockchain**. For example, consider that you want to retrieve data from the Uniswap v3 smart contract. You can simply use the [Uniswap v3 Substreams Package](https://substreams.dev/packages/uniswap-v3/v0.2.10) and send that data wherever you want!
### How Does It Work?
Watch the following video and visit the [Getting Started](/getting-started) to learn more about how Substreams works.
{% embed url="" %}
Get an overview of Substreams
{% endembed %}
# Getting Started
Integrating Substreams can be quick and easy. This guide will help you get started with consuming ready-made Substreams packages or developing your own. Substreams are permissionless. Grab a key [here](https://thegraph.market/), no personal information required, and start streaming on-chain data.
## Build
### Explore Available Substreams Packages
There are many ready-to-use Substreams packages available. You can explore these packages using the [**Substreams Registry**](https://substreams.dev). The registry lets you search for and find packages that meet your needs.
Once you find a package that fits your needs, you can choose how you want to consume the data:
* [**SQL Database**](/how-to-guides/sinks/sql): Send the data to a database.
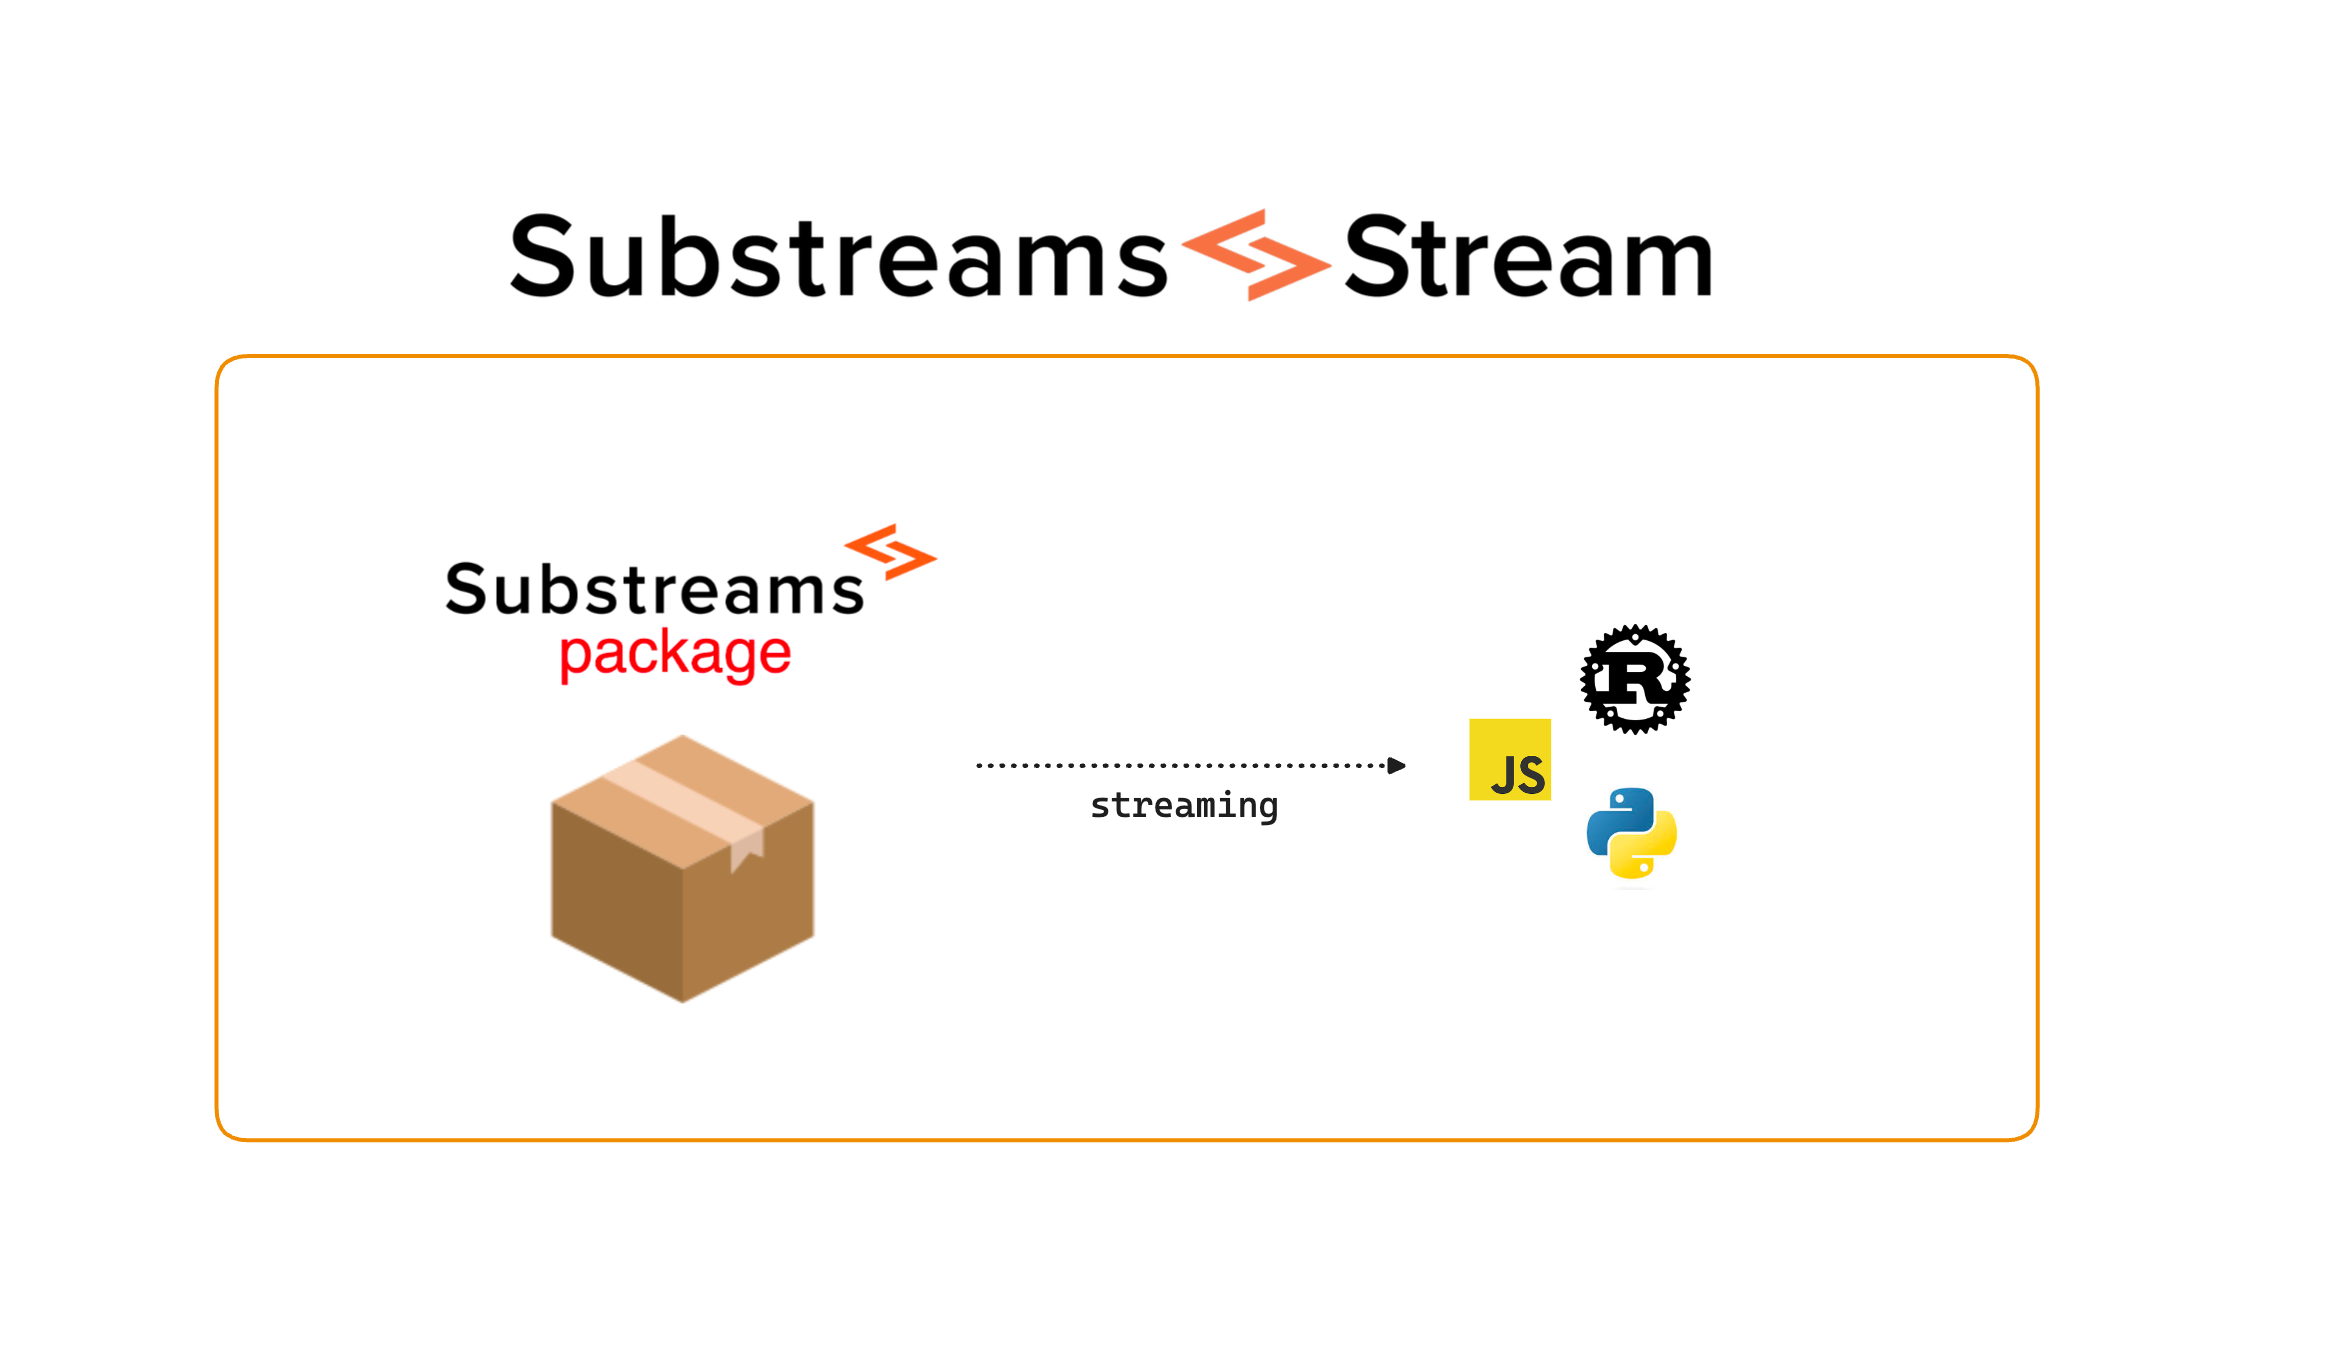
* [**Direct Streaming**](/how-to-guides/sinks/stream): Stream data directly to your application.
* [**PubSub**](/how-to-guides/sinks/pubsub): Send data to a PubSub topic.
### Optionally Develop Your Own Substreams
If you can't find a Substreams package that meets your specific needs, you can develop your own. Substreams are built with Rust, so you’ll write functions that extract and filter the data you need from the blockchain. The easiest way to get started is by referring to the [tutorial](/tutorials/intro-to-tutorials) section, enabling you to quickly filter data:
* [EVM](/tutorials/intro-to-tutorials/evm)
* [Solana](/tutorials/intro-to-tutorials/on-solana/solana)
* [Injective](/tutorials/intro-to-tutorials/injective)
To build and optimize your Substreams from zero, use the minimal path within the [Dev Container](/reference-material/development-tools/devcontainer-ref) to setup your environment and follow the [How-To Guides](/how-to-guides/develop-your-own-substreams).
{% hint style="info" %}
**Tip**: Using an AI coding assistant? Install the [Substreams agent skills](/how-to-guides/develop-your-own-substreams/general/agent-skills) to give it deep expertise in Substreams development patterns, Rust modules, protobuf schemas, and debugging techniques.
{% endhint %}
### Learn
* **Substreams Reliability Guarantees**: With a simple reconnection policy, Substreams guarantees you'll [Never Miss Data](/reference-material/core-concepts/reliability-guarantees).
* **Substreams Architecture**: For a deeper understanding of how Substreams works, explore the [architectural overview](/reference-material/core-concepts/architecture) of the data service.
* **Supported Networks**: Check-out which endpoints are supported [here](/reference-material/chain-support/chains-and-endpoints).
# Generate Your First Substreams
These tutorials demonstrate how to quickly index on-chain data for your application across various blockchains using the Substreams CLI.
{% hint style="info" %}
**Tip**: Using Claude Code, Cursor, or VS Code with AI? Install the [Substreams agent skills](/how-to-guides/develop-your-own-substreams/general/agent-skills) to give your AI assistant expert knowledge of Substreams patterns as you work through these tutorials.
{% endhint %}
Substreams data streams are available on the chains listed [here](/reference-material/chain-support/chains-and-endpoints). To support Substreams a [Firehose](https://thegraph.com/docs/en/new-chain-integration/) endpoint must be available.
If your blockchain is not supported, please ask in Discord. Then, consult the relevant ecosystem guide to get started using Substreams real-time data streams:
* [EVM](/tutorials/intro-to-tutorials/evm)
* [Solana](/tutorials/intro-to-tutorials/on-solana/solana)
* [NEAR](/tutorials/intro-to-tutorials/near)
* [Monad](/tutorials/intro-to-tutorials/monad)
* [Tron](/tutorials/intro-to-tutorials/tron)
* [Injective](/tutorials/intro-to-tutorials/injective)
* [Stellar](/tutorials/intro-to-tutorials/stellar)
# on EVM
In this tutorial, you'll learn how to initialize a EVM-based Substreams project using the Substreams CLI (`substreams init` command).
{% hint style="info" %}
The CLI installation is supported only on Linux and macOS. If you're using Windows, consider using the [DevContainer environment](/reference-material/development-tools/devcontainer-ref), which launches a Linux-based virtual environment.
{% endhint %}
{% hint style="info" %}
**Tip**: Using an AI coding assistant? Install the [Substreams agent skills](/how-to-guides/develop-your-own-substreams/general/agent-skills) to get expert Substreams guidance while building.
{% endhint %}
### Step 1: Initialize Your EVM Substreams Project
1. [Install the Substreams CLI](/how-to-guides/installing-the-cli)
2. Running `substreams init` will give you the option to choose between two EVM project options. Select the one that best fits your requirements:
* **evm-hello-world**: Creates a simple Substreams that outputs the events of a smart contract. Depending on the blockchain that you choose (Mainnet, Arbitrum, Polygon), the smart contract address will be different (usually, it's the USDC token, if it's available on the chain).
* **evm-events-calls**: Creates a Substreams that extracts and decodes EVM events and calls using the cached [EVM Foundational Module](https://substreams.dev/streamingfast/ethereum-common/v0.3.0), filtered by one or more smart contract addresses. Contract ABIs are retrieved from Etherscan. If an ABI isn’t available, you’ll need to provide it yourself.
### Step 2: Visualize the Data
1. Run `substreams auth` to sign in at [The Graph Market](https://thegraph.market/), pick an API key in your browser, then load credentials with `. ./.substreams.env`.
2. Run `substreams build` to compile the project.
3. Run `substreams gui` to visualize and iterate on your extracted data.
### Step 2.5: (Optionally) Transform the Data
1. Open the `src/lib.rs` file that has been generated.
2. Modify the transformations made to the data as needed. Every time you modify the code, you will have to recompile the project with `substreams build`.
### Step 3: Load the Data
To make your Substreams queryable (as opposed to [direct streaming](/how-to-guides/sinks/stream)), you can automatically send the data to a SQL data by using the [SQL sink](/how-to-guides/sinks/sql) or through [PubSub](/how-to-guides/sinks/pubsub).
### Additional Resources
You may find these additional resources helpful for developing your first EVM application.
#### Dev Container Reference
The [Dev Container Reference](/reference-material/development-tools/devcontainer-ref) helps you navigate the container and its common errors.
#### CLI Reference
The [CLI reference](/reference-material/command-line-interface) lets you explore all the tools available in the Substreams CLI.
#### Substreams Components Reference
The [Components Reference](/reference-material/manifest-and-components/packages) dives deeper into navigating the `substreams.yaml`.
# on Solana
# Transactions & Instructions
In this tutorial, you'll learn how to initialize a Solana-based Substreams project using the Substreams CLI (`substreams init` command).
{% hint style="info" %}
The CLI installation is supported only on Linux and macOS. If you're using Windows, consider using the [DevContainer environment](/reference-material/development-tools/devcontainer-ref), which launches a Linux-based virtual environment.
{% endhint %}
{% hint style="info" %}
**Tip**: Using an AI coding assistant? Install the [Substreams agent skills](/how-to-guides/develop-your-own-substreams/general/agent-skills) to get expert Substreams guidance while building.
{% endhint %}
## Step 1: Initialize Your Solana Substreams Project
1. [Install the Substreams CLI](/how-to-guides/installing-the-cli).
2. Running `substreams init` will give you the option to choose between two Solana project options. Select the one that best fits your requirements:
* **sol-hello-world**: Creates a simple Substreams that outputs the accounts used in the Pump.Fun smart contract. It demonstrates how to access to full Solana Block, iterate over instructions and filter on a specific program ID.
* **sol-transactions**: Creates a Substreams that filters Solana transactions based on one or more Program IDs and/or Account IDs, using the cached [Solana Foundational Module](https://substreams.dev/streamingfast/solana-common/v0.3.0).
* **sol-anchor-beta**: Given an Anchor IDL, create a Substreams that decodes instructions and events. If an IDL isn’t available using the `idl` subcommand within the [Anchor CLI](https://www.anchor-lang.com/docs/cli), you’ll need to provide it yourself.
The modules within Solana Common exclude voting transactions, to benefit from a 75% reduction in data processing size and costs, delay your stream by over 1000 blocks from head. This can be done using the [`sleep`](https://doc.rust-lang.org/std/thread/fn.sleep.html) function in Rust.
{% hint style="info" %}
To access voting transactions, use the full Solana block, `sf.solana.type.v1.Block`, as input.
{% endhint %}
## Step 2: Visualize the Data
1. Run `substreams auth` to sign in at [The Graph Market](https://thegraph.market/), pick an API key in your browser, then load credentials with `. ./.substreams.env`.
2. Run `substreams build` to compile the project.
3. Run `substreams gui` to visualize and iterate on your extracted data.
## Step 2.5: (Optionally) Transform the Data
1. Open the `src/lib.rs` file that has been generated.
2. Modify the transformations made to the data as needed. Every time you modify the code, you will have to recompile the project with `substreams build`.
## Step 3: Load the Data
To make your Substreams queryable (as opposed to [direct streaming](/how-to-guides/sinks/stream)), you can automatically send the data to a SQL data by using the [SQL sink](/how-to-guides/sinks/sql) or through [PubSub](/how-to-guides/sinks/pubsub).
## Additional Resources
You may find these additional resources helpful for developing your first Solana application.
### Dev Container Reference
The [Dev Container Reference](/reference-material/development-tools/devcontainer-ref) helps you navigate the container and its common errors.
### CLI Reference
The [CLI reference](/reference-material/command-line-interface) lets you explore all the tools available in the Substreams CLI.
### Substreams Components Reference
The [Components Reference](/reference-material/manifest-and-components/packages) dives deeper into navigating the `substreams.yaml`.
# Account Changes
## Introduction
In this tutorial, you will learn how to consume Solana account change data using Substreams. We will walk you through the process of setting up your environment, configuring your first Substreams stream, and consuming account changes efficiently.
By the end of this tutorial, you will have a working Substreams feed that allows you to track real-time account changes on the Solana blockchain, as well as historical account change data.
{% hint style="info" %}
Data for Solana account changes is available on a rolling three-month window.
{% endhint %}
{% hint style="info" %}
**Tip**: Using an AI coding assistant? Install the [Substreams agent skills](/how-to-guides/develop-your-own-substreams/general/agent-skills) to get expert Substreams guidance while building.
{% endhint %}
For each Solana Account block, only the latest update per account is recorded, see the [Protobuf Referece](https://buf.build/streamingfast/firehose-solana/file/main:sf/solana/type/v1/account.proto). If an account is deleted, a payload with `deleted == True` is provided. Additionally, events of low importance we're omitted, such as those with the special owner “Vote11111111…” account or changes that do not affect the account data (ex: lamport changes).
{% hint style="success" %}
The Account Changes Substreams natively handles a change of ownership upon delete.
{% endhint %}
## Prerequisites
Before you begin, ensure that you have the following:
1. [Substreams CLI](/how-to-guides/installing-the-cli) installed.
2. A [Substreams key](/how-to-guides/installing-the-cli/authentication) for access to the Solana Account Change data.
3. Basic knowledge of [how to use](/reference-material/command-line-interface) the command line interface (CLI).
## Step 1: Set Up a Connection to Solana Account Change Substreams
Now that you have Substreams CLI installed, we can set up a connection to the Solana Account Change Substreams feed.
Using the [Solana Accounts Foundational Module](https://substreams.dev/packages/solana-accounts-foundational/latest), you can choose to stream data directly or use the GUI for a more visual experience. The following `gui` example filters for Honey Token account data.
```bash
substreams gui solana-accounts-foundational filtered_accounts -t +10 -p filtered_accounts="owner:TokenkegQfeZyiNwAJbNbGKPFXCWuBvf9Ss623VQ5DA || account:4vMsoUT2BWatFweudnQM1xedRLfJgJ7hswhcpz4xgBTy"
```
This command will benchmark the account change stream within your terminal.
```bash
substreams run solana-accounts-foundational filtered_accounts -s -1 -o clock
```
The Foundational Module has support for filtering on specific accounts and/or owners. You can adjust the query based on your needs.
This tutorial will continue to guide you through filtering, sinking the data, and setting up reconnection policies.
## Step 2: Sink the Substreams
Consume the account stream [directly in your applicaion](/how-to-guides/sinks/stream) using a callback or make it queryable by using the [Substreams:SQL sink](/how-to-guides/sinks/sql).
## Step 3: Setting up a Reconnection Policy
[Cursor Management](/reference-material/core-concepts/reliability-guarantees) ensures seamless continuity and retraceability by allowing you to resume from the last consumed block if the connection is interrupted, preventing data loss and maintaining a persistent stream.
The user's primary responsibility when creating or using a sink is to pass a BlockScopedDataHandler and a BlockUndoSignalHandler implementation(s) which has the following interface:
```go
import (
pbsubstreamsrpc "github.com/streamingfast/substreams/pb/sf/substreams/rpc/v2"
)
type BlockScopedDataHandler = func(ctx context.Context, cursor *Cursor, data *pbsubstreamsrpc.BlockScopedData) error
type BlockUndoSignalHandler = func(ctx context.Context, cursor *Cursor, undoSignal *pbsubstreamsrpc.BlockUndoSignal) error
```
# on NEAR
In this tutorial, you'll learn how to initialize a NEAR-based Substreams project using the Substreams CLI and the available NEAR development resources.
{% hint style="info" %}
The CLI installation is supported only on Linux and macOS. If you're using Windows, consider using the [DevContainer environment](/reference-material/development-tools/devcontainer-ref), which launches a Linux-based virtual environment.
{% endhint %}
{% hint style="info" %}
**Tip**: Using an AI coding assistant? Install the [Substreams agent skills](/how-to-guides/develop-your-own-substreams/general/agent-skills) to get expert Substreams guidance while building.
{% endhint %}
## Step 1: Initialize Your NEAR Substreams Project
1. [Install the Substreams CLI](/how-to-guides/installing-the-cli).
2. Running `substreams init` will give you the option to choose between NEAR project options. Select the one that best fits your requirements:
* **near-hello-world**: Creates a simple Substreams example that demonstrates how to extract and process NEAR blockchain data using the [NEAR Full block](https://github.com/streamingfast/firehose-near/blob/develop/proto/sf/near/type/v1/type.proto) as input.
## Step 2: Visualize the Data
1. Run `substreams auth` to sign in at [The Graph Market](https://thegraph.market/), pick an API key in your browser, then load credentials with `. ./.substreams.env`.
2. Run `substreams build` to compile the project.
3. Run `substreams gui` to visualize and iterate on your extracted data.
## Step 2.5: (Optionally) Transform the Data
1. Open the `src/lib.rs` file that has been generated.
2. Modify the transformations made to the data as needed. Every time you modify the code, you will have to recompile the project with `substreams build`.
## Step 3: Load the Data
To make your Substreams queryable (as opposed to [direct streaming](/how-to-guides/sinks/stream)), you can automatically send the data to a SQL data by using the [SQL sink](/how-to-guides/sinks/sql) or through [PubSub](/how-to-guides/sinks/pubsub).
## Additional Resources
You may find these additional resources helpful for developing your first NEAR application.
### NEAR Development Kit
The [Substreams NEAR](https://github.com/streamingfast/substreams-near) development kit provides Rust Firehose Block models and helpers specifically for NEAR chains.
### NEAR Endpoints
NEAR Substreams are available on the following endpoints:
* **NEAR Mainnet**: `mainnet.near.streamingfast.io:443`
* **NEAR Testnet**: `testnet.near.streamingfast.io:443`
### Dev Container Reference
The [Dev Container Reference](/reference-material/development-tools/devcontainer-ref), in case you are developing on Windows and need a Linux virtual environment.
### Substreams Components Reference
The [Components Reference](/reference-material/manifest-and-components/packages) dives deeper into navigating the `substreams.yaml`.
# on Monad
In this tutorial, you'll learn how to initialize a Monad-based Substreams project using the Substreams CLI and the available Monad development resources.
{% hint style="warning" %}
Due to Monad full nodes not providing access to arbitrary historic state, eth\_calls are unsupported for Monad Substreams packages. See for more information.
{% endhint %}
{% hint style="info" %}
The CLI installation is supported only on Linux and macOS. If you're using Windows, consider using the [DevContainer environment](/reference-material/development-tools/devcontainer-ref), which launches a Linux-based virtual environment.
{% endhint %}
{% hint style="info" %}
**Tip**: Using an AI coding assistant? Install the [Substreams agent skills](/how-to-guides/develop-your-own-substreams/general/agent-skills) to get expert Substreams guidance while building.
{% endhint %}
## Step 1: Initialize Your Monad Substreams Project
1. [Install the Substreams CLI](/how-to-guides/installing-the-cli).
2. Running `substreams init` will give you the option to choose the EVM protocol, then select one of three project options that best fits your requirements:
* **evm-hello-world**: Creates a Substreams that extracts a popular ERC20 token's log data from blocks
* **evm-events-calls-raw**: (without ABI) Get raw Ethereum events/calls and create a Substreams as source. You'll need to specify the contract address(es) that you want to follow.
* **evm-events-calls**: (with ABI) Decode Ethereum events/calls using an ABI and create a Substreams as source. You'll need to specify the contract address(es) that you want to follow. Contract ABIs are retrieved from [Monadscan](https://monadscan.com/), or you can provide them yourself if not available.
## Step 2: Visualize the Data
1. Run `substreams auth` to sign in at [The Graph Market](https://thegraph.market/), pick an API key in your browser, then load credentials with `. ./.substreams.env`.
2. Run `substreams build` to compile the project.
3. Run `substreams gui` to visualize and iterate on your extracted data.
## Step 2.5: (Optionally) Transform the Data
1. Open the `src/lib.rs` file that has been generated.
2. Modify the transformations made to the data as needed. Every time you modify the code, you will have to recompile the project with `substreams build`.
## Step 3: Load the Data
To make your Substreams queryable (as opposed to [direct streaming](/how-to-guides/sinks/stream)), you can automatically send the data to a SQL data by using the [SQL sink](/how-to-guides/sinks/sql) or through [PubSub](/how-to-guides/sinks/pubsub).
## Additional Resources
You may find these additional resources helpful for developing your first Monad application.
### Monad Development Kit
The [Substreams Ethereum](https://github.com/streamingfast/substreams-ethereum) development kit provides Rust Firehose Block models and helpers specifically for EVM-compatible chains like Monad.
### Monad Endpoints
Monad Substreams are available on the following endpoints:
* **Monad Mainnet**: `mainnet-base.monad.streamingfast.io:443`
### Dev Container Reference
The [Dev Container Reference](/reference-material/development-tools/devcontainer-ref), in case you are developing on Windows and need a Linux virtual environment.
### Substreams Components Reference
The [Components Reference](/reference-material/manifest-and-components/packages) dives deeper into navigating the `substreams.yaml`.
# on TRON
In this tutorial, you'll learn how to initialize a TRON-based Substreams project using the Substreams CLI (`substreams init` command).
{% hint style="info" %}
The CLI installation is supported only on Linux and macOS. If you're using Windows, consider using the [DevContainer environment](/reference-material/development-tools/devcontainer-ref), which launches a Linux-based virtual environment.
{% endhint %}
{% hint style="info" %}
**Tip**: Using an AI coding assistant? Install the [Substreams agent skills](/how-to-guides/develop-your-own-substreams/general/agent-skills) to get expert Substreams guidance while building.
{% endhint %}
## Step 1: Initialize Your TRON Substreams Project
1. [Install the Substreams CLI](/how-to-guides/installing-the-cli).
2. Running `substreams init` will give you the option to choose between three TRON project options. Select the one that best fits your requirements:
* **tron-hello-world**: Creates a simple Substreams example, the example outputs results with type `TransferContract` that have an `amount` above 100M. Use this example to learn how to write a custom Substreams starting from the [TRON Full block](https://github.com/streamingfast/firehose-tron/blob/main/proto/sf/tron/type/v1/block.proto) as input.
* **tron-transactions**: Generates a Substreams that outputs filtered transactions (full transactions). Filtering is supported on `contract_type`, `to`, `from` and `contract_address`.
* **Tron EVM (mainnet)**: Navigate to the `substreams init` [EVM path](/tutorials/intro-to-tutorials/evm) to access TRON-specific EVM data. While the TRON full blocks do contain everything, TRON EVM mainnet contains only the EVM associated transactions, receipts, and logs.
## Step 2: Visualize the Data
1. Run `substreams auth` to sign in at [The Graph Market](https://thegraph.market/), pick an API key in your browser, then load credentials with `. ./.substreams.env`.
2. Run `substreams build` to compile the project.
3. Run `substreams gui` to visualize and iterate on your extracted data.
## Step 2.5: (Optionally) Transform the Data
1. Open the `src/lib.rs` file that has been generated.
2. Modify the transformations made to the data as needed. Every time you modify the code, you will have to recompile the project with `substreams build`.
## Step 3: Load the Data
To make your Substreams queryable (as opposed to [direct streaming](/how-to-guides/sinks/stream)), you can automatically send the data to a SQL data by using the [SQL sink](/how-to-guides/sinks/sql) or through [PubSub](/how-to-guides/sinks/pubsub).
## Additional Resources
You may find these additional resources helpful for developing your first TRON application.
### Dev Container Reference
The [Dev Container Reference](/reference-material/development-tools/devcontainer-ref), in case you are developing on Windows and need a Linux virtual environment.
### Substreams Components Reference
The [Components Reference](/reference-material/manifest-and-components/packages) dives deeper into navigating the `substreams.yaml`.
# on Injective
In this tutorial, you'll learn how to initialize a Injective-based Substreams project using the Substreams CLI (`substreams init` command).
{% hint style="info" %}
The CLI installation is supported only on Linux and macOS. If you're using Windows, consider using the [DevContainer environment](/reference-material/development-tools/devcontainer-ref), which launches a Linux-based virtual environment.
{% endhint %}
{% hint style="info" %}
**Tip**: Using an AI coding assistant? Install the [Substreams agent skills](/how-to-guides/develop-your-own-substreams/general/agent-skills) to get expert Substreams guidance while building.
{% endhint %}
## Step 1: Initialize Your Injective Substreams Project
1. [Install the Substreams CLI](/how-to-guides/installing-the-cli).
2. Running `substreams init` will give you the option to choose between three Injective project options. Select the one that best fits your requirements:
* **Injective EVM**: Navigate to the `substreams init` [EVM path](/tutorials/intro-to-tutorials/evm) to access Injective-specific EVM data. Supports [Extended Blocks](/reference-material/chain-support/chains-and-endpoints).
* **Injective-hello-world**: Creates a simple Substreams module that outputs all `transfer` events. It demonstrates how to access the full Injective block, iterate over events, and filter by a specific event `type`.
* **Injective-events**: Creates a Substreams that extracts Injective events using the cached [Injective Foundational Module](https://substreams.dev/packages/injective-common/v0.2.4), filtered by one or more smart contract addresses. This includes type `wasm` events.
{% hint style="info" %}
Tip: Have the start block of your transaction or specific events ready.
{% endhint %}
## Step 2: Visualize the Data
1. Run `substreams auth` to sign in at [The Graph Market](https://thegraph.market/), pick an API key in your browser, then load credentials with `. ./.substreams.env`.
2. Run `substreams build` to compile the project.
3. Run `substreams gui` to visualize and iterate on your extracted data.
## Step 2.5: (Optionally) Transform the Data
1. Open the `src/lib.rs` file that has been generated.
2. Modify the transformations made to the data as needed. Every time you modify the code, you will have to recompile the project with `substreams build`.
## Step 3: Load the Data
To make your Substreams queryable (as opposed to [direct streaming](/how-to-guides/sinks/stream)), you can automatically send the data to a SQL data by using the [SQL sink](/how-to-guides/sinks/sql) or through [PubSub](/how-to-guides/sinks/pubsub).
## Additional Resources
You may find these additional resources helpful for developing your first Injective application.
### Dev Container Reference
The [Dev Container Reference](/reference-material/development-tools/devcontainer-ref) helps you navigate the container and its common errors.
### CLI Reference
The [CLI reference](/reference-material/command-line-interface) lets you explore all the tools available in the Substreams CLI.
### Substreams Components Reference
The [Components Reference](https://github.com/streamingfast/substreams/tree/develop/docs/references/substreams-components/README.md) dives deeper into navigating the `substreams.yaml`.
# on Stellar
In this guide, you'll learn how to initialize a Stellar-based Substreams project within the Dev Container.
{% hint style="info" %}
The CLI installation is supported only on Linux and macOS. If you're using Windows, consider using the [DevContainer environment](/reference-material/development-tools/devcontainer-ref), which launches a Linux-based virtual environment.
{% endhint %}
{% hint style="info" %}
**Tip**: Using an AI coding assistant? Install the [Substreams agent skills](/how-to-guides/develop-your-own-substreams/general/agent-skills) to get expert Substreams guidance while building.
{% endhint %}
## Step 1: Initialize Your Stellar Substreams Project
1. [Install the Substreams CLI](/how-to-guides/installing-the-cli).
2. Running `substreams init` will give you the option to choose between two Stellar project options. Select the one that best fits your requirements:
* **stellar-minimal**: Creates a simple Substreams that extracts raw Stellar block data and generates corresponding Rust code. This path will start you with the full raw block, you can navigate to the `substreams.yaml` (the manifest) to modify the input.
* **stellar-transactions-operations**: Creates a Substreams that extracts and decodes Stellar trasactions or operations using the cached [Stellar Foundational Module](https://substreams.dev/packages/stellar-foundational/v0.3.0). If you choose the index transactions, you will be able to filter by **source account(s)**. If you choose to index operations, you will be able to filter by **operation name**.
{% hint style="info" %}
The first streamable block for Stellar on Substreams is currently 55,411,000.
{% endhint %}
{% hint style="info" %}
The `stellar-transactions-operations` foundational module **only decodes and indexes SOME operations**. However, you can [modify the code](https://github.com/streamingfast/substreams-foundational-modules/blob/develop/stellar-common/src/operations.rs#L16) to include the decoding of other operations if needed.
Please, find below the operations supported:
```rust
&Op::CreateAccount(_) => "create_account",
&Op::AccountMerge(_) => "account_merge",
&Op::Payment(_) => "payment",
&Op::CreateClaimableBalance(_) => "create_claimable_balance",
&Op::ClaimClaimableBalance(_) => "claim_claimable_balance",
&Op::Clawback(_) => "clawback",
&Op::ClawbackClaimableBalance(_) => "clawback_claimable_balance",
&Op::AllowTrust(_) => "allow_trust",
&Op::SetTrustLineFlags(_) => "set_trust_line_flags",
&Op::LiquidityPoolDeposit(_) => "liquidity_pool_deposit",
&Op::LiquidityPoolWithdraw(_) => "liquidity_pool_withdraw",
&Op::ManageBuyOffer(_) => "manage_buy_offer",
&Op::ManageSellOffer(_) => "manage_sell_offer",
&Op::CreatePassiveSellOffer(_) => "create_passive_sell_offer",
&Op::PathPaymentStrictSend(_) => "path_payment_strict_send",
&Op::PathPaymentStrictReceive(_) => "path_payment_strict_receive",
```
{% endhint %}
## Step 2: Visualize the Data
1. Run `substreams auth` to sign in at [The Graph Market](https://thegraph.market/), pick an API key in your browser, then load credentials with `. ./.substreams.env`.
2. Now you can freely use the `substreams gui` to visualize and iterate on your extracted data.
## Step 2.5: (Optionally) Transform the Data
Within the generated directories, modify your Substreams modules to include additional filters, aggregations, and transformations, then update the manifest accordingly. To learn more about this, visit the [How-to-Guides](/how-to-guides/develop-your-own-substreams)
## Step 3: Load the Data
To make your Substreams queryable (as opposed to [direct streaming](/how-to-guides/sinks/stream)), you can automatically generate a SQL sink.
## Additional Resources
You may find these additional resources helpful for developing your first Stellar application.
### Dev Container Reference
The [Dev Container Reference](/reference-material/development-tools/devcontainer-ref) helps you navigate the container and its common errors.
### CLI Reference
The [CLI reference](/reference-material/command-line-interface) lets you explore all the tools available in the Substreams CLI.
### Substreams Components Reference
The [Components Reference](https://github.com/streamingfast/substreams/tree/develop/docs/references/substreams-components/README.md) dives deeper into navigating the `substreams.yaml`.
# on World Chain
In this tutorial, you'll learn how to initialize a World Chain-based Substreams project using the Substreams CLI (`substreams init` command).
{% hint style="info" %}
The CLI installation is supported only on Linux and macOS. If you're using Windows, consider using the [DevContainer environment](/reference-material/development-tools/devcontainer-ref), which launches a Linux-based virtual environment.
{% endhint %}
{% hint style="info" %}
**Tip**: Using an AI coding assistant? Install the [Substreams agent skills](/how-to-guides/develop-your-own-substreams/general/agent-skills) to get expert Substreams guidance while building.
{% endhint %}
### Step 1: Initialize Your World Chain Substreams Project
1. [Install the Substreams CLI](/how-to-guides/installing-the-cli)
2. Running `substreams init` will give you the option to choose between two EVM project options. Select the one that best fits your requirements:
* **evm-hello-world**: Creates a simple Substreams that outputs the events of a smart contract. For World Chain, this will typically use a common smart contract address available on the network.
* **evm-events-calls**: Creates a Substreams that extracts and decodes EVM events and calls using the cached [EVM Foundational Module](https://substreams.dev/streamingfast/ethereum-common/v0.3.0), filtered by one or more smart contract addresses. Contract ABIs are retrieved from Etherscan-compatible block explorers. If an ABI isn't available, you'll need to provide it yourself.
### Step 2: Configure Your World Chain Endpoint
When running your Substreams commands, use the World Chain endpoint:
```bash
substreams run -e mainnet.worldchain.streamingfast.io:443 substreams.yaml [module_name] --start-block [block_number]
```
### Step 3: Visualize the Data
1. Run `substreams auth` to sign in at [The Graph Market](https://thegraph.market/), pick an API key in your browser, then load credentials with `. ./.substreams.env`.
2. Run `substreams build` to compile the project.
3. Run `substreams gui -e mainnet.worldchain.streamingfast.io:443` to visualize and iterate on your extracted data.
### Step 3.5: (Optionally) Transform the Data
1. Open the `src/lib.rs` file that has been generated.
2. Modify the transformations made to the data as needed. Every time you modify the code, you will have to recompile the project with `substreams build`.
### Step 4: Load the Data
To make your Substreams queryable (as opposed to [direct streaming](/how-to-guides/sinks/stream)), you can automatically send the data to a SQL database by using the [SQL sink](/how-to-guides/sinks/sql) or through [PubSub](/how-to-guides/sinks/pubsub).
### World Chain Specifics
World Chain is an EVM-compatible blockchain, which means:
* It uses the same [`sf.ethereum.type.v2.Block`](https://github.com/streamingfast/firehose-ethereum/blob/develop/proto/sf/ethereum/type/v2/type.proto) protobuf model as other EVM chains
* All EVM-based Substreams modules and patterns work seamlessly
* You can leverage existing EVM foundational modules and libraries
* Smart contract interactions follow standard EVM patterns
### Additional Resources
You may find these additional resources helpful for developing your first World Chain application.
#### Dev Container Reference
The [Dev Container Reference](/reference-material/development-tools/devcontainer-ref) helps you navigate the container and its common errors.
#### CLI Reference
The [CLI reference](/reference-material/command-line-interface) lets you explore all the tools available in the Substreams CLI.
#### Substreams Components Reference
The [Components Reference](/reference-material/manifest-and-components/packages) dives deeper into navigating the `substreams.yaml`.
#### EVM Development Guide
Since World Chain is EVM-compatible, you can also refer to the general [EVM development guide](/how-to-guides/develop-your-own-substreams/on-evm/exploring-ethereum) for more advanced patterns and techniques.
# Consuming a Foundational Store
This guide explains how to consume data from a Foundational Store in your Substreams modules. Foundational Stores provide efficient access to pre-processed blockchain data for building complex data processing pipelines.
{% hint style="info" %}
**Tip**: Using an AI coding assistant? Install the [Substreams agent skills](/how-to-guides/develop-your-own-substreams/general/agent-skills) to get expert Substreams guidance while building.
{% endhint %}
## What is a Foundational Store?
A Foundational Store is a high-performance, multi-backend key-value storage system designed for Substreams ingestion and serving. It provides:
* **Fork-aware storage**: Handles blockchain reorganizations automatically
* **Multiple backends**: Supports Badger (embedded) and PostgreSQL
* **Block-level versioning**: Every entry tagged with block number for historical queries
* **High-performance serving**: gRPC API for data retrieval
* **Streaming ingestion**: Continuous processing via Substreams sink
Foundational Stores are typically populated by Substreams modules that extract and transform blockchain data, then serve that data to other Substreams modules for efficient lookups.
## Consuming a Foundational Store
To consume data from a Foundational Store in your Substreams module:
### Step 1: Import the Foundational Store
Add the import to your `substreams.yaml`:
```yaml
imports:
your_store: your-foundational-store@v1.0.0
modules:
- name: your_module
kind: map
inputs:
- foundational-store: your_store
output:
type: proto:your.OutputType
```
### Step 2: Query the Store in Code
Use the `FoundationalStore` input in your Rust handler:
```rust
use substreams::store::FoundationalStore;
#[substreams::handlers::map]
fn process_data(foundational_store: FoundationalStore) -> Result {
// Single key lookup
let response = foundational_store.get(key_bytes);
if response.response == ResponseCode::Found as i32 {
// Process found data
}
// Batch lookup (recommended for performance)
let keys = vec![key1, key2, key3];
let queriedEntries = foundational_store.get(keys);
for entry in queriedEntries.entries {
// Process each entry
}
Ok(your_output)
}
```
## Understanding QueriedEntries Responses
When querying a Foundational Store, responses are returned as `QueriedEntries` containing multiple `QueriedEntry` results.
### QueriedEntries Structure
```protobuf
message QueriedEntries {
repeated QueriedEntry entries = 2;
}
message QueriedEntry {
ResponseCode code = 1;
Entry entry = 2;
}
```
Each `QueriedEntry` corresponds to one requested key, in the same order as the request.
### Response Codes
* `RESPONSE_CODE_FOUND`: Key exists and value was retrieved successfully
* `RESPONSE_CODE_NOT_FOUND`: Key does not exist at the requested block
* `RESPONSE_CODE_NOT_FOUND_FINALIZE`: Key was deleted after finality (LIB) - historical reference only
* `RESPONSE_CODE_UNSPECIFIED`: Default value, should not occur in normal operation
### Handling Responses in Code
```rust
use substreams::store::FoundationalStore;
use sf::substreams::foundational_store::model::v2::{QueriedEntry, ResponseCode};
#[substreams::handlers::map]
fn process_data(foundational_store: FoundationalStore) -> Result {
let keys = vec![key1, key2, key3];
let response = foundational_store.get_all(keys);
for queried_entry in response.entries {
match queried_entry.code {
x if x == ResponseCode::Found as i32 => {
// Successfully found - unpack the value
let account_owner: AccountOwner = queried_entry.entry
.value
.unpack()?;
// Process the data
}
x if x == ResponseCode::NotFound as i32 => {
// Key doesn't exist - handle missing data
substreams::log::debug!("Key not found");
}
x if x == ResponseCode::NotFoundFinalize as i32 => {
// Key was deleted after finality
substreams::log::info!("Key deleted after finality");
}
_ => {
// Handle unexpected response codes
substreams::log::error!("Unexpected response code: {}", queried_entry.code);
}
}
}
Ok(your_output)
}
```
## Example: SPL Token Transfers with Ownership Resolution
The [substreams-spl-token](https://github.com/streamingfast/substreams-spl-token) module demonstrates consuming a Foundational Store.
It imports the SPL Initialized Account store to resolve token account ownership:
```yaml
imports:
spl_initialized_account: spl-initialized-account@v0.1.2
modules:
- name: map_spl_instructions
inputs:
- foundational-store: spl_initialized_account
```
Then queries the store to get owner addresses for transfer resolution:
```rust
#[substreams::handlers::map]
fn map_spl_instructions(spl_initialized_account_store: FoundationalStore) -> Result {
// Resolve owners for transfer accounts
let from_owner = get_owner(&spl_initialized_account_store, &transfer.from)?;
let to_owner = get_owner(&spl_initialized_account_store, &transfer.to)?;
// Create transfer with resolved ownership
transfers.push(Transfer {
from_owner,
to_owner,
amount: transfer.amount,
// ...
});
}
```
# Install Substreams CLI
StreamingFast Substreams CLI installation documentation
### Install the `substreams` CLI
Used for connecting to endpoints, streaming data in real time, and packaging custom modules.
#### Homebrew installation (macOS)
```
brew install streamingfast/tap/substreams
```
#### Docker Alias (macOS or Linux)
You can use our published Substreams CLI Docker image and assign an alias to Docker. We mount the API token as `SF_API_TOKEN` in the alias so that credentials are known to the CLI running inside Docker.
```bash
alias substreams='docker run --rm -it -e="SF_API_TOKEN=$SF_API_TOKEN" ghcr.io/streamingfast/substreams'
```
{% hint style="info" %}
**Note**: Expansion of `$SF_API_TOKEN` above happens at command runtime, so you must ensure that it is set correctly in your own host environment.
{% endhint %}
#### Pre-compiled binary installation (macOS or Linux)
There are several CLI binaries available for different operating systems. Choose the correct platform in the [CLI releases page](https://github.com/streamingfast/substreams/releases).
If you are on MacOS, you can use the following command:
```bash
LINK=$(curl -s https://api.github.com/repos/streamingfast/substreams/releases/latest | awk "/download.url.*$(uname -s | tr '[:upper:]' '[:lower:]')_$(uname -m)/ {print \$2}" | sed 's/"//g')
curl -L $LINK | tar zxf -
```
If you are on Linux, you can use the following command:
```bash
# Use correct binary for your platform
LINK=$(curl -s https://api.github.com/repos/streamingfast/substreams/releases/latest | awk "/download.url.*linux_$(uname -m)/ {print \$2}" | sed 's/"//g')
curl -L $LINK | tar zxf -
```
#### Installation from source (Linux)
```bash
git clone https://github.com/streamingfast/substreams
cd substreams
go install -v ./cmd/substreams
```
{% hint style="warning" %}
**Important**: Add $HOME/go/bin to the system path if it's not already present.
{% endhint %}
### Validation of installation
Run the [`substreams` CLI](/reference-material/command-line-interface) passing the `--version` flag to check the success of the installation.
```bash
substreams --version
```
A successful installation will print the version that you have installed.
```bash
substreams version dev
```
### Install Other Developer Dependencies (Only for Substreams Developers)
If you plan to build your own Substreams (i.e. write Rust code to extract data from the blockchain), you will need several dependencies to set up your developer environment:
{% hint style="success" %}
**Tip**: Instructions are also provided for cloud-based Gitpod setups.
{% endhint %}
#### Rust installation
Developing Substreams modules requires a working [Rust](https://www.rust-lang.org/) compilation environment.
There are [several ways to install Rust](https://www.rust-lang.org/tools/install)**.** Install Rust through `curl` by using:
```bash
curl --proto '=https' --tlsv1.2 -sSf https://sh.rustup.rs | sh
source $HOME/.cargo/env # to configure your current shell
```
**`wasm32-unknown-unknown` target**
Ensure you have the `wasm32-unknown-unknown` target installed on your Rust installation, if unsure, you can install it with:
```bash
rustup target add wasm32-unknown-unknown
```
#### Buf installation
Buf simplifies the generation of typed structures in any language. Buf uses a remote builder executed on the Buf server, so an internet connection is required to generate Rust bindings from Protobuf definitions.
Visit the [Buf website](https://buf.build/) for additional information and [installation instructions](https://docs.buf.build/installation).
{% hint style="info" %}
**Note***:* [Substreams packages](/reference-material/manifest-and-components/packages) and [Buf images](https://docs.buf.build/reference/images) are compatible.
{% endhint %}
# Substreams CLI Authentication
This guide explains how to authenticate when running a Substreams package (`.spkg`) with a provider, specifically using The Graph Market.
## Overview
`substreams auth` opens a browser so you can pick an organization (if you belong to more than one) and an API key. The CLI retrieves the selected key over the API — you do not copy and paste it — exchanges it for a JWT, and writes the token to `.substreams.env`.
## Prerequisites
* The [Substreams CLI](/how-to-guides/installing-the-cli) installed.
* A browser, so you can sign in and pick a key.
* An account with [The Graph Market](https://thegraph.market), or be ready to create one during login.
## Step 1: Run login
```bash
substreams auth
```
The command prints an approval URL (and tries to open it in your browser). Sign in, choose an organization if asked, then select an API key.
On success it writes `.substreams.env` with `SUBSTREAMS_API_TOKEN`. Add that file to `.gitignore`.
## Step 2: Load the credentials
```bash
. ./.substreams.env
```
Other `substreams` commands also read `.substreams.env` automatically when it is present next to the manifest (or in the current directory).
## Paste a JWT or API key instead
If you already have a Graph Market JWT or `server_` API key:
```bash
substreams auth --paste
```
Paste the value when prompted. An API key is exchanged for a JWT automatically.
You can also set the token yourself:
```bash
export SUBSTREAMS_API_TOKEN=""
```
## Step 3: Verify authentication
Run a test Substreams against Ethereum Mainnet:
```bash
substreams gui ethereum-common@v0.3.1 all_events --start-block=15000000
```
If the stream starts without an authentication error, your credentials are in place.
## Need Help?
If you encounter any issues or have questions, the StreamingFast team is available on [Discord](https://discord.gg/jZwqxJAvRs) to assist you.
# Developing Substreams
These how-to guides walk through creating a Substreams that uses raw blockchain data to index your dapp. The application includes using Rust and Protobuf to extract, transform, and load the data.
{% hint style="warning" %}
**Important***:* These how-to guides are in-depth walkthroughs of building highly performance indexers for your dapp. Less experienced users may want to reference the [Tutorials](/tutorials/intro-to-tutorials) for a quick start.
{% endhint %}
{% hint style="info" %}
**Tip**: Speed up development by installing the [Substreams agent skills](/how-to-guides/develop-your-own-substreams/general/agent-skills) in your AI coding assistant (Claude Code, Cursor, VS Code). The `substreams-dev` skill provides expert guidance on Rust modules, manifest configuration, protobuf design, and debugging.
{% endhint %}
Choose your ecosystem to get started:
* [General](/how-to-guides/develop-your-own-substreams/general/local-development) - Cross-chain topics including local development, Rust, Protobuf, and agent skills
* [EVM](/how-to-guides/develop-your-own-substreams/on-evm/exploring-ethereum)
* [Solana](/how-to-guides/develop-your-own-substreams/solana)
* [Cosmos](/how-to-guides/develop-your-own-substreams/on-cosmos/injective/block-stats)
# General
# Agent Skills
AI coding assistants can be enhanced with specialized Substreams expertise through agent skills. These open-source knowledge packages give AI assistants deep understanding of Substreams development patterns, best practices, and debugging techniques.
## Available Skills
### Substreams Development (`substreams-dev`)
Expert knowledge for developing, building, and debugging Substreams projects on any blockchain:
* Creating and configuring `substreams.yaml` manifests
* Writing efficient Rust modules (map, store, index types)
* Protobuf schema design and code generation
* Performance optimization and avoiding excessive cloning
* Debugging and troubleshooting common issues
### Substreams SQL (`substreams-sql`)
Expert knowledge for building SQL database sinks from Substreams data:
* **Database Changes Mode (CDC)** - Stream individual row changes for real-time consistency
* **Relational Mappings Mode** - Transform data into normalized tables with proper relationships
* **PostgreSQL** - Advanced patterns, indexing strategies, and performance optimization
* **ClickHouse** - Analytics-optimized schemas, materialized views, and time-series patterns
* **Schema Design** - Best practices for blockchain data modeling
### Substreams Testing (`substreams-testing`)
Expert knowledge for testing Substreams applications at all levels:
* **Unit Testing** - Testing individual functions with real blockchain data
* **Integration Testing** - End-to-end workflows with real block processing
* **Performance Testing** - Benchmarking, memory profiling, and production mode validation
* **FireCore Tools** - Using Firehose, StreamingFast API, and testing utilities
* **CI/CD Integration** - Automated testing pipelines and regression detection
## Installation
### Claude Code
Install the plugin from the marketplace:
```bash
claude plugin marketplace add https://github.com/streamingfast/substreams-skills
```
Then enable the skills:
1. Run `/plugin` to open the plugin manager
2. Go to the **Discover** tab
3. Find and install the `substreams-dev` plugin (which pulls all defined skills automatically)
4. Restart Claude instance(s) for skills to be discovered
After installation, Claude automatically uses Substreams expertise when working on relevant projects.
**Alternative: Local Development**
Clone and load directly without installing from the marketplace:
```bash
git clone https://github.com/streamingfast/substreams-skills.git
claude --plugin-dir ./substreams-skills
```
### Cursor
Clone the repository and add the skill directory path in Cursor settings:
```
~/substreams-skills/skills/substreams-dev
```
### VS Code
VS Code 1.107+ supports Claude Skills as an experimental feature:
1. Enable the experimental feature in settings
2. Add skill paths to your configuration
3. Skills will be available to Claude in VS Code
See the [VS Code 1.107 release notes](https://code.visualstudio.com/updates/v1_107#_reuse-your-claude-skills-experimental) for details.
## Resources
* [Substreams Skills Repository](https://github.com/streamingfast/substreams-skills)
* [Claude Code Plugins Documentation](https://docs.anthropic.com/en/docs/claude-code/plugins)
# Local Development
Developing Substreams locally provides several advantages over using production endpoints:
* **Faster iteration cycles** - No network latency or rate limits
* **Complete control** - Customize blockchain state and transactions
* **Cost-effective** - No API usage fees during development
* **Reproducible testing** - Consistent blockchain state for testing
* **Offline development** - Work without internet connectivity
This section provides complete local development environments for different blockchain platforms, each including:
* Local blockchain node (development mode)
* Firehose integration for block streaming
* Example smart contracts/programs
* Complete Substreams modules
* Docker Compose orchestration
## Available Platforms
### Ethereum Development
* [**Ethereum with HardHat**](/how-to-guides/develop-your-own-substreams/on-evm/local-development/hardhat) - Complete Ethereum development environment using HardHat for contract deployment and testing
* [**Ethereum with Foundry**](/how-to-guides/develop-your-own-substreams/on-evm/local-development/foundry) - Alternative Ethereum setup using Foundry toolkit for faster compilation and deployment
### Solana Development
* [**Solana with Anchor**](/how-to-guides/develop-your-own-substreams/solana/local-development/anchor) - Complete Solana development environment using Anchor framework for program development
## Prerequisites
Before starting with any platform, ensure you have:
* **Docker 20.10+** with Docker Compose v2.0+
* **4GB RAM** and **20GB disk space** available
* **Substreams CLI** v1.7.0+ ([installation guide](/how-to-guides/installing-the-cli))
* **Rust** with `wasm32-unknown-unknown` target
* Platform-specific tools (detailed in each guide)
## When to Use Local vs Production
**Use local development when:**
* Building and testing new Substreams modules
* Learning Substreams concepts
* Developing with custom smart contracts
* Need reproducible test scenarios
* Working offline or with limited connectivity
**Use production endpoints when:**
* Consuming real blockchain data
* Building production applications
* Need access to historical data
* Require high availability and reliability
## Getting Started
Choose your preferred blockchain platform from the guides above. Each guide provides:
1. **15-25 minute** complete setup time
2. **Step-by-step instructions** with validation commands
3. **Working examples** you can modify and extend
4. **Troubleshooting sections** for common issues
5. **Next steps** for advanced development
{% hint style="warning" %}
These Docker configurations are for local development only - never use in production environments.
{% endhint %}
## Additional Resources
* [Substreams CLI Reference](/reference-material/command-line-interface)
* [Creating Protobuf Schemas](/how-to-guides/develop-your-own-substreams/general/creating-protobuf-schemas)
* [Dev Container Reference](/reference-material/development-tools/devcontainer-ref)
# Troubleshooting
This guide covers common issues you might encounter when setting up local blockchain environments for Substreams development.
## Docker Compose Issues
### Container Fails to Start
**Problem:** Container exits immediately or fails to start
**Solutions:**
```bash
# Check container logs
docker compose logs
# Check all container statuses
docker compose ps
# Restart services
docker compose down
docker compose up -d
# Clean restart (removes volumes)
docker compose down --volumes
docker compose up -d
```
### Port Conflicts
**Problem:** "Port already in use" errors
**Solutions:**
```bash
# Check what's using the ports
lsof -i :8545 # Ethereum RPC
lsof -i :8089 # Firehose
lsof -i :9000 # Substreams
lsof -i :8899 # Solana RPC
# Kill conflicting processes
sudo kill -9
# Or change ports in docker-compose.yml
```
### Volume Permission Issues
**Problem:** Permission denied errors in containers
**Solutions:**
```bash
# Reset volume permissions
docker compose down --volumes
sudo chown -R $USER:$USER ./data
# Or recreate volumes
docker volume rm
docker compose up -d
```
### Memory/Resource Issues
**Problem:** Containers running out of memory
**Solutions:**
* Increase Docker Desktop memory allocation (4GB minimum recommended)
* Close other resource-intensive applications
* Check available disk space (20GB minimum recommended)
### Container Name Conflicts
**Problem:** Container name conflict when starting Docker services
**Error Example:**
```
Error response from daemon: Conflict. The container name "/ethereum-dev-node" is already in use by container "10d7ad16b7895f4a0d714778b2daa222686517444e81e289ac142dc32f5e42d6". You have to remove (or rename) that container to be able to reuse that name.
```
**Solutions:**
1. **Check for existing containers:**
```bash
docker ps -a
```
2. **Remove conflicting container:**
```bash
# Remove by container name
docker rm ethereum-dev-node
# Or remove by container ID
docker rm 10d7ad16b7895f4a0d714778b2daa222686517444e81e289ac142dc32f5e42d6
```
3. **Clean up entire compose project:**
```bash
# Standard cleanup
docker compose down
# Complete cleanup (removes volumes too)
docker compose down --volumes
```
4. **Retry starting services:**
```bash
docker compose up -d
```
**Prevention:** Always use `docker compose down` to properly stop services instead of manually stopping containers with `docker stop`.
## RPC Connectivity Problems
### Connection Refused
**Problem:** Cannot connect to localhost:8545 (Ethereum) or localhost:8899 (Solana)
**Solutions:**
1. **Verify container is running and healthy:**
```bash
docker compose ps
# Look for "healthy" status
```
2. **Check port mapping:**
```bash
docker compose logs
# Look for "listening on" messages
```
3. **Test basic connectivity:**
```bash
# Ethereum
curl -X POST http://localhost:8545 \
-H "Content-Type: application/json" \
-d '{"jsonrpc":"2.0","method":"eth_blockNumber","params":[],"id":1}'
# Solana
curl http://localhost:8899 \
-X POST -H "Content-Type: application/json" \
-d '{"jsonrpc":"2.0","id":1,"method":"getHealth"}'
```
### Invalid JSON-RPC Response
**Problem:** RPC returns errors or invalid responses
**Solutions:**
* Wait for container to fully initialize (check health status)
* Verify the blockchain node is running with correct parameters
* Check container logs for initialization errors
## Substreams gRPC Issues
### Connection Failed
**Problem:** Cannot connect to Substreams endpoint
**Solutions:**
1. **Verify Substreams service is running:**
```bash
docker compose logs | grep -i substreams
```
2. **Test connectivity:**
```bash
substreams run -e localhost:9000 --plaintext common@v0.1.0 -o clock -s -1
```
3. **Check firewall settings:**
* Ensure port 9000 is not blocked
* Disable VPN if causing connectivity issues
### Authentication Errors
**Problem:** gRPC authentication failures
**Solutions:**
* Always use `--plaintext` flag for local development
* Ensure no API keys are being used for local endpoints
* Verify endpoint URL format (no https\:// for local)
## Platform-Specific Issues
### macOS Networking
**Problem:** Docker networking issues on macOS
**Solutions:**
* Use `host.docker.internal` instead of `localhost` in some contexts
* Ensure Docker Desktop networking is properly configured
* Try restarting Docker Desktop
### Linux Networking
**Problem:** Container networking issues on Linux
**Solutions:**
* Ensure Docker daemon is running: `sudo systemctl start docker`
* Check iptables rules aren't blocking connections
* Verify user is in docker group: `sudo usermod -aG docker $USER`
### Windows (WSL2) Issues
**Problem:** Performance or networking issues on Windows
**Solutions:**
* Ensure WSL2 is properly configured
* Allocate sufficient memory to WSL2
* Use WSL2 file system for better performance
* Restart WSL2: `wsl --shutdown` then restart
## Build and Development Issues
### Rust/WASM Target Missing
**Problem:** `wasm32-unknown-unknown` target not found
**Solution:**
```bash
rustup target add wasm32-unknown-unknown
```
### Substreams CLI Issues
**Problem:** Substreams commands fail
**Solutions:**
1. **Verify installation:**
```bash
substreams --version
```
2. **Update to latest version:**
```bash
# Using curl
curl -sSf https://substreams.streamingfast.io/install | bash
# Or using Homebrew
brew install streamingfast/tap/substreams
```
### Node.js/NPM Issues
**Problem:** Package installation or build failures
**Solutions:**
```bash
# Clear npm cache
npm cache clean --force
# Delete node_modules and reinstall
rm -rf node_modules package-lock.json
npm install
# Use specific Node.js version
nvm use 18
```
### Foundry Issues
**Problem:** Forge commands fail
**Solutions:**
```bash
# Update Foundry
foundryup
# Clear cache
forge clean
# Reinstall dependencies
forge install
```
## Data and State Issues
### Blockchain State Problems
**Problem:** Inconsistent or corrupted blockchain state
**Solutions:**
```bash
# Reset everything (nuclear option)
docker compose down --volumes
docker system prune -f
docker compose up -d
```
### Block Production Issues
**Problem:** No new blocks being produced
**Solutions:**
* **Ethereum:** Ensure dev mode is configured with `--dev.period=1`
* **Solana:** Check test validator is running with proper configuration
* Generate transactions to trigger block production
## Performance Issues
### Slow Block Processing
**Problem:** Blocks are processed very slowly
**Solutions:**
* Increase Docker memory allocation
* Check available disk space
* Reduce block time in dev mode configuration
* Close resource-intensive applications
### High CPU Usage
**Problem:** Docker containers using excessive CPU
**Solutions:**
* Reduce logging verbosity in container configuration
* Limit container resource usage in docker-compose.yml
* Check for infinite loops in smart contracts
## Common Error Messages
### "bind: address already in use"
**Cause:** Port conflict with existing service
**Solution:** Kill the conflicting process or change ports in docker-compose.yml
### "no space left on device"
**Cause:** Insufficient disk space
**Solution:** Free up disk space or clean Docker resources:
```bash
docker system prune -a --volumes
```
### "connection reset by peer"
**Cause:** Network connectivity issues
**Solution:** Check firewall settings and restart Docker services
### "context deadline exceeded"
**Cause:** Operation timeout
**Solution:** Increase timeout values or check service health
## Getting Help
If you continue to experience issues:
1. **Check container logs:** `docker compose logs -f`
2. **Verify system requirements:** Ensure sufficient RAM, disk space, and Docker version
3. **Search existing issues:** Check GitHub repositories for similar problems
4. **Create minimal reproduction:** Isolate the issue to specific steps
5. **Gather system information:** Include OS, Docker version, and error messages when reporting issues
## Useful Commands
```bash
# System information
docker --version
docker compose version
uname -a
# Resource usage
docker stats
df -h
free -h
# Network debugging
netstat -tulpn | grep :8545
ss -tulpn | grep :9000
# Container debugging
docker compose exec bash
docker inspect
```
# Using Rust & Protobuf
# Rust
Currently, the only programming language supported to build Substreams is Rust, although more might be added in the future.
If you have experience with typed programming languages, such as Go or Java, you should be able to understand and learn Rust pretty easily. However, there some features and standards that are specific to the Rust programming language.
The Substreams team recommends following the official [Rust by Example tutorial](https://doc.rust-lang.org/rust-by-example/), which pretty much includes everything you should know about Rust. At the same time, the following sections cover some features and standards that are important when developing Substreams.
{% hint style="info" %}
**Tip**: The [substreams-dev agent skill](/how-to-guides/develop-your-own-substreams/general/agent-skills) can assist with Rust patterns specific to Substreams — including `Option`/`Result` handling, avoiding excessive cloning, and writing WASM-compatible code.
{% endhint %}
# Option struct
{% hint style="info" %}
**Note**: This page covers Rust's own `Option`. Optional `message` fields in your generated protobuf types are `MessageField` rather than `Option`, and read without unwrapping. See [Protobuf and Rust optional fields](/how-to-guides/develop-your-own-substreams/general/creating-protobuf-schemas#protobuf-and-rust-optional-fields).
{% endhint %}
## The Problem
Consider that you want to implement a function that returns a username, given the corresponding user identifier. The signature of the function could be as follows:
```rust
fn get_username_by_id(id: u32) -> String {
// function body
}
```
In a success case, you pass the user identifier as a parameter and the function returns the corresponding username. However, **what happens if the function does not have a username for the given identifier?** A possible solution is to return an empty string:
* If the function **is able to retrieve the data**, then the string returned is the username.
* If the function **is NOT able to retrieve the data**, then the string returned is the empty string (`''`).
Although this is a valid approach, it creates hidden logic that is not visible unless you deep dive into the function code.
## The Solution
Rust provides a better way of dealing with these situations by using the `Option` enum. This enum has two possible values: `Some(T)` (used when the returned value is present) and `None` (used when the returned value is not present). Therefore, the previous function can be refactored to:
```rust
fn get_username_by_id(id: u32) -> Option {
// function body
}
```
Now, the function works as follows:
* If the function **is able to retrieve the data**, then a `Some` value containing the string is returned.
* If the function **is NOT able to retrieve the data**, then a `None` value is returned.
Let's complete the body of the function:
```rust
fn get_username_by_id(id: u32) -> Option { // 1.
match(id) {
1 => Some(String::from("Susan")), // 2.
2 => Some(String::from("John")), // 3.
_ => None // 4.
}
}
```
1. Given a user identifier, return the corresponding username if it exists.
2. If `id == 1`, then a `Some` struct containing the string is returned.
3. If `id == 2`, then a `Some` struct containing the string is returned.
4. If `id` does not match with any of the provided identifiers, then a `None` struct is returned.
## Using Options
The `Option` struct contains two helper methods to check if the returned type is `Some` or `None`: the `.is_some()` and `.is_none()` methods. Let's see how to use these methods:
```rust
fn get_username_by_id(id: u32) -> Option {
match(id) {
1 => Some(String::from("Susan")),
2 => Some(String::from("John")),
_ => None
}
}
fn main() {
let user1 = get_username_by_id(1); // 1.
let user10 = get_username_by_id(10); // 2.
if (user1.is_some()) { // 3.
println!("User with id = 1 holds username {}", user1.unwrap())
}
if (user10.is_none()) { // 4.
println!("User with id = 10 does not exist")
}
}
```
1. Get the user with `id == 1`.
2. Get the user with `id == 10`.
3. If the function returned a name for `id == 1`, then `user1.is_some()` returns `true`.
4. If the function did NOT return a name for `id == 10`, then `user1.is_none()` returns `true`.
You can also use [pattern matching](https://doc.rust-lang.org/book/ch18-03-pattern-syntax.html) instead of the helper methods:
```rust
fn get_username_by_id(id: u32) -> Option {
match(id) {
1 => Some(String::from("Susan")),
2 => Some(String::from("John")),
_ => None
}
}
fn main() {
let user1 = get_username_by_id(1);
let user10 = get_username_by_id(10);
match (&user1) {
Some(name) => println!("User with id = 1 holds username {}", &user1.unwrap()),
None => println!("No user with id = 1 found")
}
match (&user10) {
Some(name) => println!("User with id = 10 holds username {}", &user10.unwrap()),
None => println!("No user with id = 10 found")
}
}
```
# Result struct
In Rust, the `Result` struct is used to abstract both a successful response (if it exists) and an error (if it occurs). Let's better understand through an example.
## Basic Usage
Consider that you have a function `divide(num1, num2)`, which executes the division between two numbers. As you already know, dividing by 0 is undefined, and generates an error in Rust. You can use `Result` to return a controlled error.
```rust
fn divide(num1: u32, num2: u32) -> Result {
if num2 == 0 {
return Err(String::from("You can't divide by 0"));
}
return Ok(num1 / num2);
}
fn main() {
let result = divide(6, 0);
if result.is_ok() {
println!("This is the happy path: {}", result.unwrap())
} else {
println!("This is the error: {}", result.err().unwrap())
}
}
```
Let's inspect the `divide` function:
```rust
fn divide(num1: u32, num2: u32) -> Result { // 1.
if num2 == 0 {
return Err(String::from("You can't divide by 0")); // 2.
}
return Ok(num1 / num2); // 3.
}
```
1. Declaration of the function. Two unsigned numbers of 32-bit length are passed as parameters. The return type is `Result`: the first type (`u32`) is for the successful response, and the second type (`String`) is for the error response.
2. If dividing by 0, you return an error String.
3. If not, you return the result of the division (`u32`).
The `Result` is really an enum that can take two values: `Ok(T)` (success) and `Err(E)` (error).
In the previous code, when you return `Err(String)`, the success part is automatically empty. At the same time, when you return `Ok(u32)`, the error part is empty.
Now, let's see how you can interact with this result.
```rust
fn main() {
let result = divide(6, 0); // 1.
if result.is_ok() { // 2.
println!("This is the happy path: {}", result.unwrap())
} else { // 3.
println!("This is the error: {}", result.err().unwrap())
}
}
```
1. You invoke the function and store the `Result` enum in a variable.
2. If the result *is ok* (i.e. the happy path has been returned), you can take its value by using the `result.unwrap()` method.
3. If the error has been returned, you can return the error string by using the `result.err().unwrap()` method.
The output of the program for `divide(6,2)` (happy path) is:
```bash
This is the happy path: 3
```
The output of the program for `divide(6,0)` (error) is:
```bash
This is the error: You can't divide by 0
```
## The Shortcut
Checking with an `if` condition whether the result contains an error is a valid approach. However, Rust includes a shortcut to improve this.
In the previous example, consider that you want to invoke the `divide` function from another function that performs other computations.
```rust
fn divide(num1: u32, num2: u32) -> Result {
if num2 == 0 {
return Err(String::from("You can't divide by 0"));
}
return Ok(num1 / num2);
}
fn computations() -> Result {
let result = divide(6, 0); // Performing the division
if result.is_err() { // If the division returns an error, then you return an error.
return Err(result.err().unwrap());
}
let division_result = result.unwrap();
return Ok(division_result + 5);
}
fn main() {
let result = computations();
if result.is_ok() {
println!("This is the happy path: {}", result.unwrap())
} else {
println!("This is the error: {}", result.err().unwrap())
}
}
```
Now, the Rust program adds `5` to the result of the division, checking that the division is correct first. Although this approach is correct, Rust provides a `?` symbol that simplifies the logic:
```rust
fn divide(num1: u32, num2: u32) -> Result {
if num2 == 0 {
return Err(String::from("You can't divide by 0"));
}
return Ok(num1 / num2);
}
fn computations() -> Result {
let division_result = divide(6, 0)?;
return Ok(division_result + 5);
}
fn main() {
let result = computations();
if result.is_ok() {
println!("This is the happy path: {}", result.unwrap())
} else {
println!("This is the error: {}", result.err().unwrap())
}
}
```
The `?` symbol after a `Result` enum does two things:
1. If successful, it unwraps the result (in this case, a `u32` number), and stores it in a variable `let division_result = divide(6, 0)?;`
2. If an error occurs, it returns the error directly. In this example, the error type of the `divide` and the `computations` function is the same (a `String`).
## In Substreams
The `Result` enum is used in Substreams to return the data (or the errors) of a module. For example, if you take the `map_filter_transactions` module from the [Ethereum Explorer tutorial](/how-to-guides/develop-your-own-substreams/on-evm/exploring-ethereum):
```rust
[...]
#[substreams::handlers::map]
fn map_filter_transactions(params: String, blk: Block) -> Result> {
let filters = parse_filters_from_params(params)?;
let transactions: Vec = blk
.transactions()
.filter(|trans| apply_filter(&trans, &filters))
.map(|trans| Transaction {
from: Hex::encode(&trans.from),
to: Hex::encode(&trans.to),
hash: Hex::encode(&trans.hash),
})
.collect();
Ok(Transactions { transactions })
}
[...]
```
This module returns a `Result>` enum. If successful, it returns the transactions filtered; in the case of an error, it returns the `substreams::errors::Error` error, which is a Substreams wrapper for a generic [anyhow Rust error](https://docs.rs/anyhow/latest/anyhow/).
# Protobuf
StreamingFast Substreams protobuf schemas
## Protobuf overview
Substreams uses Google Protocol Buffers extensively. Protocol Buffers, also referred to as protobufs, are used as the API for data models specific to the different blockchains. Manifests contain references to the protobufs for your Substreams module.
{% hint style="success" %}
**Tip**: Protobufs define the input and output for modules.
{% endhint %}
{% hint style="info" %}
**Tip**: The [substreams-dev agent skill](/how-to-guides/develop-your-own-substreams/general/agent-skills) includes expert knowledge on protobuf schema design for blockchain data modeling — install it in your AI coding assistant to get guidance while designing your schemas.
{% endhint %}
Learn more about the details of Google Protocol Buffers in the official documentation provided by Google.
**Google Protocol Buffer Documentation**
[Learn more about Google Protocol Buffers](https://protobuf.dev/) in the official documentation provided by Google.
**Google Protocol Buffer Tutorial**
[Explore examples and additional learning material](https://protobuf.dev/programming-guides/proto3/) for Google Protocol Buffers provided by Google.
### Protobuf definition for Substreams
Define a protobuf model as [`proto:eth.erc721.v1.Transfers`](https://github.com/streamingfast/substreams-template/blob/develop/proto/erc721.proto) representing a list of ERC721 transfers.
{% hint style="info" %}
**Note**: The `Transfers` protobuf in the Substreams Template example is located in the proto directory.
{% endhint %}
{% code title="eth/erc721/v1/erc721.proto" lineNumbers="true" %}
```protobuf
syntax = "proto3";
package eth.erc721.v1;
message Transfers {
repeated Transfer transfers = 1;
}
message Transfer {
bytes from = 1;
bytes to = 2;
uint64 token_id = 3;
bytes trx_hash = 4;
uint64 ordinal = 5;
}
```
{% endcode %}
[View the `erc721.proto`](https://github.com/streamingfast/substreams-template/blob/develop/proto/erc721.proto) file in the official Substreams Template example repository.
#### Identifying data types
The ERC721 smart contract used in the Substreams Template example contains a `Transfer` event. You can use the event data through a custom protobuf.
The protobuf file serves as the interface between the module handlers and the data being provided by Substreams.
{% hint style="success" %}
**Tip**: Protobufs are platform-independent and are defined and used for various blockchains.
* The ERC721 smart contracts used in the Substreams Template example are generic contracts used across many different Ethereum applications.
* The size and scope of the Substreams module dictates the number of and complexity of protobufs.
{% endhint %}
The Substreams Template example extracts `Transfer` events from the [Bored Ape Yacht Club smart contract](https://etherscan.io/address/0xbc4ca0eda7647a8ab7c2061c2e118a18a936f13d) which is located on the Ethereum blockchain.
Several specific data types exist in the Ethereum smart contract ecosystem, some extending the ERC20 and ERC721 base modules. Complex protobufs are created and refined based on the various data types used across the different blockchains.
{% hint style="success" %}
**Tip***:* The use of fully qualified protobuf file paths reduces the risk of naming conflicts when other community members build their [Substreams packages](/reference-material/manifest-and-components/packages#dependencies).
{% endhint %}
### Generating protobufs
The [`substreams` CLI](/reference-material/command-line-interface) is used to generate the associated Rust code for the protobuf.
Notice the `protogen` command and Substreams manifest passed into the [`substreams` CLI](/reference-material/command-line-interface).
{% code overflow="wrap" %}
```bash
substreams protogen ./substreams.yaml --exclude-paths="sf/ethereum,sf/substreams,google"
```
{% endcode %}
The pairing code is generated and saved into the [`src/pb/eth.erc721.v1.rs`](https://github.com/streamingfast/substreams-template/blob/develop/src/pb/eth.erc721.v1.rs)Rust file.
The [`mod.rs`](https://github.com/streamingfast/substreams-template/blob/develop/src/pb/mod.rs) file located in the `src/pb` directory of the Substreams Template example is responsible for exporting the freshly generated Rust code.
{% code title="src/pb/mod.rs" overflow="wrap" lineNumbers="true" %}
```rust
// @generated by substreams
#![allow(clippy::all)]
pub mod eth {
pub mod erc721 {
pub mod v1 {
include!("eth.erc721.v1.mod.rs");
}
}
}
```
{% endcode %}
View the [`mod.rs`](https://github.com/streamingfast/substreams-template/blob/develop/src/pb/mod.rs) file in the repository.
`substreams build` writes this file for you, with one `pub mod` per protobuf package segment wrapping an `include!` of the file the plugin generated. A `mod.rs` the CLI did not write is left untouched, so you can hand-edit the module tree and keep your changes across rebuilds.
### Protobuf and Rust optional fields
Protocol buffers define fields' type by using standard primitive data types, such as integers, booleans, and floats or a complex data type such as `message`, `enum`, `oneof` or `map`. View the [full list](https://developers.google.com/protocol-buffers/docs/proto#scalar) of types in the [Google Protocol Buffers documentation](https://developers.google.com/protocol-buffers/docs/overview).
Any primitive data types in a message generate the corresponding Rust type,[`String`](https://doc.rust-lang.org/std/string/struct.String.html) for `string`, `u64` for `uint64,` and assign the default value of the corresponding Rust type if the field is not present in a message, an empty string for [`String`](https://doc.rust-lang.org/std/string/struct.String.html), 0 for integer types, `false` for `bool`.
A field referencing another `message` generates a [`MessageField`](https://docs.rs/buffa/latest/buffa/struct.MessageField.html), which dereferences to a default instance of `T` when the field is absent. Read through it directly:
```rust
let city = person.location.city; // "" when location is absent
```
This makes the common case total: a missing sub-message yields zero values rather than panicking, so a handler does not need to guard every nested access.
Where presence itself carries meaning, test for it explicitly:
```rust
if person.location.is_set() {
// The message set this field, do something
}
```
To work with the field as a standard Rust [`Option`](https://doc.rust-lang.org/rust-by-example/std/option.html), call `as_option()` for a borrow or `into_option()` to take it by value:
```rust
match person.location.as_option() {
Some(location) => { /* Value is present, do something */ }
None => { /* Value is absent, do something */ }
}
```
Construct the field with `MessageField::some(value)`, and clear it with `MessageField::none()`.
[buffa](https://github.com/anthropics/buffa) is the tool that generates this Rust code from your protobuf definitions. `substreams build` runs it for you.
# on EVM
# Exploring Ethereum
Getting started with Substreams might feel challenging, but you are not alone! The Substreams Explorers are a set of projects, modules, and code samples that allow you to *explore* and discover the main features of Substreams.
{% hint style="success" %}
**Tip**: This tutorial teaches you how to build a Substreams from scratch.
Remember that you can auto-generate a filtered Substreams module by using the [code-generation tools](/tutorials/intro-to-tutorials/evm).
{% endhint %}
The Ethereum block model for Substreams is represented by the [`sf.ethereum.type.v2.Block`](https://github.com/streamingfast/firehose-ethereum/blob/develop/proto/sf/ethereum/type/v2/type.proto) Rust struct.
Before moving forward, make sure to reference the minimal path within the [Dev Container](https://github.com/streamingfast/substreams-starter).
### The GitHub Repository
The `https://github.com/streamingfast/substreams-explorers` GitHub repository contains all the Substreams Explorers currently available. You can simply clone the repository:
```
git clone https://github.com/streamingfast/substreams-explorers
```
### Substreams Basics
You should be familiar with the basic Substreams terminology, which includes:
* Modules (understanding the difference between a `map` and a `store` module)
* Protobufs (understanding what they are)
## Ethereum Explorer
The Ethereum Explorer consists of several Substreams modules showcasing the most basic operations that you can perform with Substreams on the Ethereum blockchain.
You can find the Ethereum Explorer at
### Modules
The modules in this repository answer some interesting questions when developing a blockchain application:
#### How Can You Get the Basic Information of a Block?
For every block, the `map_block_meta` module retrieves the most relevant information of the block (number, hash, and parent hash).
#### How Can You Retrieve Transactions By Their From or To Fields?
Given any combination of two parameters (`from` and `to`), the `map_filter_transactions` filters a transaction among all transactions in the blockchain. This involves:
1. Providing the filters (only the `from` fields, only the `to` field, both `from` and `to` fields, or none)
2. Iterating over all the transactions.
3. Filtering the transactions, according to the parameters provided. For example, `from == tx_from`, `from == tx_from and to == tx_to`.
#### How Can You Retrieve All the Events For a Specific Smart Contract?
Given a smart contract address parameter (`contract_address`), the `map_contract_events` module retrieves all the events related to a specific smart contract. This involves:
1. Iterating over all the logs of a block.
2. Filtering the log, where the `address` field is equal to the smart contract address parameter (`address == contract_address`).
In the following sections, you will go through every module, run the corresponding Substreams, and understand every piece of code. Let's go!
### The Project Structure
Ethereum Explorer Project Structure
1. The `proto` folder contains the Protobuf definitions for the transformations. In this example, there are three Protobuf objects, which are the outputs of the Substreams module mentioned in the previous section: BlockMeta (which represents the information of an Ethereum block), Transaction (which is an abstraction for an Ethereum transaction), and Event (an abstraction for an Ethereum event).
2. The `src` folder contains the source code of the Substreams transformations. Every module has its corresponding Rust file.
3. The `substreams.yml` is the Substreams manifest, which defines relevant information, such as the inputs/outputs of every module or the Protobuf files.
#### The Substreams Manifest
Let's take a closer look at the Substreams manifest (`substreams.yml`):
Ethereum Explorer Manifest
1. The `protobuf` section specifies the location of the Protobuf files used in the Substreams (i.e. where are the files defining the objects that you are going to use as output). In this example, the files are under the `proto` folder.
2. When you run Substreams, you are really executing a Rust application inside a WASM container. Therefore, Substreams needs to know where is the WASM executable. The `binaries` section specifies the location of the WASM executable.
3. Every module must be defined in the manifest, along with its `kind`, `inputs` and `outputs`. In this example, the `map_block_meta` module is a mapper that takes a raw Ethereum block as input ([`sf.ethereum.type.v2.Block`](https://github.com/streamingfast/firehose-ethereum/blob/develop/proto/sf/ethereum/type/v2/type.proto)) and outputs the `BlockMeta` protobuf. Basically, the `map_block_meta` module returns a reduced version of the Ethereum block.
## Additional Resources
You may find these additional resources helpful for developing your first Solana application.
The [CLI reference](/reference-material/command-line-interface) lets you explore all the tools available in the Substreams CLI.
### Substreams Components Reference
The [Components Reference](/reference-material/manifest-and-components/packages) dives deeper into navigating the `substreams.yaml`.
# Filter Transactions
This module iterates over all the blockchain transactions and filters them by some of their fields (the `from` and `to` fields). For example, if you want to retrieve all the transactions initiated by the address `0xb6692f7ae54e89da0269c1bfd685ccdfd41d2bf7`, you set the filter `from = 0xb6692f7ae54e89da0269c1bfd685ccdfd41d2bf7`.
## Running the Substreams
First, build the Rust code (this will also generate the Protobuf modules):
```bash
substreams build
```
Now, you can run the Substreams:
```bash
substreams run -e mainnet.eth.streamingfast.io:443 substreams.yaml map_filter_transactions --start-block 17712038 --stop-block +3
```
The output of the command should be similar to:
```bash
...output omitted...
----------- BLOCK #17,712,038 (b96fc7e71c0daf69b19211c45fbb5c201f4356fb2b5607500b7d88d298599f5b) ---------------
{
"@module": "map_filter_transactions",
"@block": 17712038,
"@type": "eth.transaction.v1.Transactions",
"@data": {
"transactions": [
{
"from": "b6692f7ae54e89da0269c1bfd685ccdfd41d2bf7",
"to": "dac17f958d2ee523a2206206994597c13d831ec7",
"hash": "933b74565234ac9ca8389f7a49fad80099abf1be77e4bef5af69ade30127f30e"
},
...output omitted...
{
"from": "4c8e30406f5dbedfaa18cb6b9d0484cd5390490a",
"to": "dac17f958d2ee523a2206206994597c13d831ec7",
"hash": "558031630b43c8c61e36d742a779f967f3f0102fa290111f6f6f9c2acaadf3ea"
}
]
}
}
----------- BLOCK #17,712,039 (1385f853d28b16ad7ebc5d51b6f2ef6d43df4b57bd4c6fe4ef8ccb6f266d8b91) ---------------
{
"@module": "map_filter_transactions",
"@block": 17712039,
"@type": "eth.transaction.v1.Transactions",
"@data": {
"transactions": [
{
"from": "75e89d5979e4f6fba9f97c104c2f0afb3f1dcb88",
"to": "dac17f958d2ee523a2206206994597c13d831ec7",
"hash": "43e0e1b6315c4cc1608d876f98c9bbf09f2a25404aabaeac045b5cc852df0e85"
},
...output omitted...
{
"from": "e41febca31f997718d2ddf6b21b9710c5c7a3425",
"to": "dac17f958d2ee523a2206206994597c13d831ec7",
"hash": "45c03fcbefcce9920806dcd7d638cef262ad405f8beae383fbc2695ad4bc9b1b"
}
]
}
}
----------- BLOCK #17,712,040 (31ad07fed936990d3c75314589b15cbdec91e4cc53a984a43de622b314c38d0b) ---------------
{
"@module": "map_filter_transactions",
"@block": 17712040,
"@type": "eth.transaction.v1.Transactions",
"@data": {
"transactions": [
{
"from": "48c04ed5691981c42154c6167398f95e8f38a7ff",
"to": "dac17f958d2ee523a2206206994597c13d831ec7",
"hash": "137799eea9fa8ae410c913e16ebc5cc8a01352a638f3ce6f3f29a283ad918987"
},
...output omitted...
{
"from": "f89d7b9c864f589bbf53a82105107622b35eaa40",
"to": "dac17f958d2ee523a2206206994597c13d831ec7",
"hash": "0544143b459969c9ed36741533fba70d6ea7069f156d2019d5362c06bf8d887f"
}
]
}
}
all done
```
In the previous command, you are filtering all the transactions from blocks `17712038` to `17712040`, where `to = 0xdac17f958d2ee523a2206206994597c13d831ec7` (the USDT smart contract address). The filters are specified in the `params` section of the Substreams manifest (`substreams.yml`):
```yml
map_filter_transactions: "to=0xdAC17F958D2ee523a2206206994597C13D831ec7"
```
## Applying Filters
The filters are specified as a query-encoded string (`param1=value1¶m2=value2¶m3=value3`). In this example, only two parameters are supported, `from` and `to`, which you can use to create filters, such as:
```yml
map_filter_transactions: "from=0x89e51fa8ca5d66cd220baed62ed01e8951aa7c40&to=0xdAC17F958D2ee523a2206206994597C13D831ec7"
```
Retrieve all transactions where `from=0x89e51fa8ca5d66cd220baed62ed01e8951aa7c40` and `to=0xdAC17F958D2ee523a2206206994597C13D831ec7`.
```yml
map_filter_transactions: "from=0x89e51fa8ca5d66cd220baed62ed01e8951aa7c40"
```
Retrieve all transactions where `from=0x89e51fa8ca5d66cd220baed62ed01e8951aa7c40`.
```yml
map_filter_transactions: ""
```
Retrieve all transactions. Without applying any filter.
## Inspecting the Code
Declaration of the module in the manifest (`substreams.yml`):
```yml
- name: map_filter_transactions
kind: map
inputs:
- params: string
- source: sf.ethereum.type.v2.Block
output:
type: proto:eth.transaction.v1.Transactions
```
The module expects two inputs: the parameters string, which contains the filters, plus a raw Ethereum block. The output is the `Transactions` object declared in the Protobuf.
Now, let's take a look at the actual Rust code:
```rust
#[derive(Deserialize)]
struct TransactionFilterParams {
to: Option,
from: Option,
}
#[substreams::handlers::map]
fn map_filter_transactions(params: String, blk: Block) -> Result> {
let filters = parse_filters_from_params(params)?;
let transactions: Vec = blk
.transactions()
.filter(|trans| apply_filter(&trans, &filters))
.map(|trans| Transaction {
from: Hex::encode(&trans.from),
to: Hex::encode(&trans.to),
hash: Hex::encode(&trans.hash),
})
.collect();
Ok(Transactions { transactions })
}
```
The function name, `map_filter_transactions` matches the name given in the Substreams manifest. Two parameters are passed: `params: String, blk: Block`. For Substreams, the parameter specified in the manifest is a simple String. The query-encoded format is just an abstraction that you must parse. The `parse_filters_from_params` parses the string and creates a `TransactionFilterParams` struct.
```rust
let filters = parse_filters_from_params(params)?;
```
```rust
fn parse_filters_from_params(params: String) -> Result> {
let parsed_result = serde_qs::from_str(¶ms);
if parsed_result.is_err() {
return Err(Vec::from([anyhow!("Unexpected error while parsing parameters")]));
}
let filters = parsed_result.unwrap();
verify_filters(&filters)?;
Ok(filters)
}
```
The `serde_qs::from_str(¶ms)` from the [Serde QS Rust library](https://docs.rs/serde_qs/latest/serde_qs/) parses the parameters and returns the filters struct. Then, you call the `verify_filters(&filters)?` function, which ensures that the filters provided are valid Ethereum addresses. If there are errors while parsing the parameters, they are collected in a `substreams::errors::Error` vector and returned.
Back in the main function, if the parameters parsing is correct, you start filtering the transactions:
```rust
let filters = parse_filters_from_params(params)?;
// At this point, the filters are correct. If not, a Vec object is returned.
let transactions: Vec = blk
.transactions() // 1.
.filter(|trans| apply_filter(&trans, &filters)) // 2.
.map(|trans| Transaction { // 3.
from: Hex::encode(&trans.from),
to: Hex::encode(&trans.to),
hash: Hex::encode(&trans.hash),
})
.collect(); // 4.
```
1. The `transactions()` method iterates over all the **successful** transactions of the block.
2. Then, for every successful transaction, the previously parsed filters are applied.
3. Every transaction that complies with the filters provided is mapped into a `pb::eth::transaction::v1::Transaction` struct. This struct is part of the Protobuf declarations and is part of the output of the Substreams module.
4. Finally, all the transactions are collected into a vector of type `pb::eth::transaction::v1::Transaction`.
# Retrieve Events of a Smart Contract
Given a smart contract address passed as a parameter, this module returns the logs attached to the contract.
## Running the Substreams
First, build the Rust code (this will also generate the Protobuf modules):
```bash
substreams build
```
Now, you can run the Substreams. The logs retrieved correspond to the `0xbc4ca0eda7647a8ab7c2061c2e118a18a936f13d` (BoredApeYachtClub smart contract). To avoid iterating over the full blockchain, the following command starts at block `17717995` and finished at block `17718004`. Therefore, only the BoredApeYachtClub smart contract logs that happened within this block range are printed.
```bash
substreams run -e mainnet.eth.streamingfast.io:443 substreams.yaml map_contract_events --start-block 17717995 --stop-block +10
```
The output of the command should be similar to:
```bash
...output omitted...
----------- BLOCK #17,717,995 (bfecb26963a2cd77700754612185e0074fc9589d2d73abb90e362fe9e7969451) ---------------
----------- BLOCK #17,717,996 (7bf431a4f9df67e1d7e385d9a6cba41c658e66a77f0eb926163a7bbf6619ce20) ---------------
----------- BLOCK #17,717,997 (fa5a57231348f1f138cb71207f0cdcc4a0a267e2688aa63ebff14265b8dae275) ---------------
{
"@module": "map_contract_events",
"@block": 17717997,
"@type": "eth.event.v1.Events",
"@data": {
"events": [
{
"address": "bc4ca0eda7647a8ab7c2061c2e118a18a936f13d",
"topics": [
"8c5be1e5ebec7d5bd14f71427d1e84f3dd0314c0f7b2291e5b200ac8c7c3b925",
"000000000000000000000000e2a83b15fc300d8457eb9e176f98d92a8ff40a49",
"0000000000000000000000000000000000000000000000000000000000000000",
"00000000000000000000000000000000000000000000000000000000000026a7"
],
"txHash": "f18291982e955f3c2112de58c1d0a08b79449fb473e58b173de7e0e189d34939"
},
{
"address": "bc4ca0eda7647a8ab7c2061c2e118a18a936f13d",
"topics": [
"ddf252ad1be2c89b69c2b068fc378daa952ba7f163c4a11628f55a4df523b3ef",
"000000000000000000000000e2a83b15fc300d8457eb9e176f98d92a8ff40a49",
"000000000000000000000000c67db0df922238979da0fd00d46016e8ae14cecb",
"00000000000000000000000000000000000000000000000000000000000026a7"
],
"txHash": "f18291982e955f3c2112de58c1d0a08b79449fb473e58b173de7e0e189d34939"
}
]
}
}
----------- BLOCK #17,717,998 (372ff635821a434c81759b3b23e8dac59393fc27a7ebb88b561c1e5da3c4643a) ---------------
----------- BLOCK #17,717,999 (43f0878e119836cc789ecaf12c3280b82dc49567600cc44f6a042149e2a03779) ---------------
----------- BLOCK #17,718,000 (439efaf9cc0059890a09d34b4cb5a3fe4b61e8ef96ee67673c060d58ff951d4f) ---------------
----------- BLOCK #17,718,001 (c97ca5fd26db28128b0ec2483645348bbfe998e9a6e19e3a442221198254c9ea) ---------------
----------- BLOCK #17,718,002 (9398569e46a954378b16e0e7ce95e49d0f21e6119ed0e3ab84f1c91f16c0c30e) ---------------
----------- BLOCK #17,718,003 (80bcd4c1131c35a413c32903ffa52a14f8c8fe712492a8f6a0feddbb03b10bba) ---------------
----------- BLOCK #17,718,004 (d27309ac29fe47f09fa4987a318818c325403863a53eec6a3676c2c2f8c069d9) ---------------
all done
```
The smart contract address is passed as a parameter defined in the Substreams manifest (`substreams.yml`):
```yml
params:
map_contract_events: "0xbc4ca0eda7647a8ab7c2061c2e118a18a936f13d"
```
## Inspecting the Code
Declaration of the module in the manifest (`substreams.yml`):
```yml
- name: map_contract_events
kind: map
inputs:
- params: string
- source: sf.ethereum.type.v2.Block
output:
type: proto:eth.event.v1.Events
```
The module expects two inputs: the parameter as a string, and a raw Ethereum block. The output is the `Events` object defined in the Protobuf.
The corresponding Rust function declaration, which matches the name of the module, `map_contract_events`:
```rust
fn map_contract_events(contract_address: String, blk: Block) -> Result {
verify_parameter(&contract_address)?; // Verify address
let events: Vec = blk
.logs() // 1.
.filter(|log| log.address().to_vec() == Hex::decode(&contract_address).expect("already validated")) // 2.
.map(|log| Event { // 3.
address: Hex::encode(log.address()),
topics: log.topics().into_iter().map(Hex::encode).collect(),
tx_hash: Hex::encode(&log.receipt.transaction.hash),
})
.collect(); // 4.
Ok(Events { events })
}
```
In this example, you do not need to parse the parameters, as `contract_address` is the only string passed and you can use it directly. However, it is necessary to verify that the parameter is a valid Ethereum; this verification is performed by the `verify_parameter` function.
Then, you iterate over the events of the contract:
1. The `.logs()` function iterates over the logs of successful transactions within the block.
2. For every log of a successful transaction, you verify if its `address` matches the smart contract address (i.e. you verify if the log was actually emitted by the smart contract). For the comparison, both `log.address()` and `contract_address` are converted to `Vec`.
3. Every filtered log (i.e. every log that belongs to the smart contract) is mapped to a `pb::eth::event::v1::Event` struct, which was specified in the Protobuf definition.
4. Finally, you collect all the events in a vector.
# Making eth\_calls
Learn how to perform Contract Calls (eth\_calls) in EVM-compatible Substreams
EVM-compatible smart contracts are queryable, which means that you can get real-time data from the contract's internal database. In this tutorial, you will learn how to perform contract calls (`eth_calls`) through Substreams.
Specifically, you will query the USDT smart contract (`0xdac17f958d2ee523a2206206994597c13d831ec7`) to get the number of decimals used by the token. The USDT smart contract exposes a read function called `decimals`.
## Block State Execution
{% hint style="success" %}
**Important:** All `eth_call` operations are executed at the **specific block hash** being processed by your Substreams module, not at the latest block state. This guarantees **deterministic execution** across all runs and ensures that your Substreams module will produce the same results when processing the same block, regardless of when it runs.
The RPC endpoint automatically uses the block hash of the block being processed, so you never need to specify a block number or worry about using "latest" state.
{% endhint %}
## Pre-requisites
* You have some knowledge about Substreams ([modules](/reference-material/core-concepts/modules) and [fundamentals](/reference-material/core-concepts/architecture)).
* You have the latest version of the [CLI](/how-to-guides/installing-the-cli) installed.
## Querying on EthScan
You can query the `decimals` function by [visiting EthScan](https://etherscan.io/address/0xdac17f958d2ee523a2206206994597c13d831ec7#readContract).
## Initializing the Substreams project
1. First, let's use `substreams init` to scaffold a new Substreams project that uses the USDT smart contract:
```bash
substreams init
```
Complete the information required by the previous command, such as name of the project or smart contract to track. In the `Contract address to track` step, write `0xdac17f958d2ee523a2206206994597c13d831ec7`, the address of the USDT smart contract.
```bash
Project name (lowercase, numbers, underscores): usdttracker
Protocol: Ethereum
Ethereum chain: Mainnet
Contract address to track (leave empty to use "Bored Ape Yacht Club"): 0xdac17f958d2ee523a2206206994597c13d831ec7
Would you like to track another contract? (Leave empty if not):
Retrieving Ethereum Mainnet contract information (ABI & creation block)
Fetched contract ABI for dac17f958d2ee523a2206206994597c13d831ec7
Fetched initial block 4634748 for dac17f958d2ee523a2206206994597c13d831ec7 (lowest 4634748)
Generating ABI Event models for
Generating ABI Events for AddedBlackList (_user)
Generating ABI Events for Approval (owner,spender,value)
Generating ABI Events for Deprecate (newAddress)
Generating ABI Events for DestroyedBlackFunds (_blackListedUser,_balance)
Generating ABI Events for Issue (amount)
Generating ABI Events for Params (feeBasisPoints,maxFee)
Generating ABI Events for Redeem (amount)
Generating ABI Events for RemovedBlackList (_user)
Generating ABI Events for Transfer (from,to,value)
Writing project files
Generating Protobuf Rust code
```
2. Move to the project folder and build the Substreams.
```bash
substreams build
```
3. Then, verify that the Substreams runs correctly. By default, it will output all the events of the smart contract.
```bash
substreams run -e mainnet.eth.streamingfast.io:443 \
substreams.yaml \
map_events \
--start-block 12292922 \
--stop-block +1
```
The previous command will output the following:
```bash
Progress messages received: 0 (0/sec)
Backprocessing history up to requested target block 12292922:
(hit 'm' to switch mode)
----------- BLOCK #12,292,922 (e2d521d11856591b77506a383033cf85e1d46f1669321859154ab38643244293) ---------------
{
"@module": "map_events",
"@block": 12292922,
"@type": "contract.v1.Events",
"@data": {
"transfers": [
{
"evtTxHash": "90e4fd16c989cdc7ecdfd0b6f458eb4be1c538901106bb794bb608f38ac9dd9f",
"evtIndex": 1,
"evtBlockTime": "2021-04-22T23:13:40Z",
"evtBlockNumber": "12292922",
"from": "odjZclYML4FEr4cdtQjwsLEKP78=",
"to": "XmM2sGcWQDHSwcLHo85fcWEdAcw=",
"value": "372200000"
}
]
}
}
all done
```
## Adding Calls to the Substreams
The `substreams init` command generates Rust structures based on the ABI of the smart contract provided. All the calls are available under the `abi::contract::functions` namespace of the generated code. Let's take a look.
1. Open the project in an editor of your choice (for example, VS Code) and navigate to the `lib.rs` file, which contains the main Substreams code.
2. Create a new function, `get_decimals`, which returns a `BigInt` struct:
```rust
fn get_decimals() -> substreams::scalar::BigInt {
}
```
3. Import the `abi::contract::functions::Decimals` struct from the generated ABI code.
```rust
fn get_decimals() -> substreams::scalar::BigInt {
let decimals = abi::contract::functions::Decimals {};
}
```
4. Next, use the `call` method to make the actual *eth\_call* by providing the smart contract address:
```rust
fn get_decimals() -> substreams::scalar::BigInt {
let decimals = abi::contract::functions::Decimals {};
let decimals_option = decimals.call(TRACKED_CONTRACT.to_vec());
decimals_option.unwrap()
}
```
In this case, the `call` method returns a `substreams::scalar::BigInt` struct containing the number of decimals used in the USDT token (`6`).
5. You can include this function in the `map_events` module just for testing purposes:
```rust
#[substreams::handlers::map]
fn map_events(blk: eth::Block) -> Result {
let evt_block_time =
(blk.timestamp().seconds as u64 * 1000) + (blk.timestamp().nanos as u64 / 1000000);
// Using the decimals function
let decimals = get_decimals();
substreams::log::info!("Number of decimals for the USDT token: {}", decimals.to_string());
...output omitted...
}
```
{% hint style="warning" %}
**Important:** Remember that this tutorial shows how to call the `decimals` function, but all the available calls are under the `abi::contract::functions` namespace, so you should be able to find them just by exploring the auto-generated ABI Rust files.
{% endhint %}
6. To see it in action, just re-build and re-run the Substreams:
```bash
substreams build
```
```bash
substreams run -e mainnet.eth.streamingfast.io:443 \
substreams.yaml \
map_events \
--start-block 12292922 \
--stop-block +1
```
The output should be similar to the following:
```bash
Connected (trace ID 6fb1a55ed17001d850d8c6655226ef6f)
Progress messages received: 0 (0/sec)
Backprocessing history up to requested target block 12292922:
(hit 'm' to switch mode)
----------- BLOCK #12,292,922 (e2d521d11856591b77506a383033cf85e1d46f1669321859154ab38643244293) ---------------
map_events: log: Number of decimals for the USDT token: 6
{
"@module": "map_events",
"@block": 12292922,
"@type": "contract.v1.Events",
"@data": {
"transfers": [
{
"evtTxHash": "90e4fd16c989cdc7ecdfd0b6f458eb4be1c538901106bb794bb608f38ac9dd9f",
"evtIndex": 1,
"evtBlockTime": "1619133220000",
"evtBlockNumber": "12292922",
"from": "odjZclYML4FEr4cdtQjwsLEKP78=",
"to": "XmM2sGcWQDHSwcLHo85fcWEdAcw=",
"value": "372200000"
}
]
}
}
all done
```
## Batching Calls
RPC calls add latency to your Substreams, so you should avoid them as much as possible. However, if you still have to use `eth_calls`, you should batch them. Batching RPC calls meaning making several calls within the same request.
In the previous USDT example, consider that you want to make three RPC calls: `Decimals`, `Name` and `Symbol`. Instead of creating a request for every call, you can use the `substreams_ethereum::rpc::RpcBatch` struct to make a single request for all the calls.
1. In the `lib.rs` file, create a new function, `get_calls()` and initialize a batch struct.
```rust
fn get_calls() {
let batch = substreams_ethereum::rpc::RpcBatch::new();
}
```
2. Add the calls that you want to retrieve by using the ABI of the smart contract: `abi::contract::functions::Decimals`, `abi::contract::functions::Name` and `abi::contract::functions::Symbol`.
```rust
fn get_calls() {
let batch = substreams_ethereum::rpc::RpcBatch::new();
let responses = batch
.add(
abi::contract::functions::Decimals {},
TRACKED_CONTRACT.to_vec(),
)
.add(
abi::contract::functions::Name {},
TRACKED_CONTRACT.to_vec(),
)
.add(
abi::contract::functions::Symbol {},
TRACKED_CONTRACT.to_vec(),
)
.execute()
.unwrap()
.responses;
}
```
The `execute()` method make the actual RPC call and returns an array of responses. In this case, the array will have 3 responses, one for each call made.
The order used for the response is the same as the order of addition to the request. In this example, `responses[0]` contains `Decimals`, `responses[1]` contains `Name`, and `response[2]` contains `Symbol`.
3. Decode the `Decimals` response using the ABI.
```rust
fn get_calls() {
let batch = substreams_ethereum::rpc::RpcBatch::new();
let responses = batch
.add(
abi::contract::functions::Decimals {},
TRACKED_CONTRACT.to_vec(),
)
.add(
abi::contract::functions::Name {},
TRACKED_CONTRACT.to_vec(),
)
.add(
abi::contract::functions::Symbol {},
TRACKED_CONTRACT.to_vec(),
)
.execute()
.unwrap()
.responses;
let decimals: u64;
match substreams_ethereum::rpc::RpcBatch::decode::<_, abi::contract::functions::Decimals>(&responses[0]) {
Some(decoded_decimals) => {
decimals = decoded_decimals.to_u64();
substreams::log::debug!("decoded_decimals ok: {}", decimals);
}
None => {
substreams::log::debug!("failed to get decimals");
}
};
}
```
4. Then, do the same for `Name` and `Symbol`.
```rust
fn get_calls() {
let token_address = &TRACKED_CONTRACT.to_vec();
let batch = substreams_ethereum::rpc::RpcBatch::new();
let responses = batch
.add(
abi::contract::functions::Decimals {},
TRACKED_CONTRACT.to_vec(),
)
.add(
abi::contract::functions::Name {},
TRACKED_CONTRACT.to_vec(),
)
.add(
abi::contract::functions::Symbol {},
TRACKED_CONTRACT.to_vec(),
)
.execute()
.unwrap()
.responses;
let decimals: u64;
match substreams_ethereum::rpc::RpcBatch::decode::<_, abi::contract::functions::Decimals>(&responses[0]) {
Some(decoded_decimals) => {
decimals = decoded_decimals.to_u64();
substreams::log::debug!("decoded_decimals ok: {}", decimals);
}
None => {
substreams::log::debug!("failed to get decimals");
}
};
let name: String;
match substreams_ethereum::rpc::RpcBatch::decode::<_, abi::contract::functions::Name>(&responses[1]) {
Some(decoded_name) => {
name = decoded_name;
substreams::log::debug!("decoded_name ok: {}", name);
}
None => {
substreams::log::debug!("failed to get name");
}
};
let symbol: String;
match substreams_ethereum::rpc::RpcBatch::decode::<_, abi::contract::functions::Symbol>(&responses[2]) {
Some(decoded_symbol) => {
symbol = decoded_symbol;
substreams::log::debug!("decoded_symbol ok: {}", symbol);
}
None => {
substreams::log::debug!("failed to get symbol");
}
};
}
```
5. Build and run the Substreams.
```bash
substreams build
```
```bash
substreams run -e mainnet.eth.streamingfast.io:443 substreams.yaml map_events --start-block 12292922 --stop-block +1
```
You should see an output similar to the following:
```bash
Connected (trace ID 0f3e3f3868d4f8028b8fd4d6eab7d0b4)
Progress messages received: 0 (0/sec)
Backprocessing history up to requested target block 12292922:
(hit 'm' to switch mode)
----------- BLOCK #12,292,922 (e2d521d11856591b77506a383033cf85e1d46f1669321859154ab38643244293) ---------------
map_events: log: decoded_decimals ok: 6
map_events: log: decoded_name ok: Tether USD
map_events: log: decoded_symbol ok: USDT
{
"@module": "map_events",
"@block": 12292922,
"@type": "contract.v1.Events",
"@data": {
"transfers": [
{
"evtTxHash": "90e4fd16c989cdc7ecdfd0b6f458eb4be1c538901106bb794bb608f38ac9dd9f",
"evtIndex": 1,
"evtBlockTime": "2021-04-22T23:13:40Z",
"evtBlockNumber": "12292922",
"from": "odjZclYML4FEr4cdtQjwsLEKP78=",
"to": "XmM2sGcWQDHSwcLHo85fcWEdAcw=",
"value": "372200000"
}
]
}
}
all done
```
# Local Development
# HardHat
This guide walks you through setting up a complete local Ethereum development environment for Substreams development using HardHat. You'll deploy a sample Counter contract, generate transactions, and stream the events using Substreams.
**Estimated time:** 15-20 minutes
## What You'll Build
* Local Ethereum node (Geth in dev mode)
* Firehose integration for block streaming
* Counter smart contract with events
* Substreams module to extract contract events
* Complete Docker Compose orchestration
## Prerequisites
Ensure you have the following installed:
* **Docker 20.10+** with Docker Compose v2.0+
* **Node.js 18+** with npm or yarn
* **Substreams CLI** v1.7.0+ ([installation guide](/how-to-guides/installing-the-cli))
* **Rust** with `wasm32-unknown-unknown` target
* **curl** for testing endpoints
## Architecture Overview
The local environment consists of:
* **Geth** (port 8545/8546) - Ethereum node in dev mode with 1-second block time
* **Substreams** (port 9000) - Substreams Tier1 service providing gRPC streaming
* **Docker network** - Connecting all services
```
┌─────────────────┐ ┌─────────────────────┐ ┌─────────────────┐
│ Your App │ │ Substreams │ │ HardHat │
│ │ │ │ │ │
│ ┌─────────────┐ │ │ ┌─────────────────┐ │ │ ┌─────────────┐ │
│ │ Substreams │─┼────┼►│ Substreams │ │ │ │ Deploy │ │
│ │ CLI │ │ │ │ (port 9000) │ │ │ │ Contracts │ │
│ └─────────────┘ │ │ └─────────────────┘ │ │ └─────────────┘ │
└─────────────────┘ │ │ │ └─────────────────┘
│ ┌─────────────────┐ │
│ │ Geth │ │
│ │ (port 8545) │ │
│ └─────────────────┘ │
└─────────────────────┘
```
## Setup Instructions
### 1. Create Project Directory
```bash
mkdir substreams-ethereum-local
cd substreams-ethereum-local
```
### 2. Create Docker Compose Configuration
Create a `docker-compose.yml` file:
```yaml
services:
ethereum-node:
image: ghcr.io/streamingfast/go-ethereum:geth-v1.16.7-fh3.0
container_name: ethereum-dev-node
entrypoint: ["/app/fireeth"]
command:
- start
- reader-node,relayer,merger,firehose,substreams-tier1,substreams-tier2
- --config-file=
- --log-format=text
- --log-to-file=false
- --data-dir=/data
- --advertise-block-id-encoding=hex
- --advertise-chain-name=local-ethereum
- --common-first-streamable-block=0
- --reader-node-path=geth
- --reader-node-arguments=--dev --dev.period=1 --vmtrace=firehose --http --http.addr=0.0.0.0 --http.port=8545 --http.api=eth,net,web3,debug,txpool --datadir=/data/geth
- --firehose-grpc-listen-addr=:8089
- --substreams-tier1-grpc-listen-addr=:9000
- --substreams-tier1-block-type=sf.ethereum.type.v2.Block
ports:
- "8545:8545"
- "8546:8546"
- "8089:8089"
- "9000:9000"
healthcheck:
test: ["CMD", "curl", "-f", "http://localhost:8545", "-X", "POST", "-H", "Content-Type: application/json", "-d", '{"jsonrpc":"2.0","method":"eth_blockNumber","params":[],"id":1}']
interval: 10s
timeout: 5s
retries: 5
start_period: 30s
volumes:
- ethereum_data:/data
networks:
- ethereum_network
fund-address:
image: ghcr.io/streamingfast/go-ethereum:geth-v1.16.7-fh3.0
volumes:
- ethereum_data:/data
entrypoint: ["geth"]
command:
- attach
- --datadir=/data/geth
- '--exec=[
"0xf39fd6e51aad88f6f4ce6ab8827279cfffb92266",
"0x70997970c51812dc3a010c7d01b50e0d17dc79c8",
"0x3c44cdddb6a900fa2b585dd299e03d12fa4293bc",
"0x90f79bf6eb2c4f870365e785982e1f101e93b906",
"0x15d34aaf54267db7d7c367839aaf71a00a2c6a65",
"0x9965507d1a55bcc2695c58ba16fb37d819b0a4dc",
"0x976ea74026e726554db657fa54763abd0c3a0aa9",
"0x14dc79964da2c08b23698b3d3cc7ca32193d9955",
"0x23618e81e3f5cdf7f54c3d65f7fbc0abf5b21e8f",
"0xa0ee7a142d267c1f36714e4a8f75612f20a79720"
].forEach(to =>
eth.sendTransaction({from: eth.accounts[0], to, value: web3.toWei(10000, "ether")})
);'
restart: on-failure
deploy:
restart_policy:
condition: on-failure
delay: 2s
volumes:
ethereum_data:
networks:
ethereum_network:
driver: bridge
```
### 3. Start the Environment
```bash
docker compose up -d
```
{% hint style="warning" %}
To restart everything from scratch, use `docker compose down --volumes` to remove all data and start fresh.
{% endhint %}
## Validation Commands
### 1. Check Docker Services
Verify all containers are running and healthy:
```bash
docker compose ps
```
Expected output:
```
NAME COMMAND SERVICE STATUS PORTS
ethereum-dev-node "/app/fireeth start …" ethereum-node Up (healthy) 0.0.0.0:8089->8089/tcp, 0.0.0.0:8545->8545/tcp, 0.0.0.0:8546->8546/tcp, 0.0.0.0:9000->9000/tcp
fund-address "geth attach --datad…" fund-address Exited (0)
```
### 2. Test Substreams Connectivity
Test Substreams Tier1 gRPC connectivity:
```bash
substreams run -e localhost:9000 --plaintext common@v0.1.0 -o clock -s -1
```
Expected output:
```
Writing clock information only (no data)
----------- BLOCK #24 (6c3dbc20ae11cb856bed9789f7845359e98de71b830f0d9599d0061ed4e962d2) age=1.959195s ---------------
...
```
{% hint style="success" %}
If all validation commands succeed, your environment is ready!
{% endhint %}
## Deploy Counter Contract with HardHat
### 1. Initialize HardHat Project
{% hint style="info" %}
This guide mostly follows [HardHat's setup tutorial](https://hardhat.org/docs/tutorial/setup) in a streamlined way.
{% endhint %}
```bash
npx hardhat --init
```
Follow the interactive prompts:
* First choose `Hardhat 3 Beta (recommended for new projects)`
* Second use `.` as the relative path
* Third choose `A TypeScript Hardhat project using Node Test Runner and Viem`
* Fourth choose `Yes` when requested to install dependencies
### 2. Configure HardHat
Update `hardhat.config.ts` to add the local network:
```typescript
export default defineConfig({
...,
networks: {
local: {
type: "http",
chainType: "l1",
chainId: 1337,
url: "http://localhost:8545",
},
...
},
});
```
### 3. Counter Contract
HardHat created a contract for us! You can view the contract at `contracts/Counter.sol`:
```solidity
// SPDX-License-Identifier: UNLICENSED
pragma solidity ^0.8.28;
contract Counter {
uint public x;
event Increment(uint by);
function inc() public {
x++;
emit Increment(1);
}
function incBy(uint by) public {
require(by > 0, "incBy: increment should be positive");
x += by;
emit Increment(by);
}
}
```
### 4. Deploy the Contract
HardHat created a deployment script at `ignition/modules/Counter.ts`. Deploy the contract:
```bash
npx hardhat ignition deploy ignition/modules/Counter.ts --network=local
```
Example output:
```
...
Deployed Addresses
CounterModule#Counter -
```
### 5. Verify Deployment
```bash
npx hardhat console --network local
```
In the console:
```javascript
const { viem } = await network.connect();
let counter = await viem.getContractAt("Counter", "");
await counter.write.incBy([2n]);
await counter.read.x(); // Should return current counter value
```
## Create Substreams Module
### 1. Initialize Substreams Project
```bash
substreams init
```
Follow the interactive prompts:
* **Chosen protocol**: `EVM`
* **Chosen generator**: `evm-events-calls`
* **Please enter the project name**: `counter`
* **Please select the chain**: `Ethereum Mainnet` (or the chain you are targeting)
* **Please enter the contract address**: `` (use your deployed address)
* **How do you want to provide the JSON ABI?**: `JSON in a local file`
* **Input the full path of the JSON ABI**: `./artifacts/contracts/Counter.sol/Counter.json`
* **Please enter the contract initial block number**: `0`
* **Choose a short name for the contract**: `counter`
* **What do you want to track for this contract?**: `Both events and calls`
* **Is this contract a factory**: `No`
* **Add another contract?**: `No`
* **In which directory do you want to download the project?**: `./substreams`
* **How would you like to consume the Substreams?**: `To Postgres` (or choose any other one)
{% hint style="info" %}
The IDL file at `./artifacts/contracts/Counter.sol/Counter.json` was automatically generated by Hardhat during the build process. We reference this file when initializing the Substreams module.
{% endhint %}
This will generate the basic Substreams module structure with the necessary configuration for tracking your Counter program.
### 2. Build and Test Substreams
```bash
cd substreams
substreams build
substreams run -e localhost:9000 --plaintext counter-v0.1.0.spkg
```
{% hint style="info" %}
Look for the deployment block as it's the one that will contain some actual data. You can scan a specific range using `-s -t +10` to scan 10 blocks starting from the deployment block.
You can also leave the `substreams run` running and open another terminal to run execute the [Verify Deployment](#5-verify-deployment) commands to see data being process live.
{% endhint %}
You should see the Increment events from your contract deployment!
## Cleanup
Congratulations! You've completed the tutorial and have a working local HardHat development environment for Substreams.
When you're done, you can clean up the Docker environment with:
```bash
docker compose down --volumes
```
This will stop all containers and remove all data, allowing you to start fresh if needed.
## Troubleshooting
For common issues with Docker Compose, RPC connectivity, Substreams, and platform-specific problems, see the [Local Development Troubleshooting Guide](/how-to-guides/develop-your-own-substreams/general/local-development/troubleshooting).
## Next Steps
Now that you have a working local environment:
1. **Try Other Platforms** - Explore [Foundry](/how-to-guides/develop-your-own-substreams/on-evm/local-development/foundry) or [Solana](/how-to-guides/develop-your-own-substreams/solana/local-development/anchor) local development
2. **Advanced Substreams** - Learn about [modules](/reference-material/core-concepts/modules), [manifests](/reference-material/manifest-and-components/manifests), and [data transformations](/how-to-guides/develop-your-own-substreams/general/using-rust-proto)
3. **Consuming Substreams** - Connect to [databases](/how-to-guides/sinks/sql) or [streaming platforms](/how-to-guides/sinks/stream)
4. **Production Deployment** - Move to [production endpoints](/reference-material/chain-support/chains-and-endpoints)
## Additional Resources
* [HardHat Documentation](https://hardhat.org/docs)
* [Substreams Ethereum Reference](https://github.com/streamingfast/substreams-ethereum)
* [Substreams CLI Reference](/reference-material/command-line-interface)
* [Creating Protobuf Schemas](/how-to-guides/develop-your-own-substreams/general/creating-protobuf-schemas)
# Foundry
This guide walks you through setting up a complete local Ethereum development environment for Substreams development using Foundry. You'll deploy a sample Counter contract, generate transactions, and stream the events using Substreams.
**Estimated time:** 15-20 minutes
## What You'll Build
* Local Ethereum node (Geth in dev mode)
* Firehose integration for block streaming
* Counter smart contract with events
* Substreams module to extract contract events
* Complete Docker Compose orchestration
## Prerequisites
Ensure you have the following installed:
* **Docker 20.10+** with Docker Compose v2.0+
* **Foundry** (forge, cast, anvil) - [Installation guide](https://book.getfoundry.sh/getting-started/installation)
* **Substreams CLI** v1.7.0+ ([installation guide](/how-to-guides/installing-the-cli))
* **Rust** with `wasm32-unknown-unknown` target
* **curl** for testing endpoints
## Architecture Overview
The local environment consists of:
* **Geth** (port 8545/8546) - Ethereum node in dev mode with 1-second block time
* **Substreams** (port 9000) - Substreams Tier1 service providing gRPC streaming
* **Docker network** - Connecting all services
```
┌─────────────────┐ ┌─────────────────────┐ ┌─────────────────┐
│ Your App │ │ Substreams │ │ Foundry │
│ │ │ │ │ │
│ ┌─────────────┐ │ │ ┌─────────────────┐ │ │ ┌─────────────┐ │
│ │ Substreams │─┼────┼►│ Substreams │ │ │ │ Deploy │ │
│ │ CLI │ │ │ │ (port 9000) │ │ │ │ Contracts │ │
│ └─────────────┘ │ │ └─────────────────┘ │ │ └─────────────┘ │
└─────────────────┘ │ │ │ └─────────────────┘
│ ┌─────────────────┐ │
│ │ Geth │ │
│ │ (port 8545) │ │
│ └─────────────────┘ │
└─────────────────────┘
```
## Setup Instructions
### 1. Create Project Directory
```bash
mkdir substreams-ethereum-foundry
cd substreams-ethereum-foundry
```
### 2. Create Docker Compose Configuration
Create a `docker-compose.yml` file:
```yaml
services:
ethereum-node:
image: ghcr.io/streamingfast/go-ethereum:geth-v1.16.7-fh3.0
container_name: ethereum-dev-node
entrypoint: ["/app/fireeth"]
command:
- start
- reader-node,relayer,merger,firehose,substreams-tier1,substreams-tier2
- --config-file=
- --log-format=text
- --log-to-file=false
- --data-dir=/data
- --advertise-block-id-encoding=hex
- --advertise-chain-name=local-ethereum
- --common-first-streamable-block=0
- --reader-node-path=geth
- --reader-node-arguments=--dev --dev.period=1 --vmtrace=firehose --http --http.addr=0.0.0.0 --http.port=8545 --http.api=eth,net,web3,debug,txpool --datadir=/data/geth
- --firehose-grpc-listen-addr=:8089
- --substreams-tier1-grpc-listen-addr=:9000
- --substreams-tier1-block-type=sf.ethereum.type.v2.Block
ports:
- "8545:8545"
- "8546:8546"
- "8089:8089"
- "9000:9000"
healthcheck:
test: ["CMD", "curl", "-f", "http://localhost:8545", "-X", "POST", "-H", "Content-Type: application/json", "-d", '{"jsonrpc":"2.0","method":"eth_blockNumber","params":[],"id":1}']
interval: 10s
timeout: 5s
retries: 5
start_period: 30s
volumes:
- ethereum_data:/data
networks:
- ethereum_network
fund-address:
image: ghcr.io/streamingfast/go-ethereum:geth-v1.16.7-fh3.0
volumes:
- ethereum_data:/data
entrypoint: ["geth"]
command:
- attach
- --datadir=/data/geth
- '--exec=[
"0xf39fd6e51aad88f6f4ce6ab8827279cfffb92266",
"0x70997970c51812dc3a010c7d01b50e0d17dc79c8",
"0x3c44cdddb6a900fa2b585dd299e03d12fa4293bc",
"0x90f79bf6eb2c4f870365e785982e1f101e93b906",
"0x15d34aaf54267db7d7c367839aaf71a00a2c6a65",
"0x9965507d1a55bcc2695c58ba16fb37d819b0a4dc",
"0x976ea74026e726554db657fa54763abd0c3a0aa9",
"0x14dc79964da2c08b23698b3d3cc7ca32193d9955",
"0x23618e81e3f5cdf7f54c3d65f7fbc0abf5b21e8f",
"0xa0ee7a142d267c1f36714e4a8f75612f20a79720"
].forEach(to =>
eth.sendTransaction({from: eth.accounts[0], to, value: web3.toWei(10000, "ether")})
);'
restart: on-failure
deploy:
restart_policy:
condition: on-failure
delay: 2s
volumes:
ethereum_data:
networks:
ethereum_network:
driver: bridge
```
### 3. Start the Environment
```bash
docker compose up -d
```
{% hint style="warning" %}
To restart everything from scratch, use `docker compose down --volumes` to remove all data and start fresh.
{% endhint %}
## Validation Commands
### 1. Check Docker Services
Verify all containers are running and healthy:
```bash
docker compose ps
```
Expected output:
```
NAME COMMAND SERVICE STATUS PORTS
ethereum-dev-node "/app/fireeth start …" ethereum-node Up (healthy) 0.0.0.0:8089->8089/tcp, 0.0.0.0:8545->8545/tcp, 0.0.0.0:8546->8546/tcp, 0.0.0.0:9000->9000/tcp
fund-address "geth attach --datad…" fund-address Exited (0)
```
### 2. Test Substreams Connectivity
Test Substreams Tier1 gRPC connectivity:
```bash
substreams run -e localhost:9000 --plaintext common@v0.1.0 -o clock -s -1
```
Expected output:
```
Writing clock information only (no data)
----------- BLOCK #24 (6c3dbc20ae11cb856bed9789f7845359e98de71b830f0d9599d0061ed4e962d2) age=1.959195s ---------------
...
```
{% hint style="success" %}
If all validation commands succeed, your environment is ready!
{% endhint %}
## Deploy Counter Contract with Foundry
### 1. Install Foundry
If you haven't installed Foundry yet:
```bash
curl -L https://foundry.paradigm.xyz | bash
foundryup
```
### 2. Initialize Foundry Project
```bash
forge init --no-git --force
```
### 3. Configure Foundry
Add the following network configuration to `foundry.toml` (the file already exists from `forge init`):
```toml
[profile.default]
src = "src"
out = "out"
libs = ["lib"]
solc_version = "0.8.20"
[rpc_endpoints]
local = "http://localhost:8545"
[etherscan]
# No API key needed for local development
```
### 4. Set Environment Variables
Set up the private key environment variable for easier command usage:
```bash
# Using HardHat's default test account 0 private key (pre-funded in dev environment)
export PKEY="0xac0974bec39a17e36ba4a6b4d238ff944bacb478cbed5efcae784d7bf4f2ff80"
```
{% hint style="info" %}
This makes subsequent `forge` and `cast` commands cleaner and easier to read. You'll need to run this in each new terminal session.
{% endhint %}
### 5. Use Default Counter Contract
Foundry already created a suitable Counter contract in `src/Counter.sol`. The default contract contains:
```solidity
// SPDX-License-Identifier: UNLICENSED
pragma solidity ^0.8.13;
contract Counter {
uint256 public number;
function setNumber(uint256 newNumber) public {
number = newNumber;
}
function increment() public {
number++;
}
}
```
No need to modify this file - we'll use the default contract as-is.
### 6. Compile and Deploy
```bash
# Compile contracts
forge build
# Deploy to local network
forge create --rpc-url local --private-key $PKEY --broadcast src/Counter.sol:Counter
```
Example output:
```
...
Deployer: 0xf39Fd6e51aad88F6F4ce6aB8827279cffFb92266
Deployed to: 0x5FbDB2315678afecb367f032d93F642f64180aa3
Transaction hash: 0x83dba3bc167c38e36b79b075552f67cd6c3f924bf8efb09ab6686ee50ed4816a
```
Export the deployed contract address for easy reference:
```bash
export CONTRACT=
```
Replace `` with the actual address from the deployment output (look for the `Deployed to:` field).
### 7. Verify Deployment
Test the deployed contract with the following sequence:
```bash
# 1. Read the current counter value
cast call $CONTRACT "number()(uint256)" --rpc-url local
# 2. Set a number using setNumber
cast send $CONTRACT "setNumber(uint256)" 42 --rpc-url local --private-key $PKEY
# 3. Increment the counter
cast send $CONTRACT "increment()" --rpc-url local --private-key $PKEY
# 4. Verify the value changed
cast call $CONTRACT "number()(uint256)" --rpc-url local
```
Expected output from the final call: `43` (42 + 1 from increment)
## Create Substreams Module
### 1. Initialize Substreams Project
```bash
substreams init
```
Follow the interactive prompts:
* **Chosen protocol**: `EVM`
* **Chosen generator**: `evm-events-calls`
* **Please enter the project name**: `counter`
* **Please select the chain**: `Ethereum Mainnet` (or the chain you are targeting)
* **Please enter the contract address**: Use your deployed address (from `$CONTRACT` variable)
* **How do you want to provide the JSON ABI?**: `JSON in a local file`
* **Input the full path of the JSON ABI**: `./out/Counter.sol/Counter.json`
* **Please enter the contract initial block number**: `0`
* **Choose a short name for the contract**: `counter`
* **What do you want to track for this contract?**: `Both events and calls`
* **Is this contract a factory**: `No`
* **Add another contract?**: `No`
* **In which directory do you want to download the project?**: `./substreams`
* **How would you like to consume the Substreams?**: `To Postgres` (or choose any other one)
{% hint style="info" %}
The IDL file at `./out/Counter.sol/Counter.json` was automatically generated by Foundry during the build process. We reference this file when initializing the Substreams module.
{% endhint %}
This will generate the basic Substreams module structure with the necessary configuration for tracking your Counter program.
### 2. Build and Test Substreams
```bash
cd substreams
substreams build
substreams run -e localhost:9000 --plaintext counter-v0.1.0.spkg
```
{% hint style="info" %}
Look for the deployment block as it's the one that will contain some actual data. You can scan a specific range using `-s -t +10` to scan 10 blocks starting from the deployment block.
You can also leave the substreams run command running and open another terminal to run `cast send $CONTRACT "increment()" --rpc-url local --private-key $PKEY` to increment the counter and see the events appear live in your Substreams output.
{% endhint %}
You should see the Increment events from your contract deployment!
## Cleanup
Congratulations! You've completed the tutorial and have a working local Foundry development environment for Substreams.
When you're done, you can clean up the Docker environment with:
```bash
docker compose down --volumes
```
This will stop all containers and remove all data, allowing you to start fresh if needed.
## Troubleshooting
For common issues with Docker Compose, RPC connectivity, and Substreams, see the [Local Development Troubleshooting](/how-to-guides/develop-your-own-substreams/general/local-development/troubleshooting) guide.
## Next Steps
Now that you have a working local environment:
1. **Try Other Platforms** - Explore [HardHat](/how-to-guides/develop-your-own-substreams/on-evm/local-development/hardhat) or [Solana](/how-to-guides/develop-your-own-substreams/solana/local-development/anchor) local development
2. **Advanced Substreams** - Learn about [modules](/reference-material/core-concepts/modules), [manifests](/reference-material/manifest-and-components/manifests), and [data transformations](/how-to-guides/develop-your-own-substreams/general/using-rust-proto)
3. **Consuming Substreams** - Connect to [databases](/how-to-guides/sinks/sql) or [streaming platforms](/how-to-guides/sinks/stream)
4. **Production Deployment** - Move to [production endpoints](/reference-material/chain-support/chains-and-endpoints)
## Additional Resources
* [Foundry Book](https://book.getfoundry.sh/)
* [Substreams Ethereum Reference](https://github.com/streamingfast/substreams-ethereum)
* [Substreams CLI Reference](/reference-material/command-line-interface)
* [Creating Protobuf Schemas](/how-to-guides/develop-your-own-substreams/general/creating-protobuf-schemas)
# on Solana
In the following sections, you will find several Solana how-to guides showcasing how you can index data using Substreams.
# Explore Solana
In this tutorial, you will learn the basics of developing Solana Substreams through examples. The Solana Substreams Explorer contains several modules performing basic and advanced aggregations on Solana data.
### Before You Begin
Before you start coding, there are several dependencies you must install on your computer.
#### The GitHub Repository
The `https://github.com/streamingfast/substreams-explorers` GitHub repository contains all the Substreams Explorers currently available. You can simply clone the repository:
```
git clone https://github.com/streamingfast/substreams-explorers
```
#### The Substreams CLI
The Substreams CLI allows you to run, package, and visualize your Substreams. Make sure you have the CLI installed by following the [Install Substreams CLI](/how-to-guides/installing-the-cli) instructions or use our [Dev Container](/reference-material/development-tools/devcontainer-ref) to setup your environment.
#### Substreams Basics
You should be familiar with the basic Substreams terminology, which includes:
* Manifest & Modules (understanding the difference between a `map` and a `store` module)
* Protobufs
* Packages
Take a look at the *Develop Substreams* section for more information on how to start developing Substreams.
### The Solana Explorer
The Solana explorer includes several modules showcasing what Solana data you can extract with Substreams (it's easy and fast!). In the following sections, you will find out about the different functions you can use to easily get started with Solana.
# Filter Instructions
The `map_filter_instructions` module of the Solana Substreams Explorer extracts instruction of a given Program ID. For example, consider that you want to extract all the `Stake11111111111111111111111111111111111111` instructions.
### Run the Substreams
#### Run From Source Code
In the `substreams-explorer` project, move to the `solana-explorer` folder, which contains the source of the Solana Substreams. Then, build the Rust code:
```bash
substreams build
```
Now, you can run the Substreams by using the `substreams gui` command. To avoid iterating over the whole blockchain, the following command extracts instructions from the Stake Program only at block `243830383`:
```bash
substreams gui ./substreams.yaml \
map_filter_instructions -e mainnet.sol.streamingfast.io:443 \
--start-block 243830383 --stop-block +1
```
In the `Output` screen of the GUI, you can see two `Stake11111111111111111111111111111111111111` instructions were retrieved at block `243830383`:
The `map_filter_instructions` allows you to filter any Program ID, and this is configurable as a parameter in the Substreams Manifest (`substreams.yaml`):
```yaml
params:
map_filter_instructions: "program_id=Stake11111111111111111111111111111111111111"
```
You can replace `Stake11111111111111111111111111111111111111` by any instruction of your choice.
#### Run the Package From the Substreams Registry
The Solana Explorer package is also available on the [Substreams Registry](https://substreams.dev). You can run it by using the following command, achieving the same result:
```bash
substreams gui https://spkg.io/streamingfast/solana-explorer-v0.2.0.spkg \
map_filter_instructions -e mainnet.sol.streamingfast.io:443 \
--start-block 243830383 --stop-block +1
```
### Inspect the Code
The `map_filter_instructions.rs` file contains the source of the module. The output of the Substreams module is the `Instructions` object, which is defined in the `/proto/transactions.proto` file of the project. This is a custom object defined by the user, and you can modify at your will.
```protobuf
message Instructions {
repeated Instruction instructions = 1;
}
message Instruction {
string program_id = 1;
repeated string accounts = 2;
string data = 3;
}
```
Let's inspect the module function:
```rust
#[substreams::handlers::map]
fn map_filter_instructions(params: String, blk: Block) -> Result {
let filters = parse_filters_from_params(params)?; // 1.
let instructions : Vec = blk.transactions().flat_map(|tx| { // 2.
let msg = &tx.transaction.message; // 3.
let acct_keys = tx.resolved_accounts(); // 4.
msg.instructions.iter() // 5.
.filter(|inst| apply_filter(inst, &filters, &acct_keys)) // 6.
.map(|inst| { // 7.
Instruction {
program_id: bs58::encode(acct_keys[inst.program_id_index as usize].to_vec()).into_string(),
accounts: inst.accounts.iter().map(|acct| bs58::encode(acct_keys[*acct as usize].to_vec()).into_string()).collect(),
data: bs58::encode(&inst.data).into_string(),
}
}).collect::>()
}).collect();
Ok(Instructions { instructions })
}
```
1. The `parse_filters_from_params` function parses the parameters passed to the module. In this example, the parameter passed is defined in the `substreams.yaml` file as `program_id=Stake11111111111111111111111111111111111111`.
2. Iterate over the transactions of the blocks.
3. Extract the [Message](https://github.com/streamingfast/firehose-solana/blob/develop/proto/sf/solana/type/v1/type.proto#L32) object, which contains relevant information, such as the instructions of the transaction. Optional `message` fields read through directly, because the generated type is a `MessageField` that dereferences to a default instance when unset.
4. Get accounts of the transaction (the `resolved_accounts()` method contains also accounts stored in the [Address Lookup Tables](https://docs.solana.com/developing/lookup-tables)).
5. Iterate over the instructions.
6. Use the `apply_filter` function to only keep instruction where `program_id=Stake11111111111111111111111111111111111111`.
7. Create an `Instruction` object, which will be the output of the Substreams. This object is declared as a Protobuf in the `proto` folder of the project.
# Filter Transactions
The `map_filter_transactions` module of the Solana Substreams Explorer filters transactions given a signature hash. For example, let's consider that you want to retrieve transactions containing the `21ED2HBGuLUwgbaBb77cGwFR8MkVQfjR9KszzCb7jZkeSysJkHAVew6RaaBh3r1zTefpdq9Kf5geFp19P3nUXB3t`.
### Run the Substreams
#### Run From Source Code
In the `substreams-explorer` project, move to the `solana-explorer` folder, which contains the source of the Solana Substreams. Then, build the Rust code:
```bash
substreams build
```
Now, you can run the Substreams by using the `substreams gui` command. To avoid iterating over the whole blockchain, the following command extracts transactions including `21ED2HBGuLUwgbaBb77cGwFR8MkVQfjR9KszzCb7jZkeSysJkHAVew6RaaBh3r1zTefpdq9Kf5geFp19P3nUXB3t` signatures.
```bash
substreams gui ./substreams.yaml \
map_filter_transactions -e mainnet.sol.streamingfast.io:443 \
--start-block 153000028 --stop-block +1
```
In the `Output` screen of the Substreams GUI you can see there is a transaction with the corresponding signature at block number `153000028`.
You can change the signature hash in `params` section of the Substreams Manifest (`substreams.yaml`):
```yaml
params:
map_filter_transactions: "signature=21ED2HBGuLUwgbaBb77cGwFR8MkVQfjR9KszzCb7jZkeSysJkHAVew6RaaBh3r1zTefpdq9Kf5geFp19P3nUXB3t"
```
#### Run the Package From the Substreams Registry
The Solana Explorer is also available as a Substreams package in the [Substreams Registry](https://substreams.dev). You can simply run it:
```bash
substreams gui https://spkg.io/streamingfast/solana-explorer-v0.2.0.spkg \
map_filter_transactions -e mainnet.sol.streamingfast.io:443 \
--start-block 153000028 --stop-block +1
```
### Inspect the Code
The `map_filter_transaction.rs` file contains the source of the module. The output emitted by the module is defined as a Protobuf in the `/proto/transactions.proto` file of the project.
```protobuf
message Instructions {
repeated Instruction instructions = 1;
}
message Instruction {
string program_id = 1;
repeated string accounts = 2;
string data = 3;
}
message Transactions {
repeated Transaction transactions = 1;
}
message Transaction {
repeated string signatures = 1;
repeated Instruction instructions = 2;
}
```
The output of the Substreams is the `Transactions` Protobuf object:
```rust
#[substreams::handlers::map]
fn map_filter_transactions(params: String, blk: Block) -> Result> {
let filters = parse_filters_from_params(params)?; // 1.
let mut transactions: Vec = Vec::new();
blk.transactions // 2.
.iter()
.filter(|tx| apply_filter(tx, &filters)) // 3.
.for_each(|tx| {
let msg = &tx.transaction.message;
let acct_keys = tx.resolved_accounts(); // 4.
let insts: Vec = msg
.instructions // 5.
.iter()
.map(|inst| Instruction { // 6.
program_id: bs58::encode(acct_keys[inst.program_id_index as usize].to_vec()).into_string(),
accounts: inst
.accounts
.iter()
.map(|acct| bs58::encode(acct_keys[*acct as usize].to_vec()).into_string())
.collect(),
data: bs58::encode(&inst.data).into_string(),
})
.collect();
let t = Transaction { // 7.
signatures: tx
.transaction
.signatures
.iter()
.map(|sig| bs58::encode(sig).into_string())
.collect(),
instructions: insts,
};
transactions.push(t);
});
Ok(Transactions { transactions })
}
```
1. Parse the filters provided as a parameter to the module function. The signature to filter is defined as a parameter in the Substreams Manifest, and is then injected as a string in the Rust function.
2. Iterate over the transactions of the block.
3. Filter the transactions by invoking the `apply_filters` function. This function only keeps transactions containing the signature passed as a parameter.
4. Get the accounts of the transaction. The `resolved_accounts()` method includes accounts stored in the [Address Lookup Tables](https://docs.solana.com/developing/lookup-tables).
5. Iterate over the instructions of the transaction.
6. Map every instruction to the `Instruction` output Protobuf data model of the Substreams, keeping only three fields: `program_id`, `accounts` and `data`.
7. Map the transaction to the `Transaction` output Protobuf data model of the Substreams.
# SPL Token Tracker
The Solana Token Tracker Substreams allows you to extract transfers from Solana Token Programs. You can simply provide the address of the token you want to track as an input to the Substreams.
### Before You Begin
The Solana Token Tracker Substreams requires medium to advanced Substreams knowledge. If this is the first time you are using Substreams, make sure you:
* Read the [Develop Substreams](/tutorials/intro-to-tutorials) section, which will teach you the basics of the developing Substreams modules.
* Complete the [Explore Solana](/how-to-guides/develop-your-own-substreams/solana/explore-solana) tutorial, which will assist you in understanding the main pieces of the Solana Substreams.
If you already have the required knowledge, clone the [Solana Token Tracker GitHub repository](https://github.com/streamingfast/solana-token-tracker). You will go through the code in the following steps.
### Inspect the Project
The Substreams has only one module: `map_solana_token_events`, as you can check in the Substreams manifest (`substreams.yaml`):
```yaml
modules:
- name: map_solana_token_events
kind: map
initialBlock: 158558168
inputs:
- params: string
- source: sf.solana.type.v1.Block
output:
type: proto:solana_token_tracker.types.v1.Output
params:
map_solana_token_events: "token_contract=EPjFWdd5AufqSSqeM2qN1xzybapC8G4wEGGkZwyTDt1v&token_decimals=6"
```
The module receives two inputs (defined in the `inputs` section of the YAML):
* A string containing a couple of parameters: this parameter is defined in the `params` section of the YAML, and defines the token that you want to extract data from: `token_contract=EPjFWdd5AufqSSqeM2qN1xzybapC8G4wEGGkZwyTDt1v&token_decimals=6` `token_contract=EPjFWdd5AufqSSqeM2qN1xzybapC8G4wEGGkZwyTDt1v` is the address of the USDC contract in Solana mainnet and `token_decimals=6` is the number of decimals used the USDC token.
* A raw Solana block.
You can update the `token_contract` parameter to track any token of your choice. You can also use the `-p` option in the Substreams GUI to dynamically override the parameters of the Substreams.
### Run the Substreams
You can run the Substreams by using the Substreams CLI. As specified in the manifest by default, the USDC data will be retrieved.
```bash
substreams gui ./substreams.yaml map_solana_token_events -e mainnet.sol.streamingfast.io:443 --start-block 158558168 --stop-block +1
```
You can also override the parameters of the manifest by using the `-p` option of the CLI. For example, if you want to track the transfer of the USDT token (`Es9vMFrzaCERmJfrF4H2FYD4KCoNkY11McCe8BenwNYB`):
```bash
substreams gui ./substreams.yaml map_solana_token_events -e mainnet.sol.streamingfast.io:443 --start-block 158558168 --stop-block +1 -p map_solana_token_events="token_contract=Es9vMFrzaCERmJfrF4H2FYD4KCoNkY11McCe8BenwNYB&token_decimals=6"
```
### Inspect the Code
* Open the `lib.rs` file, which contains the code for the `map_solana_token_events` module. The function receives two parameters: the raw Solana block object and the parameters provided in the Substreams manifest.
* The `parse_parameters` function converts the parameters string passed to the module and converts it into a `TokenParams` object. This object contains two fields: `token_contract` (representing the address of the token to track) and `token_decimals` (representing the number of decimals used in the token).
```rust
pub fn map_solana_token_events(params: String, block: Block) -> Result {
let parameters = parse_parameters(params)?;
// ...
}
```
* Then, you iterate over all the transactions
```rust
pub fn map_solana_token_events(params: String, block: Block) -> Result {
let parameters = parse_parameters(params)?;
let mut output = Output::default(); // 1.
let timestamp = block.block_time.timestamp;
for confirmed_trx in block.transactions_owned() { // 2.
let accounts = confirmed_trx.resolved_accounts_as_strings(); // 3.
let trx = &confirmed_trx.transaction; // 4.
let trx_hash = bs58::encode(&trx.signatures[0]).into_string();
let msg = &trx.message;
let meta = &confirmed_trx.meta;
for (i, compiled_instruction) in msg.instructions.iter().enumerate() { // 5.
utils::process_compiled_instruction( // 6.
&mut output,
timestamp,
&trx_hash,
meta,
i as u32,
compiled_instruction,
&accounts,
¶meters
);
}
}
Ok(output) // 7.
}
```
1. Create an `Output` object, which is the container of all the events extracted.
2. Iterate over the confirmed transactions of the block.
3. Get the accounts of the transaction. The `resolved_accounts()` method contains also accounts stored in the [Address Lookup Tables](https://docs.solana.com/developing/lookup-tables).
4. Read the transaction, its message and its metadata. These are `MessageField` values, so they read directly without unwrapping.
5. Iterate over the instructions contained within the transaction.
6. For every instruction, call the `process_compiled_instruction(...)` function to process the instruction further.
* The `process_compiled_instruction(...)` function is defined in the `util.rs` file.
```rust
pub fn process_compiled_instruction(
output: &mut Output,
timestamp: i64,
trx_hash: &String,
meta: &TransactionStatusMeta,
inst_index: u32,
inst: &CompiledInstruction,
accounts: &Vec,
parameters: &TokenParams
) {
let instruction_program_account = &accounts[inst.program_id_index as usize]; // 1.
if instruction_program_account == constants::TOKEN_PROGRAM { // 2.
match process_token_instruction(trx_hash, timestamp, &inst.data, &inst.accounts, meta, accounts, output, parameters) {
Err(err) => {
panic!(
"trx_hash {} top level transaction without inner instructions: {}",
trx_hash, err
);
}
Ok(()) => {}
}
}
process_inner_instructions(output, inst_index, meta, accounts, trx_hash, timestamp, parameters); // 3.
}
```
1. The `instruction.program_id_index` indicates the position of the program account in the accounts array. For example, if `program_index_id = 5`, it means that the program account will be at position number 5 in the `accounts` array.
2. If the instruction account is the Token Program Account (i.e. `TokenkegQfeZyiNwAJbNbGKPFXCWuBvf9Ss623VQ5DA`), this means that the instruction executed in the transaction has been produced by the Token Program. Therefore, you process the instruction further by calling the `process_token_instruction(...)` function to extract token-related information, such as transfers or mints.
3. Every top-level instruction holds inner instructions. If the top-level instruction is not from the Token Program, you check if any Inner Instruction is from the Token Program by calling the `process_inner_instructions(...)` function.
* A top-level instruction could hold a Token Program instruction within its inner instructions. The `process_inner_instructions(...)` checks if there are Token Program among the inner instructions of every top-level instruction.
```rust
pub fn process_inner_instructions(
output: &mut Output,
instruction_index: u32,
meta: &TransactionStatusMeta,
accounts: &Vec,
trx_hash: &String,
timestamp: i64,
parameters: &TokenParams,
) {
meta.inner_instructions // 1.
.iter()
.filter(|inst| inst.index == instruction_index) // 2.
.for_each(|inst| { // 3.
inst.instructions
.iter() // 4.
.filter(|&inner_instruction| { // 5.
let instruction_program_account = &accounts[inner_instruction.program_id_index as usize];
instruction_program_account == constants::TOKEN_PROGRAM
})
.for_each(|inner_instruction| {
match process_token_instruction( // 6.
trx_hash,
timestamp,
&inner_instruction.data,
&inner_instruction.accounts,
meta,
accounts,
output,
parameters
) {
Err(err) => {
panic!("trx_hash {} filtering inner instructions: {}", trx_hash, err)
}
Ok(()) => {}
}
})
});
}
```
1. The `TransactionStatusMeta` object holds an array with the inner instructions of the transaction (an array of `InnerTransactions` objects).
2. Because the inner instructions are at the transaction level (contained within the `TransactionStatusMeta`), you keep only the inner transactions belonging to the current top-level instruction. For this purpose, an index variable (`instruction_index`) is passed as a parameter. Essentially, you are matching every top-level instruction with its corresponding `InnerTransactions` object. The filtering should only keep **one** `InnerTransactions` object, as every top-level instruction should only have one `InnerTransactions` object.
3. The `InnerTransactions` object is a just wrapper for the array of inner transactions. For every `InnerTransactions` object filtered (which should be **only one**), you actually extract the inner instructions.
4. You iterate over the array of inner instructions.
5. You only keep Token Program inner instructions.
6. You process every Token Program inner instruction found further by calling the `process_token_instruction(...)`.
Once you have identified all the Token Program instructions, the `process_token_instruction(...)` function extracts transfer or mint data from these instructions. To easily extract data from a Token Program instruction, the Substreams relies on the `substreams-solana-program-instructions` Rust crate, which provides useful helper functions.
```rust
fn process_token_instruction(
trx_hash: &String,
timestamp: i64,
data: &Vec,
inst_accounts: &Vec,
meta: &TransactionStatusMeta,
accounts: &Vec,
output: &mut Output,
parameters: &TokenParams,
) -> Result<(),Error> {
match TokenInstruction::unpack(&data) { // 1.
Err(err) => { // 2.
substreams::log::info!("unpacking token instruction {:?}", err);
return Err(anyhow::anyhow!("unpacking token instruction: {}", err));
}
Ok(instruction) => match instruction { // 3.
TokenInstruction::Transfer { amount: amt } => { // 4.
let authority = &accounts[inst_accounts[2] as usize];
if is_token_transfer(&meta.pre_token_balances, &authority, ¶meters.token_contract) { // 5.
let source = &accounts[inst_accounts[0] as usize];
let destination = &accounts[inst_accounts[1] as usize];
output.transfers.push(Transfer { // 6.
trx_hash: trx_hash.to_owned(),
timestamp,
from: source.to_owned(),
to: destination.to_owned(),
amount: amount_to_decimals(amt as f64, parameters.token_decimals as f64),
});
return Ok(());
}
}
// ...code omitted...
}
}
}
```
1. The `TokenInstruction::unpack(...)` function decodes the instruction and allows you to identify the action executed: `Transfer`, `TransferChecked`, `Mint`, or `Burn`.
2. Controlled way to handle errors from the `unpack(...)` function.
3. If there are no errors, then you can handle every action (`Transfer`, `Mint`...) differently.
4. Handle the `Transfer` instruction.
5. Call the `is_token_transfer(...)` to verify if the transfer is from the specified in the parameters of the Substreams module. Note that you pass `parameters.token_contract` as a parameter to the function.
6. Create a new `Transfer` object from the Protobuf with the corresponding data. This object is added to the `Output` object and will be emitted as the output of the Substreams.
The code for other actions (`Mint`, `Burn`...) is analogous to the code of the `Transfer` instructions.
# NFT Trades
The NFT Trades project, developed by TopLedger, extracts NFT trades from different Solana exchanges, such as Tensor, MagicEden, or HadeSwap.
### About TopLedger
[TopLedger](https://topledger.xyz/) is SQL-based data discovery and analytics platform focused on Solana. By using Substreams, TopLedger has been able to extract data from the main Solana dapps, thus providing rich analytics products.
TopLedger is an active contributor to the Substreams community and has developed several useful ready-to-use Substreams.
### Before You Begin
The NFT Trades Substreams requires medium to advanced Substreams knowledge. If this is the first time you are using Substreams, make sure you:
* Read the [Develop Substreams](/tutorials/intro-to-tutorials) section, which will teach you the basics of the developing Substreams modules.
* Complete the [Explore Solana](/how-to-guides/develop-your-own-substreams/solana/explore-solana) tutorial, which will assist you in understanding the main pieces of the Solana Substreams.
Clone the [TopLedger Solana Programs](https://github.com/Topledger/solana-programs) project and navigate to the `nft-trades` folder, which contains the code of the Substreams.
### Inspect the Project
The Substreams contains only one module, `map_block`:
```rust
modules:
- name: map_block
kind: map
inputs:
- source: sf.solana.type.v1.Block
output:
type: proto:sf.solana.nft.trades.v1.Output
```
The `Output` object provided as the Substreams output is defined in the `proto/output.proto` file:
```protobuf
message Output {
repeated TradeData data = 1;
}
message TradeData {
required string block_date = 1;
required int64 block_time = 2;
required uint64 block_slot = 3;
required string tx_id = 4;
required uint64 txn_fee = 5;
required string mint = 6;
required double amount = 7;
required string category = 8;
required string buyer = 9;
required string seller = 10;
required double taker_fee = 11;
required double maker_fee = 12;
required double amm_fee = 13;
required double royalty = 14;
required string instruction_type = 15;
required uint32 instruction_index = 16;
required string outer_program = 17;
required string inner_program = 18;
required uint32 inner_instruxtion_index = 19;
required bool is_inner_instruction = 20;
required string platform = 21;
required string currency_mint = 22;
}
```
The `TradeData` object contains information about every trade executed, such as `amount`, `buyer` or `seller`.
Every exchange handles data differently, so there is no unique way to decode the data. Therefore, it is necessary to create a custom *decode* function for every exchange supported by the Substreams. If you navigate to the `nft-trades/dapps` folder, you will find a file for every exchange.
NFT Trades Dapps Files
Every `dapp` file has a `parse_trade_instruction` function, which is responsible for decoding the data.
### Run the Substreams
You can use the Substreams CLI to run the project:
```bash
substreams gui -e mainnet.sol.streamingfast.io:443 \
substreams.yaml map_block -s 200321235 -t +1
```
Substreams Execution in the GUI
### Inspect the Code
The `src/lib.rs` file contains the declaration of the Substreams module, `map_block`. This function is executed for every block of the blockchain.
```rust
fn map_block(block: Block) -> Result {
let slot = block.slot;
let parent_slot = block.parent_slot;
let timestamp = block.block_time.timestamp;
let mut data: Vec = vec![]; // 1.
for trx in block.transactions_owned() { // 2.
let accounts = trx.resolved_accounts_as_strings(); // 3.
let meta = trx.meta;
let pre_balances = meta.pre_balances;
let post_balances = meta.post_balances;
let post_token_balances = meta.post_token_balances;
let msg = trx.transaction.message;
for (idx, inst) in msg.instructions.into_iter().enumerate() { // 4.
let program = &accounts[inst.program_id_index as usize]; // 5.
let trade_data = get_trade_data( // 6.
program,
inst.data,
&inst.accounts,
&accounts,
&pre_balances,
&post_balances,
&meta.log_messages,
&post_token_balances,
);
// ...code omitted...
}
}
}
```
1. Create an *array* of `TradeData` objects, where the trading data will be stored.
2. Iterate over the transactions of the block.
3. Get accounts of the transaction (the `resolved_accounts()` method contains also accounts stored in the [Address Lookup Tables](https://docs.solana.com/developing/lookup-tables)).
4. Iterate over the instructions of the transaction.
5. Get the program account. The `instruction.program_id_index` indicates the position of the program account in the accounts array.
6. Pass the data to the `get_trade_data` function. This function verifies if the instruction executed is from one of the NFT exchanges that you want to track. The return type is `Option`. The `Option` will only be populated if the instruction belongs to one of the NFT exchanges.
Because every exchange handles the NFT data differently, there must be a custom decoding function for every exchange. The `dapps` folder of the project contains a file for every exchange, declaring the `parse_trade_instruction` function.
```rust
fn get_trade_data(
dapp_address: &String,
instruction_data: Vec,
account_indices: &Vec,
accounts: &Vec,
pre_balances: &Vec,
post_balances: &Vec,
log_messages: &Vec,
post_token_balances: &Vec,
) -> Option {
let input_accounts = prepare_input_accounts(account_indices, accounts); // 1.
let mut result = None;
match dapp_address.as_str() { // 2.
"TSWAPaqyCSx2KABk68Shruf4rp7CxcNi8hAsbdwmHbN" => { // 3. Tensor
result =
dapps::dapp_TSWAPaqyCSx2KABk68Shruf4rp7CxcNi8hAsbdwmHbN::parse_trade_instruction( // 4.
instruction_data,
input_accounts,
log_messages,
);
}
"M2mx93ekt1fmXSVkTrUL9xVFHkmME8HTUi5Cyc5aF7K" => { // 4. MagicEden
result =
dapps::dapp_M2mx93ekt1fmXSVkTrUL9xVFHkmME8HTUi5Cyc5aF7K::parse_trade_instruction(
instruction_data,
input_accounts,
accounts,
log_messages,
post_token_balances,
);
}
"hadeK9DLv9eA7ya5KCTqSvSvRZeJC3JgD5a9Y3CNbvu" => { // 5. HadeSwap
result =
dapps::dapp_hadeK9DLv9eA7ya5KCTqSvSvRZeJC3JgD5a9Y3CNbvu::parse_trade_instruction(
instruction_data,
input_accounts,
accounts,
pre_balances,
post_balances,
)
}
"mmm3XBJg5gk8XJxEKBvdgptZz6SgK4tXvn36sodowMc" => { // 6. MMM
result =
dapps::dapp_mmm3XBJg5gk8XJxEKBvdgptZz6SgK4tXvn36sodowMc::parse_trade_instruction(
instruction_data,
input_accounts,
accounts,
pre_balances,
post_balances,
log_messages,
);
}
"CJsLwbP1iu5DuUikHEJnLfANgKy6stB2uFgvBBHoyxwz" => { // 7. Solanart
result =
dapps::dapp_CJsLwbP1iu5DuUikHEJnLfANgKy6stB2uFgvBBHoyxwz::parse_trade_instruction(
instruction_data,
input_accounts,
accounts,
pre_balances,
post_balances,
log_messages,
);
}
"SNPRohhBurQwrpwAptw1QYtpFdfEKitr4WSJ125cN1g" => { // 8. Sniper Market
result =
dapps::dapp_SNPRohhBurQwrpwAptw1QYtpFdfEKitr4WSJ125cN1g::parse_trade_instruction(
instruction_data,
input_accounts,
accounts,
pre_balances,
post_balances,
log_messages,
);
}
_ => {} // 9.
}
return result;
}
```
1. Based on the `account_indices` parameter passed, create an in-order array of accounts.
2. The `dapp_address` parameter passed is the program account. For every NFT program, you handle the decoding differently.
3. For example, the `TSWAPaqyCSx2KABk68Shruf4rp7CxcNi8hAsbdwmHbN` account represents the Tensor exchange.
4. If the program account does not match any of the NFT exchanges, then an empty `Option` object is returned.
# DEX Trades
The DEX Trades Substreams, developed by TopLedger, extracts trades from different Solana DEXs (decentralized exchanges).
### About TopLedger
[TopLedger](https://topledger.xyz/) is SQL-based data discovery and analytics platform focused on Solana. By using Substreams, TopLedger has been able to extract data from the main Solana dapps, thus providing rich analytics products.
TopLedger is an active contributor to the Substreams community and has developed several useful ready-to-use Substreams.
### Before You Begin
The DEX Trades Substreams requires medium to advanced Substreams knowledge. If this is the first time you are using Substreams, make sure you:
* Read the [Develop Substreams](/tutorials/intro-to-tutorials) section, which will teach you the basics of the developing Substreams modules.
* Complete the [Explore Solana](/how-to-guides/develop-your-own-substreams/solana/explore-solana) tutorial, which will assist you in understanding the main pieces of the Solana Substreams.
Then, clone the [TopLedger Solana Programs](https://github.com/Topledger/solana-programs) project and navigate to the `dex-trades` folder, which contains the code of the Substreams.
### Inspect the Substreams
The Substreams contains only one module, `map_block`:
```yaml
modules:
- name: map_block
kind: map
inputs:
- source: sf.solana.type.v1.Block
output:
type: proto:sf.solana.dex.trades.v1.Output
```
The module receives a raw Solana block as a parameter (`sf.solana.type.v1.Block`) and emits a custom object containing the trades data (`sf.solana.dex.trades.v1.Output`). The output is a Protobuf object defined in the `proto/output.proto` file:
```protobuf
message Output {
repeated TradeData data = 1;
}
message TradeData {
required string block_date = 1;
required int64 block_time = 2;
required uint64 block_slot = 3;
required string tx_id = 4;
required string signer = 5;
required string pool_address = 6;
required string base_mint = 7;
required string quote_mint = 8;
required string base_vault = 9;
required string quote_vault = 10;
required double base_amount = 11;
required double quote_amount = 12;
required bool is_inner_instruction = 13;
required uint32 instruction_index = 14;
required string instruction_type = 15;
required uint32 inner_instruction_index = 16;
required string outer_program = 17;
required string inner_program = 18;
required uint64 txn_fee = 19;
required int64 signer_sol_change = 20;
}
```
The Substreams extracts trades from different DEXs. Because every DEX handles the data differently, it is necessary to create a custom decoding function for every DEX. Every supported DEX has its corresponding function in the `dapps` directory of the project.
### Run the Substreams
You can run the Substreams against the Solana StreamingFast endpoint by using the Substreams CLI:
```bash
substreams gui -e mainnet.sol.streamingfast.io:443 \
substreams.yaml map_block -s 138616676 -t +1
```
Substreams Execution in the GUI
### Inspect the Code
```rust
fn process_block(block: Block) -> Result {
let slot = block.slot;
let parent_slot = block.parent_slot;
let mut data: Vec = vec![]; // 1.
let timestamp = block.block_time.timestamp;
for trx in block.transactions_owned() { // 2.
let accounts = trx.resolved_accounts_as_strings(); // 3.
let meta = trx.meta;
let pre_token_balances = meta.pre_token_balances;
let post_token_balances = meta.post_token_balances;
let msg = trx.transaction.message;
for (idx, inst) in msg.instructions.into_iter().enumerate() { // 4.
let inner_instructions: Vec =
filter_inner_instructions(&meta.inner_instructions, idx as u32); // 5.
let program = &accounts[inst.program_id_index as usize]; // 6.
let trade_data = get_trade_instruction( // 7.
program,
inst.data,
&inst.accounts,
&accounts,
&pre_token_balances,
&post_token_balances,
&"".to_string(),
false,
&inner_instructions,
);
// ...code omitted...
}
}
}
```
1. Initialize an *array* to keep the trades data extracted.
2. Iterate over the transactions.
3. Get accounts of the transaction (the `resolved_accounts()` method contains also accounts stored in the [Address Lookup Tables](https://docs.solana.com/developing/lookup-tables)).
4. Iterate over the instructions within the transaction.
5. Keep only inner instructions belonging to the current top-level instruction. Because the inner instructions are at the transaction level, you must filter filter which inner instruction belong to the current instruction by using the `index` property.
6. Get the program account.
7. Process trade instruction by calling the `get_trade_instruction(...)` function.
Every DEX handles the data differently, so it is necessary to create a decoding function for every exchange supported. The `get_trade_instruction(...)` function receives the data of every top-level instruction and figures out whether the instruction belongs to any of the supported DEXs. If the instruction is part of a known DEX, the corresponding DEX decoding function is called and a `TradeInstruction` object is returned.
```rust
fn get_trade_instruction(
dapp_address: &String,
instruction_data: Vec,
account_indices: &Vec,
accounts: &Vec,
pre_token_balances: &Vec,
post_token_balances: &Vec,
outer_program: &String,
is_inner: bool,
inner_instructions: &Vec,
) -> Option {
let input_accounts = prepare_input_accounts(account_indices, accounts);
let mut result = None;
match dapp_address.as_str() { // 1.
"CLMM9tUoggJu2wagPkkqs9eFG4BWhVBZWkP1qv3Sp7tR" => { // 2.
result =
dapps::dapp_CLMM9tUoggJu2wagPkkqs9eFG4BWhVBZWkP1qv3Sp7tR::parse_trade_instruction( // 3.
instruction_data,
input_accounts,
);
}
"Dooar9JkhdZ7J3LHN3A7YCuoGRUggXhQaG4kijfLGU2j" => { // 4.
result =
dapps::dapp_Dooar9JkhdZ7J3LHN3A7YCuoGRUggXhQaG4kijfLGU2j::parse_trade_instruction(
instruction_data,
input_accounts,
);
}
"Eo7WjKq67rjJQSZxS6z3YkapzY3eMj6Xy8X5EQVn5UaB" => { // 5.
result =
dapps::dapp_Eo7WjKq67rjJQSZxS6z3YkapzY3eMj6Xy8X5EQVn5UaB::parse_trade_instruction(
instruction_data,
input_accounts,
);
}
"PhoeNiXZ8ByJGLkxNfZRnkUfjvmuYqLR89jjFHGqdXY" => {
result =
dapps::dapp_PhoeNiXZ8ByJGLkxNfZRnkUfjvmuYqLR89jjFHGqdXY::parse_trade_instruction(
instruction_data,
input_accounts,
);
}
"SSwapUtytfBdBn1b9NUGG6foMVPtcWgpRU32HToDUZr" => {
result =
dapps::dapp_SSwapUtytfBdBn1b9NUGG6foMVPtcWgpRU32HToDUZr::parse_trade_instruction(
instruction_data,
input_accounts,
);
}
// ...code omitted...
}
}
```
1. Match the program account passed as a parameter.
2. Executed if the program account is `CLMM9tUoggJu2wagPkkqs9eFG4BWhVBZWkP1qv3Sp7tR` (Crema Finance).
3. Call the decoding function of Crema Finance (`parse_trade_instruction(...)`).
4. Executed if the program account is `Dooar9JkhdZ7J3LHN3A7YCuoGRUggXhQaG4kijfLGU2j` (Dooar Exchange).
5. Executed if the program account is `Eo7WjKq67rjJQSZxS6z3YkapzY3eMj6Xy8X5EQVn5UaB` (Meteora).
You can find the decoding functions in the `dapps` folder of the project.
Back in the main function (`process_block`), if the instruction processed matches any of the supported DEXs, then the `trade_data` variable will be populated. A new `TradeData` object is created with the corresponding trading information and is added to the array as part of the output of the Substreams.
```rust
fn process_block(block: Block) -> Result {
// ...code omitted...
let trade_data = get_trade_instruction(
program,
inst.data,
&inst.accounts,
&accounts,
&pre_token_balances,
&post_token_balances,
&"".to_string(),
false,
&inner_instructions,
);
if trade_data.is_some() {
let td = trade_data.unwrap();
data.push(TradeData {
block_date: convert_to_date(timestamp),
tx_id: bs58::encode(&transaction.signatures[0]).into_string(),
block_slot: slot,
block_time: timestamp,
signer: accounts.get(0).unwrap().to_string(),
pool_address: td.amm,
base_mint: get_mint(&td.vault_a, &post_token_balances, &accounts),
quote_mint: get_mint(&td.vault_b, &pre_token_balances, &accounts),
base_amount: get_amt(
&td.vault_a,
&pre_token_balances,
&post_token_balances,
&accounts,
),
quote_amount: get_amt(
&td.vault_b,
&pre_token_balances,
&post_token_balances,
&accounts,
),
base_vault: td.vault_a,
quote_vault: td.vault_b,
is_inner_instruction: false,
instruction_index: idx as u32,
instruction_type: td.name,
inner_instruxtion_index: 0,
outer_program: td.dapp_address,
inner_program: "".to_string(),
txn_fee: meta.fee,
signer_sol_change: get_signer_balance_change(
&pre_balances,
&post_balances,
),
});
}
// ...code omitted...
}
```
Until now, the code logic has taken care of the top-level instructions. However, it is also necessary to verify if any of the inner instructions contain relevant DEX information.
The logic for the inner instruction is analogous to the logic of top-level instructions:
* Iterate over the inner instructions.
* Pass the data to the `get_trade_instruction(...)` function.
* If the `get_trade_instruction(...)` function returns a `TradeInstruction` object, then a new `TradeData` object is created and added to the array.
```rust
fn process_block(block: Block) -> Result {
// ...code omitted...
meta.inner_instructions
.iter()
.filter(|inner_instruction| inner_instruction.index == idx as u32)
.for_each(|inner_instruction| {
inner_instruction.instructions.iter().enumerate().for_each(
|(inner_idx, inner_inst)| {
let inner_program =
&accounts[inner_inst.program_id_index as usize];
let trade_data = get_trade_instruction(
inner_program,
inner_inst.data.clone(),
&inner_inst.accounts,
&accounts,
&pre_token_balances,
&post_token_balances,
&program.to_string(),
true,
&inner_instructions,
);
if trade_data.is_some() {
let td = trade_data.unwrap();
data.push(TradeData {
block_date: convert_to_date(timestamp),
tx_id: bs58::encode(&transaction.signatures[0])
.into_string(),
block_slot: slot,
block_time: timestamp,
signer: accounts.get(0).unwrap().to_string(),
pool_address: td.amm,
base_mint: get_mint(
&td.vault_a,
&pre_token_balances,
&accounts,
),
quote_mint: get_mint(
&td.vault_b,
&pre_token_balances,
&accounts,
),
base_amount: get_amt(
&td.vault_a,
&pre_token_balances,
&post_token_balances,
&accounts,
),
quote_amount: get_amt(
&td.vault_b,
&pre_token_balances,
&post_token_balances,
&accounts,
),
base_vault: td.vault_a,
quote_vault: td.vault_b,
is_inner_instruction: true,
instruction_index: idx as u32,
instruction_type: td.name,
inner_instruxtion_index: inner_idx as u32,
outer_program: program.to_string(),
inner_program: td.dapp_address,
txn_fee: meta.fee,
signer_sol_change: get_signer_balance_change(
&pre_balances,
&post_balances,
),
});
}
},
)
});
}
```
# Local Development
# Anchor
This guide walks you through setting up a complete local Solana development environment for Substreams development using Anchor. You'll deploy a sample Counter program, generate transactions, and stream the events using Substreams.
**Estimated time:** 20-25 minutes
## What You'll Build
* Local Solana validator (test mode)
* Firehose integration for block streaming
* Counter Anchor program with events
* Substreams module to extract program events
* Complete Docker Compose orchestration
## Prerequisites
Ensure you have the following installed:
* **Docker 20.10+** with Docker Compose v2.0+
* **Node.js 18+** with npm or yarn
* **Anchor CLI** (latest) - [Installation guide](https://www.anchor-lang.com/docs/installation)
* **Solana CLI** 2.x+ - [Installation guide](https://docs.solana.com/cli/install-solana-cli-tools)
* **Substreams CLI** v1.7.0+ ([installation guide](/how-to-guides/installing-the-cli))
* **Rust** with `wasm32-unknown-unknown` target
* **curl** for testing endpoints
## Architecture Overview
The local environment consists of:
* **Solana Validator** (port 8899/8900) - Test validator with unlimited SOL
* **Substreams** (port 9000) - Substreams Tier1 service providing gRPC streaming
* **Docker network** - Connecting all services
```
┌─────────────────┐ ┌─────────────────────┐ ┌─────────────────┐
│ Your App │ │ Substreams │ │ Anchor │
│ │ │ │ │ │
│ ┌─────────────┐ │ │ ┌─────────────────┐ │ │ ┌─────────────┐ │
│ │ Substreams │─┼────┼►│ Substreams │ │ │ │ Deploy │ │
│ │ CLI │ │ │ │ (port 9000) │ │ │ │ Programs │ │
│ └─────────────┘ │ │ └─────────────────┘ │ │ └─────────────┘ │
└─────────────────┘ │ │ │ └─────────────────┘
│ ┌─────────────────┐ │
│ │ Solana │ │
│ │ (port 8899) │ │
│ └─────────────────┘ │
└─────────────────────┘
```
## Setup Instructions
### 1. Create Project Directory
```bash
mkdir substreams-solana-local
cd substreams-solana-local
```
### 2. Create Docker Compose Configuration
Create a `docker-compose.yml` file:
```yaml
services:
solana-node:
image: ghcr.io/beeman/solana-test-validator:2.2.15
container_name: solana-dev-validator
entrypoint: ["solana-test-validator"]
command:
- --bind-address=0.0.0.0
- --rpc-port=8899
- --faucet-sol=1000000
ports:
- "8899:8899"
- "8900:8900"
volumes:
- solana_data:/root/.config/solana/test-ledger
networks:
- solana_network
firehose:
image: ghcr.io/streamingfast/firehose-solana:v1.2.0
container_name: firehose-solana
entrypoint: ["/app/firecore"]
command:
- start
- reader-node,merger,relayer,firehose,substreams-tier1,substreams-tier2
- --config-file=
- --log-format=text
- --log-to-file=false
- --data-dir=/data
- --common-first-streamable-block=0
- --advertise-block-id-encoding=base58
- --advertise-chain-name=local-solana
- --reader-node-path=/app/firesol
- --reader-node-arguments=fetch rpc 0 --endpoints=http://solana-node:8899 --state-dir=/data/reader-state
- --firehose-grpc-listen-addr=:8089
- --substreams-tier1-grpc-listen-addr=:9000
- --substreams-tier1-block-type=sf.solana.type.v1.Block
ports:
- "8089:8089"
- "9000:9000"
healthcheck:
test: ["CMD", "grpc_health_probe", "-addr=localhost:9000"]
interval: 10s
timeout: 5s
retries: 5
start_period: 60s
volumes:
- solana_data:/data
networks:
- solana_network
volumes:
solana_data:
networks:
solana_network:
driver: bridge
```
### 3. Start the Environment
```bash
docker compose up -d
```
{% hint style="warning" %}
To restart everything from scratch, use `docker compose down --volumes` to remove all data and start fresh.
{% endhint %}
## Validation Commands
### 1. Check Docker Services
Verify all containers are running and healthy:
```bash
docker compose ps
```
Expected output:
```
NAME IMAGE COMMAND SERVICE CREATED STATUS PORTS
firehose-solana ghcr.io/streamingfast/firehose-solana:v1.1.4 "/app/firecore start…" firehose 2 minutes ago Up 2 minutes (healthy) 0.0.0.0:8089->8089/tcp, 0.0.0.0:9000->9000/tcp
solana-dev-validator ghcr.io/beeman/solana-test-validator:2.2.15 "solana-test-validat…" solana-node 2 minutes ago Up 2 minutes 0.0.0.0:8899-8900->8899-8900/tcp
```
### 2. Test Substreams Connectivity
Test Substreams Tier1 gRPC connectivity:
```bash
substreams run -e localhost:9000 --plaintext common@v0.1.0 -o clock -s -1
```
Expected output:
```
Writing clock information only (no data)
----------- BLOCK #25 (7TjZKsW6nhKtS7UrJvv5eS7u6NzVTpFcM97wc7TBPgPW) age=3.301572s ---------------
...
```
{% hint style="success" %}
If all validation commands succeed, your environment is ready!
{% endhint %}
## Deploy Counter Program with Anchor
### 1. Install Required Tools
Anchor installation requires several prerequisites. Before proceeding, familiarize yourself with the [Anchor installation requirements](https://www.anchor-lang.com/docs/installation).
Install AVM (Anchor Version Manager):
```bash
cargo install --git https://github.com/coral-xyz/anchor avm --force
```
Install and use the latest Anchor version:
```bash
avm install latest
avm use latest
```
Verify installation:
```bash
anchor --version
# Expected output (latest version):
# anchor-cli 0.30.1
solana --version
# Expected output (version 2.x or higher):
# solana-cli 2.3.13 (src:5466f459; feat:2142755730, client:Agave)
```
### 2. Configure Solana CLI
```bash
# Set cluster to local
solana config set --url http://localhost:8899
# Create a keypair (or use existing)
solana-keygen new --outfile ~/.config/solana/id.json
# Airdrop SOL for deployment
solana airdrop 100
```
### 3. Initialize Anchor Project
```bash
anchor init counter --no-git
cd counter
```
### 4. Review Generated Program
The `anchor init counter` command created a basic program for us. The generated program source is located at `programs/counter/src/lib.rs`:
```rust
// File: programs/counter/src/lib.rs
use anchor_lang::prelude::*;
declare_id!("4xFCXVK9eym8DoPwgn9Z6gHqjmWk8B7bZimpDgP7cvNs");
#[program]
pub mod counter {
use super::*;
pub fn initialize(ctx: Context) -> Result<()> {
msg!("Greetings from: {:?}", ctx.program_id);
Ok(())
}
}
#[derive(Accounts)]
pub struct Initialize {}
```
This simple program demonstrates the basic structure of an Anchor program with an `initialize` instruction.
### 5. Build and Deploy Program
Build the program:
```bash
anchor build
```
Deploy to your local cluster (as configured in `Anchor.toml`):
```bash
anchor deploy
```
After deployment, you'll see output similar to this:
```
Deploying cluster: http://127.0.0.1:8899
Upgrade authority: /Users/maoueh/.config/solana/id.json
Deploying program "counter"...
Program path: /private/tmp/substreams-solana-local/counter/target/deploy/counter.so...
Program Id: E2sTdp1aDaKbyh26BQkpYUH338u52fzwaiFbnym8MTk4
Signature: 29aeeGh2c4ogsKwnLjR8KoANY7rBDwonXdJzzDRF8MbQEASQerEMCSZbz591GfmZU8Uff5JHtnehT5w1zSbjq5wP
Waiting for program E2sTdp1aDaKbyh26BQkpYUH338u52fzwaiFbnym8MTk4 to be confirmed...
Program confirmed on-chain
Idl data length: 211 bytes
Step 0/211
Idl account created: G5GLdJwfDagZ7jfWjDZPBDwFNmZWtsY6WA3Lgbw6txmF
Deploy success
```
Export the Program ID from the deployment output:
```bash
export PROGRAM=
```
Replace `` with the address from the `Program Id:` line (e.g., `E2sTdp1aDaKbyh26BQkpYUH338u52fzwaiFbnym8MTk4`) and `` with the address from the `Idl account created:` line (e.g., `G5GLdJwfDagZ7jfWjDZPBDwFNmZWtsY6WA3Lgbw6txmF`).
### 8. Verify Deployment
```bash
# Check program account
solana program show $PROGRAM
# Check if program is deployed
solana account $PROGRAM
```
## Interact with the Counter Program
Now that the program is deployed, let's interact with it to generate some on-chain activity by calling the initialize instruction.
Start the Anchor shell:
```bash
anchor shell
```
In the Anchor shell, run the following commands to call the initialize instruction:
```javascript
const program = anchor.workspace.Counter
await program.methods.initialize().accounts({}).signers([]).rpc()
```
You should see a transaction signature returned, indicating the initialize instruction was successfully called.
Exit the shell:
```javascript
.exit
```
This will create transactions on the local Solana validator that you can later observe when running your Substreams module.
## Create Substreams Module
### 1. Initialize Substreams Project
Navigate back to the parent directory:
```bash
cd ..
```
Initialize the Substreams module:
```bash
substreams init
```
Follow the interactive prompts:
* **Chosen protocol**: `Solana`
* **Chosen generator**: `sol-anchor-beta`
* **Please enter the project name**: `counter`
* **Please select the chain**: `Solana Mainnet` (or choose another chain)
* **How do you want to provide the JSON IDL?**: `JSON in a local file`
* **Input the full path of your JSON IDL in your filesystem**: `./counter/target/idl/counter.json`
* **Do you want to proceed with this IDL?**: `Yes`
* **At what block do you want to start indexing data?**: `0`
* **How would you like to consume the Substreams?**: `To Postgres`
* **In which directory do you want to download the project?**: `./substreams`
{% hint style="info" %}
The IDL file at `./counter/target/idl/counter.json` was automatically generated by Anchor during the build process. We reference this file when initializing the Substreams module.
{% endhint %}
This will generate the basic Substreams module structure with the necessary configuration for tracking your Counter program.
### 2. Build and Test Substreams
```bash
cd substreams
substreams build
substreams run -e localhost:9000 --plaintext counter-v0.1.0.spkg
```
{% hint style="info" %}
Look for the block where you called the initialize instruction as it's the one that will contain some actual data. You can scan a specific range using `-s -t +10` to scan 10 blocks starting from a specific block.
You can also leave the substreams run command running and open another terminal to run `anchor shell` and execute `await anchor.workspace.Counter.methods.initialize().accounts({}).signers([]).rpc()` to call the initialize instruction and see the events appear live in your Substreams output.
{% endhint %}
You should see the Counter program events from your deployment and interactions!
## Cleanup
Congratulations! You've completed the tutorial and have a working local Anchor development environment for Substreams.
When you're done, you can clean up the Docker environment with:
```bash
docker compose down --volumes
```
This will stop all containers and remove all data, allowing you to start fresh if needed.
## Troubleshooting
For common issues with Docker Compose, RPC connectivity, and Substreams, see the [Local Development Troubleshooting](/how-to-guides/develop-your-own-substreams/general/local-development/troubleshooting) guide.
## Next Steps
Now that you have a working local Solana development environment:
1. **Try Other Platforms** - Explore [HardHat](/how-to-guides/develop-your-own-substreams/on-evm/local-development/hardhat) or [Foundry](/how-to-guides/develop-your-own-substreams/on-evm/local-development/foundry) local development
2. **Advanced Substreams** - Learn about [modules](/reference-material/core-concepts/modules), [manifests](/reference-material/manifest-and-components/manifests), and [data transformations](/how-to-guides/develop-your-own-substreams/general/using-rust-proto)
3. **Consuming Substreams** - Connect to [databases](/how-to-guides/sinks/sql) or [streaming platforms](/how-to-guides/sinks/stream)
4. **Production Deployment** - Move to [production endpoints](/reference-material/chain-support/chains-and-endpoints)
## Additional Resources
* [Anchor Documentation](https://www.anchor-lang.com/docs)
* [Substreams Solana Reference](https://github.com/streamingfast/substreams-solana)
* [Substreams CLI Reference](/reference-material/command-line-interface)
* [Creating Protobuf Schemas](/how-to-guides/develop-your-own-substreams/general/creating-protobuf-schemas)
# From Yellowstone to Substreams
## Introduction
Both Substreams and Yellowstone allow you consume Solana data in a fast and reliable way through gRPC connection. However, there are some unique capabilities of Substreams that make it shine:
### Improvements over Yellowstone
* Substreams is a programmable stack, while Yellowstone is only a gRPC interface with the Geyser plugin.
* Substreams gives you access to the full Solana `Block`, and you can use Rust to filter and output the schema that you need.
* Substreams runs on top of a parallelization engine, which speeds up the indexing times.
* Substreams allows you to filter data and create your own output schema (you choose what data model gets ouputted from the Substreams).
* Substreams is a composable stack, which means that you can reuse other Substreams modules built by other people (take a look at the [Substreams Registry](https://substreams.dev)).
* Substreams has native integrations with many *sinks* (people where you want to consume the data), such as Postgres or Subgraphs. You can also use libraries like Go, Rust or JavaScript.
### Pricing
Yellowstone is usually charged based on credit units. A single response from Yellowstone will cost X credit units.
In Substreams, you are charged depending on the amount of data (TBs) that you consume from the endpoint. Therefore, you will be charge exactly for what the Solana blockchain is producing.
To reduce the cost even more, we have caches of data that will help you consume less data (blocks without voting transactions cache or transactions filtered by program ID cache, for example).
## Examples
In Substreams, you can build your own Substreams modules to filter and output the data that you need.
By default, you can consume the most basic information in Solana (full Blocks, transactions and account changes). In the following examples, you will see different example in differents formats: using the Substreams CLI, consuming the data in JavaScript, or consuming the data in Go.
### Installation
{% tabs %}
{% tab title="CLI" %}
1. Install the Substreams CLI in your computer.
2. Verify that the installation is correct by running:
```bash
substreams --version
```
{% endtab %}
{% tab title="JavaScript (Node)" %}
1. Clone the [Yellostone Examples GitHub repository](https://github.com/enoldev/yellowstone-to-substreams-examples).
2. In the repository, move to the `javascript` folder.
3. Run `npm install` to install all the necessary dependencies.
{% endtab %}
{% endtabs %}
### Get the Full Solana Block
The [https://spkg.io/streamingfast/solana\_common-v0.3.3.spkg](https://substreams.dev/packages/solana-common/v0.3.3) Substreams package contains several modules to get the most basic Solana data, such as blocks or transactions. The `blocks_without_votes` module retrieves Solana blocks, removing all the *voting* transactions.
{% tabs %}
{% tab title="CLI" %}
Run the following command in your terminal:
```bash
substreams gui https://spkg.io/streamingfast/solana_common-v0.3.3.spkg blocks_without_votes --start-block=320100000
```
* `substreams gui` allows you to run a Substreams module and debug its content (move across the content, search, etc).
* `https://spkg.io/streamingfast/solana_common-v0.3.3.spkg` is the Substreams package that extracts the most basic information on Solana.
* `blocks_without_votes` is the module that extracts full Blocks (removing voting transactions).
* `--start-block=320100000` specifies where you want to start consuming data.
You will enter the Substreams GUI view, which will allow you to start the stream and move across blocks.
**IMPORTANT:**
* To start the streaming of data, press the `Enter` key.
* To move across tabs (`Request`, `Output`...), press the `Tab` key.
* To move across blocks, press the `o` and `p` keys.
* To exist the GUI screen, press the `q` key.
{% endtab %}
{% tab title="JavaScript (Node)" %}
```bash
node index.js https://mainnet.sol.streamingfast.io:443 https://spkg.io/streamingfast/solana_common-v0.3.3.spkg blocks_without_votes 320876956
```
* `https://mainnet.sol.streamingfast.io:443 https://spkg.io/streamingfast/`: StreamingFast endpoint for Solana mainnet.
* `https://spkg.io/streamingfast/solana_common-v0.3.3.spkg`: URL of the `solana-common` package in the Substreams Registry.
* `blocks_without_votes`: name of the module you want to execute. This will retrieve Blocks without voting transactions.
* `320876956`: start block of the application.
{% endtab %}
{% endtabs %}
### Get Transactions Filtered by Program ID (Pump.Fun)
The `solana-common` package also allows you to filter transaction by program ID and/or accounts by using the `transactions_by_programid_without_votes` module.
{% tabs %}
{% tab title="CLI" %}
Run the following command in your terminal:
```bash
substreams gui https://spkg.io/streamingfast/solana_common-v0.3.3.spkg transactions_by_programid_without_votes -p "transactions_by_programid_without_votes=program:6EF8rrecthR5Dkzon8Nwu78hRvfCKubJ14M5uBEwF6P" --start-block=320100000
```
* `https://spkg.io/streamingfast/solana_common-v0.3.3.spkg` package contains several modules that extract the most basic Solana data.
* `transactions_by_programid_without_votes` is the module that extracts filtered transactions.
* `-p "transactions_by_programid_without_votes=program:6EF8rrecthR5Dkzon8Nwu78hRvfCKubJ14M5uBEwF6P"` specifies the parameters passed to the Substreams module. The `transactions_by_programid_without_votes` expects one or several filters to be provided. In this example, you filter transactions that contain data from the `6EF8rrecthR5Dkzon8Nwu78hRvfCKubJ14M5uBEwF6P` program (Pump Fun program).
{% endtab %}
{% tab title="JavaScript (Node)" %}
```bash
node index.js https://mainnet.sol.streamingfast.io:443 https://spkg.io/streamingfast/solana_common-v0.3.3.spkg blocks_without_votes 320876956
```
* `https://mainnet.sol.streamingfast.io:443 https://spkg.io/streamingfast/`: StreamingFast endpoint for Solana mainnet.
* `https://spkg.io/streamingfast/solana_common-v0.3.3.spkg`: URL of the `solana-common` package in the Substreams Registry.
* `blocks_without_votes`: name of the module you want to execute. This will retrieve Blocks without voting transactions.
* `320876956`: start block of the application.
{% endtab %}
{% endtabs %}
### Get Account Changes History
You can also get the history of an account (with some limitations) using the [solana-accounts-foundational module](https://substreams.dev/packages/solana-accounts-foundational/v0.1.1).
{% tabs %}
{% tab title="CLI" %}
Run the following command in your terminal:
```bash
substreams gui https://spkg.io/streamingfast/solana_accounts_foundational-v0.1.1.spkg filtered_accounts -p "filtered_accounts=account:5Q544fKrFoe6tsEbD7S8EmxGTJYAKtTVhAW5Q5pge4j1" --start-block=327404502
```
* `https://spkg.io/streamingfast/solana_accounts_foundational-v0.1.1.spkg` package contains module to filter Solana account changes data.
* `filtered_accounts` is the module that extracts filtered accounts.
* `-p "filtered_accounts=account:5Q544fKrFoe6tsEbD7S8EmxGTJYAKtTVhAW5Q5pge4j1"` specifies the parameters passed to the Substreams module. The `filtered_accounts` module expects one or several filters to be provided. In this example, you filter to only get data from the `5Q544fKrFoe6tsEbD7S8EmxGTJYAKtTVhAW5Q5pge4j1` account.
{% endtab %}
{% tab title="JavaScript (Node)" %}
```bash
node index.js https://accounts.mainnet.sol.streamingfast.io:443 https://spkg.io/streamingfast/solana_accounts_foundational-v0.1.1.spkg filtered_accounts 327404502 filtered_accounts=account:5Q544fKrFoe6tsEbD7S8EmxGTJYAKtTVhAW5Q5pge4j1
```
* `https://accounts.mainnet.sol.streamingfast.io:443`: StreamingFast endpoint for Account Changes
* `https://spkg.io/streamingfast/solana_accounts_foundational-v0.1.1.spkg`: URL of the `solana-accounts-foundational` module in the Substreams Registry.
* `filtered_accounts`: module of the package that allows you to filter one or several accounts.
* `327404502`: start block of the stream.
* `filtered_accounts=account:5Q544fKrFoe6tsEbD7S8EmxGTJYAKtTVhAW5Q5pge4j1`: parameters passed to the module. In this example, you filter on the `5Q544fKrFoe6tsEbD7S8EmxGTJYAKtTVhAW5Q5pge4j1` account.
{% endtab %}
{% endtabs %}
# Versioned Transactions (v0 and v1)
Solana introduced [versioned transactions](https://solana.com/docs/core/transactions/versioned-transactions) to let a transaction reference more accounts than fit in a legacy transaction, using [Address Lookup Tables (ALTs)](https://solana.com/news/transaction-v1-and-the-alt-trade-off). Legacy transactions and v0 transactions have been available for a while; v1 transactions are the newest addition.
This page explains what changed on the Substreams side, and who needs to make a change to keep consuming this data.
## What changed
Solana blocks contain transactions tagged with a `version` and a `versioned` flag. A v1 transaction also carries a `transaction_config` field:
```json
{
"transaction_config": {
"compute_unit_limit": 1350000,
"heap_size": 256000,
"loaded_accounts_data_size_limit": 2162688
},
"version": 1,
"versioned": true
}
```
A v0 transaction looks the same, minus `transaction_config`:
```json
{
"version": 0,
"versioned": true
}
```
The Solana Firehose protobuf models expose these fields on `sf.solana.type.v1.Message`. See the [protobuf reference](https://buf.build/streamingfast/firehose-solana/docs/main%3Asf.solana.type.v1#sf.solana.type.v1.Message) for the full schema.
## Do you need to change anything?
For most Substreams users, no. Existing Substreams packages keep working against v0 and v1 transactions without any change, the same way they already work against legacy transactions.
You only need to update your Substreams package if you want to read the new fields, for example to:
* Inspect `transaction_config` (compute unit limit, heap size, loaded accounts data size limit).
* Branch your logic on whether a transaction is legacy, v0, or v1.
To do that:
1. In your Rust module's `Cargo.toml`, bump the `substreams-solana` dependency to [v0.15.1](https://crates.io/crates/substreams-solana) or later, which decodes these fields.
2. If your manifest vendors the `sf.solana.type.v1` proto files directly instead of relying on the crate, replace them with the versions linked in [Protobuf reference](https://buf.build/streamingfast/firehose-solana/docs/main%3Asf.solana.type.v1#sf.solana.type.v1.Message) and rerun `substreams protogen` (see [Protobuf](/how-to-guides/develop-your-own-substreams/general/creating-protobuf-schemas)) to regenerate the Rust bindings.
3. Rebuild your module and redeploy the resulting `.spkg`.
{% hint style="info" %}
If you consume Solana data through the Solana RPC API instead of Substreams, check the `maxSupportedTransactionVersion` parameter on your `getTransaction`, `getBlock`, or `blockSubscribe` requests. If it's unset or too low, the RPC call fails outright on a v1 transaction (for example, `getTransaction` returns error `-32015`, and one v1 transaction in a block fails the entire `getBlock` response) rather than silently omitting it.
{% endhint %}
## Related resources
* [Solana: Versioned Transactions](https://solana.com/docs/core/transactions/versioned-transactions)
* [Solana: Transaction v1 and the ALT trade-off](https://solana.com/news/transaction-v1-and-the-alt-trade-off)
* [`sf.solana.type.v1.Message` protobuf reference](https://buf.build/streamingfast/firehose-solana/docs/main%3Asf.solana.type.v1#sf.solana.type.v1.Message)
# on Cosmos
# Injective
# Simple Substreams Example
The [BlockStats Substreams](https://github.com/streamingfast/substreams-cosmos-block-stats) is a very basic Substreams, extracting data from the Injective blockchain.
{% hint style="success" %}
**Tip**: This tutorial teaches you how to build a Substreams from scratch.
Remember that you can auto-generate your Substreams module by using the [code-generation tools](/tutorials/intro-to-tutorials/injective).
{% endhint %}
### Before You Begin
* [Install the Substreams CLI](/how-to-guides/installing-the-cli)
* [Get an authentication token](/how-to-guides/installing-the-cli/authentication)
* [Learn about the basics of the Substreams](/reference-material/manifest-and-components/manifests)
Clone the [BlockStats Substreams GitHub repository](https://github.com/streamingfast/substreams-cosmos-block-stats) and open it in an IDE of your choice (for example, VSCode).
### Inspect the Project
Every Substreams project contains three main pieces:
* **The Protobuf definitions:** the outputs of your Substreams, which you define through Protobuf schemas.
* **The source code:** the Rust functions that extract the actual data from the blockchain.
* **The Substreams manifest:** the `substreams.yaml` file contains the configuration of your Substreams.
1. The `proto` folder contains the Protobuf definitions for the output of your Substreams. In this example, only a `BlockStats` Protobuf is defined as the output of the Substreams.
2. The `src` folder contains the source code of the Substreams transformations. Specifically, the `lib.rs` contains the Rust functions.
3. The `substreams.yml` is the Substreams manifest, which defines relevant information, such as the inputs/outputs of every module or the Protobuf files.
Take a look at the `substreams.yaml` file:
```yaml
network: cosmos # 1.
imports:
cosmos: https://github.com/streamingfast/substreams-cosmos/releases/download/v0.1.1/cosmos-v0.1.0.spkg # 2.
protobuf:
files:
- cosmos/v1/stats/stats.proto # 3.
importPaths:
- ./proto
binaries:
default:
type: wasm/rust-v1
file: target/wasm32-unknown-unknown/release/cosmos_block_stats.wasm
modules:
- name: block_to_stats # 4.
kind: map
initialBlock: 64987400
inputs:
- source: sf.cosmos.type.v2.Block # 5.
output:
type: proto:cosmos.v1.BlockStats # 6.
```
1. The `network` field specifies which network is the Substreams going to be executed on.
2. Import the [Cosmos Block Protobuf](https://github.com/streamingfast/firehose-cosmos/blob/develop/cosmos/pb/sf/cosmos/type/v2/block.pb.go#L75), which gives you access to the blockchain data.
3. Import the user-defined Protobuf schemas (i.e. the outputs of your Substreams).
4. Define a module. `block_to_stats`, which will be mapped to the `block_to_stats` Rust function in the source code.
5. Define the inputs of the module. In this case, the `Block` Cosmos Protobuf.
6. Define the outputs of the module. In this case, the `BlockStats` Protobuf, which you imported in `#3`.
### Run the Substreams
1. Build the Rust code:
```bash
substreams build
```
1. Run the Substreams using the `substreams run` command of the CLI:
```bash
substreams run substreams.yaml block_to_stats \
-e mainnet.injective.streamingfast.io:443 \
--start-block=64987400 --stop-block=+1000
```
* `substreams.yaml` is the Substreams manifest with the configurations.
* `block_to_stats` is the name of the module that you want to run (in this Substreams, there only one module).
* `-e mainnet.injective.streamingfast.io:443` is the StreamingFast (Substreams provider) endpoint that will read execute the Substreams and stream back the data.
* `--start-block=64987400 --stop-block=+1000` defines the start and stop block (start at block `64987400` and finish at block `64987500`, 100 blocks later).
1. The `substreams run` displays the data extract at every block linearly, so it might be difficult to properly read the data if your execution happens through thousands of blocks. **The `substreams gui` allows you to jump between blocks and search content.**
```bash
substreams gui substreams.yaml block_to_stats \
-e mainnet.injective.streamingfast.io:443 \
--start-block=64987400 --stop-block=+1000
```
Review the [GUI Reference](/reference-material/command-line-interface#gui) to get more information on how to use this utility.
### Inspect the Code
The `lib.rs` file contains the only module defined in this Substreams, `block_to_stats`.
```rust
mod pb;
use crate::pb::sf::cosmos::r#type::v2::Block; // 1.
use crate::pb::cosmos::v1::BlockStats; // 2.
use substreams::errors::Error;
#[substreams::handlers::map]
pub fn block_to_stats(block: Block) -> Result { // 3.
let mut stats = BlockStats::default(); // 4.
let header = &block.header;
let last_block_id = &header.last_block_id;
stats.block_height = block.height as u64; // 5,
stats.block_hash = hex::encode(block.hash);
stats.block_time = block.time;
stats.block_proposer = hex::encode(&header.proposer_address);
stats.parent_hash = hex::encode(&last_block_id.hash);
stats.parent_height = block.height - 1i64;
stats.num_txs = block.txs.len() as u64; // 6.
Ok(stats) // 7.
}
```
1. Import the Cosmos `Block` Protobuf object, which is passed as a parameter.
2. Import the `BlockStats` Protobuf object, which is the return type of the function. This Rust object is automatically generated from the Protobuf defined in the `proto` folder.
3. Declaration of the Rust function. **Input:** Injective block. **Output:** `BlockStats` object, which is defined by the user and is consumable from the outside world.
4. Creation of the `BlockStats` object.
5. Add data from the `Block` Injective object to user-defined `BlockStats` object. In this case, the `height` of the block.
6. Add more data. In this case, the number of transactions contained in the block.
# Foundational Modules
The [Injective Foundational Substreams](https://github.com/streamingfast/substreams-foundational-modules/tree/develop/injective-common) contains Substreams modules, which retrieve fundamental data on the Injective blockchain.
You can use the Injective Foundational Modules as the input for your Substreams.
The Foundational Modules are the base of the code generation tools provided by the Substreams CLI.
### Before You Begin
* [Install the Substreams CLI](/how-to-guides/installing-the-cli)
* [Get an authentication token](/how-to-guides/installing-the-cli/authentication)
* [Learn about the basics of the Substreams](/reference-material/manifest-and-components/manifests)
* [Go through the Block Stats Substreams tutorial](/how-to-guides/develop-your-own-substreams/on-cosmos/injective/block-stats)
Clone the [Foundational Substreams GitHub repository](https://github.com/streamingfast/substreams-foundational-modules), move to the `injective-common` folder, and open it in an IDE of your choice (for example, VSCode).
### The Foundational Modules
First, take a look at the Substreams manifest (`substreams.yaml`), which contains the declaration of all the Injective Foundational Modules.
```yaml
...output omitted...
modules:
- name: all_transactions # 1.
kind: map
initialBlock: 0
inputs:
- source: sf.cosmos.type.v2.Block
output:
type: proto:sf.substreams.cosmos.v1.TransactionList
- name: all_events # 2.
kind: map
initialBlock: 0
inputs:
- source: sf.cosmos.type.v2.Block
output:
type: proto:sf.substreams.cosmos.v1.EventList
- name: index_events # 3.
kind: blockIndex
inputs:
- map: all_events
output:
type: proto:sf.substreams.index.v1.Keys
doc: |
`index_events` sets the keys corresponding to every event 'type'
ex: `coin_received`, `message` or `injective.peggy.v1.EventDepositClaim`
- name: filtered_events # 4.
kind: map
blockFilter:
module: index_events
query:
params: true
inputs:
- params: string
- map: all_events
output:
type: proto:sf.substreams.cosmos.v1.EventList
doc: |
`filtered_events` reads from `all_events` and applies a filter on the event types, only outputting the events that match the filter.
The only operator that you should need to use this filter is the logical or `||`, because each event can only match one type.
```
1. The `all_transactions` module provides access to all the transactions of the Injective blockchain. It receives a raw Injective block object as input (`sf.cosmos.type.v2.Block`), and outputs a list of transactions object (`sf.substreams.cosmos.v1.TransactionList`).
2. The `all_events` module provides access to all the events in the Injective blockchain. It receives a raw Injective block as input (`sf.cosmos.type.v2.Block`), and outputs a list of events object (`sf.substreams.cosmos.v1.EventList`).
3. The `index_events` module uses the `all_events` module to create a cache where events are sorted based on their `type` field. This cache helps in the performance of the module. You can read more about *index modules* in the [corresponding documentation](/reference-material/manifest-and-components/indexes).
4. The `filtered_events` allows you to use the `index_events` module (i.e. using the cache of events), to filter only the event types you are interested in. The string parameter passed as input is used to specify which events you want to consume.
### Use The Foundational Modules
All this module are pre-programmed and ready to use in your Substreams.
#### Use in a Substreams
Using another module as input for your Substreams is very easy: you just have to declare it in the manifest.
For example, the following declaration of the `my_test_module` module receives the `all_transactions` module as input:
```yaml
- name: my_test_module
kind: map
inputs:
- map: all_transactions
output:
type: proto:sf.test.MyOutputObject
```
Then, in the Rust handler declaration, you can simply receive the output object of the `all_transactions` module:
```rust
#[substreams::handlers::map]
fn my_test_module(transactions: TransactionList) -> Result {
// Your code here
}
```
# Composing Substreams
Substreams are designed with composability at their core, allowing developers to build upon existing modules and data sources to create powerful, interconnected data processing pipelines. This composability enables you to leverage pre-built components, reducing development time and ensuring consistency across your blockchain data infrastructure.
## Understanding Substreams Composability
Composability in Substreams means that you can:
* **Reuse existing modules**: Build upon proven, tested modules rather than starting from scratch
* **Chain data transformations**: Connect outputs from one module as inputs to another
* **Share common functionality**: Leverage shared libraries and utilities across different projects
* **Create modular architectures**: Design systems where components can be easily swapped or upgraded
## How Composition Can Be Leveraged
Substreams composition allows you to:
1. **Accelerate Development**: Start with foundational modules that handle common blockchain data patterns
2. **Ensure Data Consistency**: Use standardized modules that provide consistent data formats across different use cases
3. **Reduce Maintenance Overhead**: Benefit from community-maintained modules that are regularly updated and optimized
4. **Focus on Business Logic**: Spend more time on your unique value proposition rather than basic data extraction
## Three Main Sources for Composition
Substreams offers three primary sources for composable modules and data:
### 1. Foundational Modules
Pre-built modules that provide common blockchain data transformations and extractions. These modules handle standard patterns like event filtering, transaction parsing, and data normalization across different blockchain networks.
**Key Benefits:**
* Pre-transformed blockchain models
* Standardized data formats
* Optimized performance
* Multi-chain support
### 2. Foundational Stores
Stateful, pre-made datasets that provide historical blockchain data in an easily queryable format. These stores are particularly useful when you need to access large amounts of historical data or when store size limits become a constraint.
**Key Benefits:**
* Pre-computed historical data
* Efficient data access patterns
* Alternative when store limits are reached
* Reduced computational overhead
### 3. Published Packages
A growing ecosystem of community-contributed Substreams packages available through the Substreams registry. These packages cover a wide range of use cases, from DeFi protocols to NFT marketplaces.
**Key Benefits:**
* Community-driven development
* Diverse use case coverage
* Easy discovery and integration
* Collaborative improvement
## Getting Started with Composition
To begin composing Substreams:
1. **Identify Your Data Needs**: Determine what blockchain data you need to process
2. **Explore Available Components**: Check foundational modules, stores, and published packages
3. **Design Your Pipeline**: Plan how to connect different components to achieve your goals
4. **Implement and Test**: Build your composed Substreams and validate the results
5. **Contribute Back**: Consider publishing your own modules for the community
The following sections will dive deeper into each composition source, providing practical examples and implementation guidance.
# Foundational Modules
Foundational modules are pre-built Substreams modules that provide common blockchain data transformations and extractions. These modules serve as building blocks for more complex data processing pipelines, offering standardized ways to access and transform blockchain data across different networks.
## What Are Foundational Modules?
Foundational modules are production-ready Substreams modules that handle common blockchain data patterns. They provide:
* **Pre-transformed blockchain models**: Clean, structured data formats that are ready for consumption
* **Standardized interfaces**: Consistent APIs across different blockchain networks
* **Optimized performance**: Efficient data processing with minimal computational overhead
* **Multi-chain support**: Modules available for Ethereum, Solana, Cosmos, and other major blockchains
## Key Chains and Capabilities
### Ethereum
The Ethereum foundational modules provide comprehensive access to:
* **Events and Logs**: Filtered and decoded smart contract events
* **Transactions**: Detailed transaction data with receipt information
* **Blocks**: Complete block data with metadata
### Solana
Solana foundational modules offer:
* **Instructions**: Parsed and filtered program instructions
* **Account Changes**: Track state changes across Solana accounts
* **Token Programs**: SPL token transfers and account modifications
### Cosmos Ecosystem
Cosmos-compatible chains include modules for:
* **Messages and Events**: Cosmos SDK message parsing and event extraction
* **Validator Operations**: Staking, delegation, and governance activities
* **IBC Transfers**: Inter-blockchain communication tracking
* **Chain-Specific Features**: Modules tailored for Injective, Osmosis, and other Cosmos chains
### TRON
TRON foundational modules offer:
* **TRC-20 tokens**: Token transfer and balance tracking
* **Smart contract events**: Decoded contract event data
### NEAR
NEAR foundational modules include:
* **Function calls**: Parsed function call data and results
* **Account state modifications**: Track account state changes
### Antelope
Antelope foundational modules support:
* **EOS and other Antelope-based chains**: Transaction and action data
* **Resource management**: CPU, NET, and RAM usage tracking
## Using Foundational Modules
### Installation and Setup
To use foundational modules in your Substreams project:
1. **Add the dependency** to your `substreams.yaml`:
```yaml
imports:
ethereum_common: ethereum_common@v0.3.3
```
2. **Reference the module** in your manifest with query expressions:
```yaml
modules:
- name: my_custom_module
kind: map
inputs:
- source: sf.ethereum.type.v2.Block
- map: ethereum_common:filtered_logs
output:
type: proto:my.custom.Output
params:
ethereum_common:filtered_logs: "address=0xa0b86a33e6776e1b1c4b0b8b8b8b8b8b8b8b8b8b" # lowercase is important! this is an exact string match
```
### Example: Using Ethereum Log Filtering
```rust
use substreams::prelude::*;
use substreams_ethereum::pb::eth::v2 as eth;
#[substreams::handlers::map]
fn process_logs(logs: eth::Logs) -> Result {
let mut output = MyOutput::default();
for log in logs.logs {
// Check for ERC-20 Transfer topic
if log.topics.len() > 0 && log.topics[0] == "0xddf252ad1be2c89b69c2b068fc378daa952ba7f163c4a11628f55a4df523b3ef" {
// Handle ERC-20 transfers
output.transfers.push(process_transfer_log(&log));
}
}
Ok(output)
}
```
## Available Module Categories
### Data Extraction Modules
* **Block processors**: Extract and normalize block-level data
* **Transaction filters**: Filter transactions by various criteria
* **Event decoders**: Decode smart contract events with ABI information
* **Log processors**: Parse and structure blockchain logs
## Performance Optimization with Indexes and Query Expressions
One of the biggest performance factors when consuming Substreams is the use of indexes and query expressions. These features allow the Substreams engine to skip processing entire blocks when they don't contain relevant data, dramatically improving performance.
### Using Query Expressions
Query expressions filter data at the source, ensuring that only relevant blocks are processed:
```yaml
modules:
- name: filtered_transfers
kind: map
inputs:
- map: ethereum_common:filtered_logs
output:
type: proto:my.transfers.Transfers
params:
ethereum_common:filtered_logs: "address=0xa0b86a33e6776e1b1c4b0b8b8b8b8b8b8b8b8b8b&topic0=0xddf252ad1be2c89b69c2b068fc378daa952ba7f163c4a11628f55a4df523b3ef"
```
### Performance Benefits
* **Block Skipping**: When no logs match the query expression, the entire block is skipped
* **Reduced Processing**: Only relevant data flows through the pipeline
* **Lower Resource Usage**: Significant reduction in CPU and memory consumption
* **Faster Sync Times**: Historical data processing completes much faster
A well-designed query expression can improve performance by orders of magnitude, especially when processing historical data where many blocks may not contain relevant events.
## Benefits of Using Foundational Modules
### Development Speed
* **Rapid prototyping**: Get started quickly with proven modules
* **Reduced boilerplate**: Focus on business logic rather than data extraction
* **Tested components**: Use modules that have been battle-tested in production
### Data Quality
* **Consistent formats**: Standardized data structures across different use cases
* **Validated logic**: Modules are thoroughly tested and validated
* **Community feedback**: Benefit from community contributions and bug reports
### Maintenance
* **Automatic updates**: Receive improvements and bug fixes automatically
* **Security patches**: Stay protected with timely security updates
* **Performance optimizations**: Benefit from ongoing performance improvements
## Contributing to Foundational Modules
The foundational modules are open source and welcome community contributions:
1. **Report Issues**: Submit bug reports and feature requests
2. **Contribute Code**: Add new modules or improve existing ones
3. **Documentation**: Help improve module documentation and examples
4. **Testing**: Contribute test cases and validation scenarios
Visit the [Substreams Foundational Modules repository](https://github.com/streamingfast/substreams-foundational-modules) to get started with contributions.
## Next Steps
* Explore the [Foundational Stores](/how-to-guides/composing-substreams/foundational-stores) for pre-computed historical data
* Discover [Published Packages](/how-to-guides/composing-substreams/published-packages) from the community
* Learn how to [publish your own modules](/how-to-guides/publish-package) for others to use
# Foundational Stores
Chain-specific foundational stores
Foundational stores are available for various blockchain ecosystems, each optimized for specific data patterns and use cases. To have StreamingFast run a store populated by a package like these, see the [Substreams Feed Hosted Store Guide](/how-to-guides/hosted-services/hosted-store-substreams-feed). To push your own data over gRPC instead, see the [Remote Feed Hosted Store Guide](/how-to-guides/hosted-services/hosted-store-remote-feed). For the full hosted offering (sinks and stores), see [Hosted Services](/how-to-guides/hosted-services).
### Ethereum
* [ERC20 Token Metadata](/how-to-guides/composing-substreams/foundational-stores/erc20-token-metadata) - Store and serve ERC20 token metadata and balances
### Solana
* [SPL Initialized Account](/how-to-guides/composing-substreams/foundational-stores/spl-initialized-account) - Track SPL token account initialization and ownership
## Additional Resources
* [Foundational Stores Reference](/reference-material/core-concepts/foundational-store-reference) - Detailed architecture and technical specifications
# Ethereum - ERC20 Token Metadata
ERC20 Token Metadata Foundational Store
A specialized foundational store for tracking ERC20 token metadata on Ethereum and EVM-compatible chains. This store focuses specifically on metadata extraction and serving, working in conjunction with separate modules for transfer tracking.
## Overview
The ERC20 Token Metadata foundational store provides efficient storage and retrieval of:
* **Token Metadata**: Name, symbol, and decimals for ERC20 tokens
* **Metadata Events**: Initialization and change events for token metadata
* **RPC-Enhanced Data**: Complete metadata fetched via batch RPC calls for accuracy
> **Note**: This foundational store is currently deployed on **Ethereum Mainnet only** for testing purposes. For deployments on other networks, please reach out on [Discord](https://discord.com/invite/jZwqxJAvRs).
## Consuming Foundational Store Data
```rust
use substreams::store::FoundationalStore;
use substreams_ethereum::pb::eth::v2::Block;
#[substreams::handlers::map]
fn map_tokens_transfers(
block: Block,
foundational_store: FoundationalStore,
) -> Result {
// ... extract transfers from block
// Collect token addresses that need metadata lookup
let keys_to_query: Vec> = token_addresses_to_resolve.into_iter().collect();
let resp = foundational_store.get_all(&keys_to_query);
// Process responses and decode metadata
let mut metadata_map = std::collections::HashMap::new();
for entry in resp.entries {
if entry.response.code != ResponseCode::Found {
continue;
}
if let Ok(token_metadata) = TokenMetadata::decode_from_slice(&entry.response.value.value) {
metadata_map.insert(entry.key, token_metadata);
}
}
// Use metadata_map to enrich transfers with name, symbol, decimals
Ok(TokenTransfers { transfers })
}
```
**Consumer Module** (uses foundational store as input):
```yaml
specVersion: v0.1.0
package:
name: erc20_token_transfers_with_metadata
version: v0.2.0
modules:
- name: map_tokens_transfers
kind: map
inputs:
- source: sf.ethereum.type.v2.Block
- foundational-store: erc20-token-metadata@v0.1.0
output:
type: proto:erc20.metadata.v1.TokenTransfers
network: mainnet
```
> **Complete Example**: See the [map\_tokens\_transfers](https://github.com/streamingfast/substreams-erc20-token-transfers-with-metadata/blob/main/src/lib.rs#L23) implementation.
## Data Model
### Key Structure
The store uses token contract addresses as keys:
```
{token_contract_address} (bytes)
```
### Value Schema
**TokenMetadata** (type.googleapis.com/sf.substreams.ethereum.erc20.v1.TokenMetadata)
```protobuf
syntax = "proto3";
package sf.substreams.ethereum.erc20.v1;
message TokenMetadata {
bytes address = 1;
string name = 2;
string symbol = 3;
int32 decimals = 4;
}
```
## Implementation details
The foundational store processes ERC20 metadata through two mechanisms:
1. **MetadataInitialize Events**: Direct extraction from event data
2. **MetadataChanges Events**: Batch RPC calls to ensure accuracy
Each token address becomes a key, with the corresponding `TokenMetadata` protobuf message as the value.
## Implementation
### Creating Foundational Store Entries
```rust
use buffa::{Message, MessageField};
use buffa_types::google::protobuf::Any;
#[substreams::handlers::map]
fn metadata_to_foundational_store(
events: erc20_metadata::Events,
) -> Result {
let mut entries = Vec::new();
// For MetadataInitialize events, create TokenMetadata directly
for init in events.metadata_initialize {
let token_metadata = TokenMetadata {
address: init.address.clone(),
name: init.name.unwrap_or_default(),
symbol: init.symbol.unwrap_or_default(),
decimals: init.decimals,
};
let buf = token_metadata.encode_to_vec();
entries.push(Entry {
key: MessageField::some(Key {
bytes: init.address
}),
value: MessageField::some(Any {
type_url: "type.googleapis.com/sf.substreams.ethereum.erc20.v1.TokenMetadata".to_string(),
value: buf.into(),
..Default::default()
}),
});
}
// For MetadataChanges events, fetch full metadata via RPC
// ... batch RPC calls to get name, symbol, decimals
// ... create entries with updated metadata
Ok(SinkEntries {
entries,
if_not_exist: false,
})
}
```
### Substreams Manifest Configuration
**Producer Module** (creates foundational store entries):
```yaml
specVersion: v0.1.0
package:
name: erc20-token-metadata
version: v0.2.0
network: mainnet
imports:
erc20_metadata: https://github.com/pinax-network/substreams-evm-tokens/releases/download/erc20-metadata-v0.2.1/evm-erc20-metadata-v0.2.1.spkg
modules:
- name: metadata_to_foundational_store
kind: map
inputs:
- map: erc20_metadata:map_events
output:
type: proto:sf.substreams.foundational_store.model.v2.SinkEntries
```
> **Complete Example**: See the [metadata\_to\_foundational\_store](https://github.com/streamingfast/substreams-foundational-modules/blob/develop/ethereum/erc20-token-metadata/src/lib.rs#L11) implementation.
## Related Resources
* [Hosting a Foundational Store](https://github.com/streamingfast/substreams/tree/develop/docs/references/README.md)
* [Consuming a Foundational Store](/tutorials/consuming-foundational-store)
* [Foundational Stores Architecture](/reference-material/core-concepts/foundational-store-reference)
# Solana - SPL Initialized Account
SPL Initialized Account Foundational Store
A specialized foundational store for tracking SPL token account initializations on Solana. This store provides the essential account-to-owner mappings needed to resolve SPL token transfers, since transfer instructions only contain account addresses without owner information.
## Overview
The SPL Initialized Account foundational store provides efficient storage and retrieval of:
* **Account-Owner Mappings**: Relationship between SPL token accounts and their owners
* **Mint Associations**: Which token mint each account is associated with
* **Initialization Events**: Tracking of newly created SPL token accounts
SPL token transfer instructions on Solana only contain account addresses, not the wallet owners. To determine who actually sent/received tokens, you need to resolve account ownership. This foundational store provides that critical mapping.
## Consuming Account Owner Data
```rust
use substreams::store::FoundationalStore;
use std::collections::HashSet;
#[substreams::handlers::map]
fn map_spl_instructions(
params: String,
transactions: SolanaTransactions,
foundational_store: FoundationalStore,
) -> Result {
// ... extract transfer instructions from transactions
// Collect account addresses that need owner lookup
let mut accounts_to_lookup = HashSet::::new();
accounts_to_lookup.insert(transfer.from.clone());
accounts_to_lookup.insert(transfer.to.clone());
// Convert addresses to bytes and query store
let account_bytes: Vec> = accounts_to_lookup
.iter()
.filter_map(|addr| bs58::decode(addr).into_vec().ok())
.collect();
let resp = foundational_store.get(&account_bytes);
// Process responses and decode owner data
for queried_entry in resp.entries {
if queried_entry.code != ResponseCode::Found as i32 {
continue;
}
let Some(entry) = &queried_entry.entry else { continue; };
let Some(value) = &entry.value else { continue; };
let Ok(account_owner) = AccountOwner::decode(value.value.as_slice()) else {
continue;
};
// Use owner data to enrich transfers
let owner_b58 = bs58::encode(&account_owner.owner).into_string();
transfer.from_owner = owner_b58;
}
Ok(SplInstructions { instructions })
}
```
**Consumer Module** (uses foundational store as input):
```yaml
specVersion: v0.1.0
package:
name: solana-spl-token
version: v0.2.0
imports:
solana_common: solana-common@v0.3.0
spl_initialized_account: spl-initialized-account@v0.2.0
modules:
- name: map_spl_instructions
kind: map
initialBlock: 158569587
inputs:
- params: string
- map: solana_common:transactions_by_programid_and_account_without_votes
- foundational-store: spl-initialized-account@v0.1.2
output:
type: proto:sf.solana.spl.v1.type.SplInstructions
params:
map_spl_instructions: "spl_token_address=EPjFWdd5AufqSSqeM2qN1xzybapC8G4wEGGkZwyTDt1v|spl_token_decimal=6"
solana_common:transactions_by_programid_and_account_without_votes: "program:TokenkegQfeZyiNwAJbNbGKPFXCWuBvf9Ss623VQ5DA || program:TokenzQdBNbLqP5VEhdkAS6EPFLC1PHnBqCXEpPxuEb"
```
> **Complete Example**: See the [map\_spl\_instructions](https://github.com/streamingfast/substreams-spl-token/blob/main/src/lib.rs#L49) implementation.
## Data Model
### Key Structure
The store uses SPL token account addresses as keys:
```
{spl_token_account_address} (bytes)
```
### Value Schema
**AccountOwner** (type.googleapis.com/sf.substreams.solana.spl.v1.AccountOwner)
```protobuf
syntax = "proto3";
package sf.substreams.solana.spl.v1;
// Represents ownership relationship between a mint and its owner
// Both in raw bytes
message AccountOwner {
bytes mint_address = 2;
bytes owner = 3;
}
```
## Implementation details
The foundational store processes SPL token account initialization instructions to extract account-to-owner mappings. It tracks three instruction types:
1. **`InitializeAccount`** - Basic account initialization with separate owner account
2. **`InitializeAccount2`** - Account initialization with embedded owner in instruction data
3. **`InitializeAccount3`** - Newer variant of account initialization with embedded owner
Each SPL token account address becomes a key, with the corresponding `AccountOwner` protobuf message containing mint and owner information as the value.
## Implementation
### Creating Foundational Store Entries
```rust
use buffa::{Message, MessageField};
use buffa_types::google::protobuf::Any;
#[substreams::handlers::map]
pub fn map_spl_initialized_account(
transactions: SolanaTransactions
) -> Result {
let mut entries: Vec = vec![];
for transaction in transactions.transactions {
if !transaction.is_successful() {
continue;
}
for instruction in transaction.walk_instructions() {
// Decode SPL token instruction
let token_instruction = TokenInstruction::unpack(instruction.data().as_slice())?;
match token_instruction {
TokenInstruction::InitializeAccount {} => {
let account_owner = AccountOwner {
mint_address: instruction.accounts()[1].clone(),
owner: instruction.accounts()[2].clone(),
};
let buf = account_owner.encode_to_vec();
entries.push(Entry {
key: MessageField::some(Key {
bytes: instruction.accounts()[0].to_vec(),
}),
value: MessageField::some(Any {
type_url: "type.googleapis.com/sf.substreams.solana.spl.v1.AccountOwner".to_string(),
value: buf.into(),
..Default::default()
}),
});
}
TokenInstruction::InitializeAccount2 { owner } |
TokenInstruction::InitializeAccount3 { owner } => {
// Handle embedded owner in instruction data
// ... similar to InitializeAccount
}
_ => {}
}
}
}
Ok(SinkEntries {
entries,
if_not_exist: true,
})
}
```
### Substreams Manifest Configuration
**Producer Module** (creates foundational store entries):
```yaml
specVersion: v0.1.0
package:
name: spl-initialized-account
version: v0.2.1
network: solana
imports:
solana_common: solana-common@v0.3.0
modules:
- name: map_spl_initialized_account
kind: map
initialBlock: 31310775
inputs:
- params: string
- map: solana_common:transactions_by_programid_without_votes
output:
type: proto:sf.substreams.foundational_store.model.v2.SinkEntries
params:
solana_common:transactions_by_programid_without_votes: "program:TokenkegQfeZyiNwAJbNbGKPFXCWuBvf9Ss623VQ5DA || program:TokenzQdBNbLqP5VEhdkAS6EPFLC1PHnBqCXEpPxuEb"
```
> **Complete Example**: See the [map\_spl\_initialized\_account](https://github.com/streamingfast/substreams-foundational-modules/blob/develop/solana/spl-initialized-account/src/lib.rs#L23) implementation.
## Related Resources
* [Hosting a Foundational Store](/reference-material/operators/hosting-foundational-stores)
* [Consuming a Foundational Store](/tutorials/consuming-foundational-store)
* [Foundational Stores Architecture](/reference-material/core-concepts/foundational-store-reference)
# Published Packages
The Substreams ecosystem includes a growing registry of community-contributed packages available at [substreams.dev](https://substreams.dev). These packages provide ready-to-use Substreams modules for a wide variety of blockchain use cases, from DeFi protocols to NFT marketplaces, gaming applications, and infrastructure tools.
## What Are Published Packages?
Published packages are complete Substreams modules that have been packaged and shared by the community through the Substreams registry. These packages offer:
* **Community-driven development**: Built and maintained by developers worldwide
* **Diverse use case coverage**: Spanning DeFi, NFTs, gaming, infrastructure, and more
* **Easy discovery and integration**: Searchable registry with detailed package information
* **Collaborative improvement**: Open-source packages that benefit from community contributions
## Discovering Packages
### Using the Substreams Registry
The [substreams.dev](https://substreams.dev) website provides several ways to discover packages:
#### Search and Browse
* **Search by name**: Find packages by searching for specific protocols or use cases
* **Browse by category**: Explore packages organized by blockchain, protocol type, or functionality
* **Filter by chain**: Focus on packages for specific blockchains like Ethereum, Solana, or Cosmos
#### Sorting Options
* **Most downloaded**: Find the most popular and trusted packages
* **Recently uploaded**: Discover the latest additions to the registry
* **By contributor**: Explore packages from specific developers or organizations
#### Package Information
Each package listing includes:
* **Version history**: Track package updates and changes
* **Download statistics**: See how widely used a package is
* **Documentation**: Access usage instructions and examples
* **Source code links**: Review the implementation on GitHub
### Top Contributors
The registry features a contributor leaderboard showcasing the most active package publishers:
* **StreamingFast**: Core foundational modules and infrastructure packages
* **TopLedger**: Comprehensive DeFi and trading analytics modules
* **Pinax Network**: Multi-chain data extraction and transformation tools
* **Community developers**: Individual contributors building specialized modules
## Popular Package Categories
### DeFi Protocols
* **Uniswap V2/V3**: Swap events, liquidity changes, and pool analytics
* **Aave**: Lending, borrowing, and liquidation events
* **Compound**: Interest rate changes and market activities
* **Curve**: Pool swaps and liquidity provider actions
* **Balancer**: Weighted pool operations and governance
### NFT and Gaming
* **OpenSea**: NFT marketplace transactions and metadata
* **Axie Infinity**: Game-specific events and token transfers
* **The Sandbox**: Virtual land transactions and asset movements
* **CryptoPunks**: Historical sales and ownership changes
* **Art Blocks**: Generative art minting and trading
### Infrastructure and Tools
* **ENS (Ethereum Name Service)**: Domain registrations and resolutions
* **Chainlink**: Oracle price feeds and data updates
* **The Graph**: Subgraph deployment and indexing events
* **Gnosis Safe**: Multi-signature wallet operations
* **1inch**: DEX aggregator trades and routing
### Cross-Chain and Layer 2
* **Polygon**: Layer 2 transaction processing and bridge events
* **Arbitrum**: Rollup transactions and state updates
* **Optimism**: Optimistic rollup data and fraud proofs
* **IBC**: Inter-blockchain communication for Cosmos ecosystem
## Using Published Packages
### Installation
To use a published package in your Substreams project:
1. **Find the package** on [substreams.dev](https://substreams.dev)
2. **Copy the package URL** from the package details page
3. **Add it to your imports** in `substreams.yaml`:
```yaml
imports:
uniswap_v3: uniswap_v3@v0.2.10
```
### Integration Example
```yaml
modules:
- name: my_dex_analytics
kind: map
inputs:
- map: uniswap_v3:pool_swaps
- map: uniswap_v3:pool_created
output:
type: proto:my.analytics.DexData
```
### Rust Implementation
```rust
use substreams::prelude::*;
use uniswap_v3::pb::uniswap::v1::{Events, Pool};
#[substreams::handlers::map]
fn process_dex_data(
events: Events,
) -> Result {
let mut data = DexData::default();
// Process Uniswap events
for event in events.pool_events {
match event.r#type.as_str() {
"SWAP" => {
data.volume_usd += event.amount_usd;
data.transaction_count += 1;
}
"POOL_CREATED" => {
data.new_pools.push(event.pool_address.clone());
}
_ => {}
}
}
Ok(data)
}
```
## Package Quality and Trust
### Evaluation Criteria
When selecting packages, consider:
* **Download statistics**: Higher download counts often indicate reliability
* **Contributor reputation**: Packages from established contributors tend to be well-maintained
* **Documentation quality**: Well-documented packages are easier to integrate and debug
* **Update frequency**: Regularly updated packages are more likely to be compatible with latest changes
* **Community feedback**: Check GitHub issues and discussions for user experiences
### Best Practices
* **Version pinning**: Use specific versions in your imports to ensure reproducibility
* **Testing**: Thoroughly test packages in your development environment
* **Monitoring**: Keep track of package updates and security advisories
* **Fallback plans**: Have alternatives ready in case a package becomes unavailable
## Contributing Packages
### Publishing Your Own Package
To contribute to the ecosystem:
1. **Develop your Substreams**: Create a useful, well-tested module
2. **Package it**: Use the Substreams CLI to create a `.spkg` file
3. **Publish to registry**: Upload your package to the Substreams registry
4. **Document thoroughly**: Provide clear usage instructions and examples
5. **Maintain actively**: Respond to issues and keep the package updated
### Package Guidelines
* **Clear naming**: Use descriptive names that indicate the package's purpose
* **Comprehensive documentation**: Include usage examples and API documentation
* **Semantic versioning**: Follow semantic versioning for releases
* **License clarity**: Specify the license for your package
* **Community engagement**: Respond to user feedback and contributions
## Advanced Usage Patterns
### Package Composition
Combine multiple packages for complex analytics:
```yaml
imports:
ethereum_common: ethereum_common@v0.3.3
uniswap_v3: uniswap_v3@v0.2.10
aave_v2: aave-v2@v0.1.0
modules:
- name: defi_analytics
kind: map
inputs:
- map: ethereum_common:filtered_logs
- map: uniswap_v3:pool_events
- map: aave_v2:lending_events
output:
type: proto:defi.Analytics
```
## Next Steps
* Explore the [Substreams Registry](https://substreams.dev) to discover available packages
* Learn about [Foundational Modules](/how-to-guides/composing-substreams/foundational-modules) for core blockchain data processing
* Check out [Foundational Stores](/how-to-guides/composing-substreams/foundational-stores) for pre-computed historical data
* Read the guide on [Publishing a Substreams Package](/how-to-guides/publish-package) to contribute your own modules
# Hosted Services
Overview of the Substreams services StreamingFast hosts for you
**Hosted Services** are managed Substreams deployments that StreamingFast runs for you on [The Graph Market](https://thegraph.market). You configure a service in the portal; StreamingFast provisions the runners, keeps them online, and scales them. You do not operate the sink process or the store server yourself.
{% hint style="warning" %}
Hosted Services are currently in beta. To stay up to date, join our [Discord](https://discord.gg/jZwqxJAvRs) and follow the **#announcements** channel.
{% endhint %}
There are two kinds of hosted service. Both are created from **Hosted Services** in The Graph Market — [create a new service](https://thegraph.market/sinks/new) or [list the ones you already have](https://thegraph.market/sinks).
| Kind | What StreamingFast runs | What you bring |
| ---------------- | ------------------------------------------------------------------------------ | --------------------------------------------------------------------------------------------------- |
| **Hosted Sink** | A Substreams sink that writes package output into a SQL database | A Postgres or ClickHouse database you already operate |
| **Hosted Store** | A block-aware key/value store, queryable over gRPC and from Substreams modules | Values to store — either you push them, or a Substreams package reads the chain and fills the store |
## Hosted Sink
A hosted sink continuously reads a Substreams package and writes the output into **your** Postgres or ClickHouse database. StreamingFast hosts the sink runner only. It does not create, host, or manage the database.
Use a hosted sink when you want SQL in a database you already run (or a managed one such as Supabase, Neon, or ClickHouse Cloud) without operating `substreams-sink-sql` yourself.
Supported engines are **PostgreSQL** and **ClickHouse**, in Database Changes Mode or Relational Mappings Mode. See [Substreams:SQL](/how-to-guides/sinks/sql).
The database must be reachable from StreamingFast's network (a public hostname, not `localhost` or a private Docker name).
**How-to:** [Hosted Sinks](/how-to-guides/hosted-services/hosted-sinks) — create a sink, connect Postgres or ClickHouse, then [manage it](/how-to-guides/hosted-services/hosted-sinks/manage-your-sink). Walkthroughs: [Supabase](/how-to-guides/hosted-services/hosted-sinks/supabase), [Neon](/how-to-guides/hosted-services/hosted-sinks/neon), [ClickHouse Cloud](/how-to-guides/hosted-services/hosted-sinks/clickhouse-cloud).
If you would rather run the sink on your own infrastructure, see [Consuming Substreams](/how-to-guides/sinks).
## Hosted Store
A hosted store is a managed, block-aware key/value map. Keys are raw bytes; values are protobuf messages. Reads target a block height, so a Substreams module that queries the store stays in sync with the stream.
The create wizard offers two feed modes:
| Mode | Who writes | When to use | How-to |
| ------------------- | ------------------------------------------------------------------------------------------ | ---------------------------------------------------------------------------------------------------------------------------------------------- | ------------------------------------------------------------------------------------------------- |
| **Remote feed** | You (or another service) push and delete entries over gRPC with `Feed.Set` / `Feed.Delete` | Off-chain or application-owned data that Substreams should look up | [Remote Feed Hosted Store Guide](/how-to-guides/hosted-services/hosted-store-remote-feed) |
| **Substreams feed** | A Substreams package reads the chain and populates the store | On-chain lookups other modules should reuse (the same idea as a [foundational store](/how-to-guides/composing-substreams/foundational-stores)) | [Substreams Feed Hosted Store Guide](/how-to-guides/hosted-services/hosted-store-substreams-feed) |
Once deployed, the store is reachable at `.hs.streamingfast.io:443` and is referenced from a Substreams manifest as `foundational-store: @`.
To run a foundational store yourself instead of using a StreamingFast-managed one, see [Hosting a Foundational Store](/reference-material/operators/hosting-foundational-stores).
## Create a service
1. Sign in to [The Graph Market](https://thegraph.market) with an organization.
2. Open [**Hosted Services**](https://thegraph.market/sinks) and click **New Service**.
3. Choose **Sink** or **Hosted Store**, then follow the wizard.
An API key is created automatically for each deployment. Manage keys at .
## Related resources
* [Hosted Sinks](/how-to-guides/hosted-services/hosted-sinks) — managed SQL sinks
* [Remote Feed Hosted Store Guide](/how-to-guides/hosted-services/hosted-store-remote-feed) — write, delete, and read a hosted store over gRPC
* [Substreams Feed Hosted Store Guide](/how-to-guides/hosted-services/hosted-store-substreams-feed) — populate a hosted store from a Substreams package
* [Foundational Stores](/how-to-guides/composing-substreams/foundational-stores) — chain-specific stores populated by a Substreams package
* [Consuming Substreams](/how-to-guides/sinks) — self-managed sinks (SQL, stream, PubSub, files, and community sinks)
# Hosted Sinks
{% hint style="warning" %}
**Hosted Sinks is currently in beta.** The service is under active development and changes may occur. To stay up to date with the latest information, join our [Discord Server](https://discord.gg/jZwqxJAvRs) and follow the **#announcements** channel.
{% endhint %}
**Hosted Sinks** is a managed service on [The Graph Market](https://thegraph.market) that runs your Substreams sink for you. Instead of provisioning servers, managing deployments, or operating sink processes yourself, you configure a sink in the portal and StreamingFast handles the infrastructure. Hosted Sinks is one of the two [Hosted Services](/how-to-guides/hosted-services) offerings; the other is a Hosted Store ([remote feed](/how-to-guides/hosted-services/hosted-store-remote-feed) or [Substreams feed](/how-to-guides/hosted-services/hosted-store-substreams-feed)).
A hosted sink continuously reads data from your Substreams package and writes it to your own Postgres or ClickHouse database.
{% hint style="info" %}
Hosted Sinks is available to organizations on The Graph Market. Your database must be publicly reachable from StreamingFast's infrastructure.
{% endhint %}
## Requirements
Before creating a sink, you need:
* An account on [The Graph Market](https://thegraph.market) with an active organization.
* A Substreams package (`.spkg`) that outputs data in Database Changes Mode (a `db_out` module) or Relational Mappings Mode. See [Substreams:SQL](/how-to-guides/sinks/sql) for how to build one.
* A running Postgres (default port `5432`) or ClickHouse (default port `9000`) database that is network-accessible from the internet.
* Your database schema already applied, or a schema that your Substreams package will create automatically. See [Sink Config](/reference-material/sql/sql/sink-config).
## Creating a Sink
Navigate to [**Sinks**](https://thegraph.market/sinks) in the sidebar and click **New Sink**.

### 1. Basics
Enter a **Sink name**. This is a human-readable label for the deployment (e.g., `mainnet-erc20-transfers`).
### 2. Substreams Package
Choose how you want to supply the `.spkg`:
| Source | When to use |
| ------------------ | ----------------------------------------------------------------------------------------------------------------------------- |
| **URL** | The package is hosted at a public URL (e.g., GitHub releases, IPFS). |
| **Substreams.dev** | The package is published on [the Substreams Registry](https://substreams.dev). Enter its ID (e.g., `ethereum_common@v0.3.3`). |
### 3. Output
Choose **Postgres** or **ClickHouse** and fill in the connection details. See walkthroughs provided below for different SQL services you can rely on, with guided setups to run your Hosted Sink.
**Postgres fields:**
| Field | Description |
| -------- | ----------------------------------------------------------- |
| Host | Database hostname or IP address. |
| Port | Default `5432`. |
| Database | Database name. |
| Schema | Target schema. Default `public`. |
| User | Database user with write access. |
| Password | Password for the user. |
| SSL Mode | One of `disable`, `require`, `verify-ca`, or `verify-full`. |
**ClickHouse fields:**
| Field | Description |
| ------------ | ---------------------------------- |
| Host | ClickHouse hostname or IP address. |
| Port | Default `9000` (native protocol). |
| Database | Database name. Default `default`. |
| User | ClickHouse user. |
| Password | Password for the user. |
| Secure (TLS) | Enable TLS for the connection. |
{% hint style="warning" %}
Credentials are stored securely and used only to connect the sink process to your database. Use a dedicated database user with write access restricted to the target schema.
{% endhint %}
### 4. GraphQL API
Optionally select **Expose a GraphQL API over this database** to deploy a read-only [GraphQL layer](/how-to-guides/hosted-services/hosted-sinks/graphql-layer) alongside the sink. You can also add or remove it later from the sink's **Edit** dialog.
### 5. Execution
| Field | Description |
| ------------- | ------------------------------------------------------------------------------------------- |
| Start block | Block number to start processing from. Use `0` to start from genesis. |
| Stop block | Block number to stop at. Use `0` to follow the chain head indefinitely. |
| Output module | The name of the Substreams module whose output is written to the database (e.g., `db_out`). |
**Advanced options** (optional):
| Field | Description |
| ---------- | ------------------------------------------------------- |
| Filters | A filter expression passed to the Substreams execution. |
| Parameters | Module parameters passed at execution time. |
### 6. Deploy
Click **Deploy sink**. The sink enters the `Deploying` state while the infrastructure provisions. Once pods are ready it transitions to `Deployed` and begins indexing.
## Provider Walkthroughs
Step-by-step guides for connecting a Hosted Sink to common managed database providers:
**Postgres**
* [Supabase](/how-to-guides/hosted-services/hosted-sinks/supabase) — managed Postgres with a generous free tier.
* [Neon](/how-to-guides/hosted-services/hosted-sinks/neon) — serverless Postgres that scales to zero.
**ClickHouse**
* [ClickHouse Cloud](/how-to-guides/hosted-services/hosted-sinks/clickhouse-cloud) — fully managed ClickHouse from the creators of ClickHouse.
## Next Steps
* [Monitor and manage your sink](/how-to-guides/hosted-services/hosted-sinks/manage-your-sink) — check status, view logs, edit config, stop, or delete.
* [Serve your data over GraphQL](/how-to-guides/hosted-services/hosted-sinks/graphql-layer) — add a read-only GraphQL API and console over the sink's database.
# Managing Your Sink
Once a sink is deployed, the sink detail page gives you visibility into its runtime state and controls to manage its lifecycle.
## Sink Detail Page
Navigate to **Sinks** and click a sink to open its detail page. The page has three main sections: the runtime summary, the pod list, and the deployment event log.

### Runtime Summary
The summary strip shows four metrics at a glance:
| Metric | Meaning |
| ----------------- | ------------------------------------------------------------------------------- |
| **Replicas** | `ready / total` — how many replicas are ready vs. requested. |
| **Instances** | Number of active pods. |
| **Restarts** | Total container restarts across all pods. Elevated counts indicate instability. |
| **Output module** | The Substreams module being executed, and the package source URL. |
### Pod List
Each pod row shows:
* **Status badge** — the execution state of that pod (see [Execution States](#execution-states) below).
* **Current block / Head block** — how far behind the chain head the pod is.
* **Head block time drift** — seconds behind real-time. Near zero means the pod is live.
* **Restart count** — restarts for this individual pod.
* **Logs** — click to view the latest container logs for that pod.
### Deployment Events
The events log records lifecycle changes to the deployment (e.g., created, config updated, stopped). Use it to audit changes or troubleshoot issues.
## Status Reference
### Deployment Status
The status badge in the page header reflects the overall deployment state.
| Status | Meaning |
| ------------- | ----------------------------------------------------------- |
| **Deploying** | Pods are starting up; replicas requested but not yet ready. |
| **Deployed** | All requested replicas are running. |
| **Stopped** | Replica count is set to 0; no pods are running. |
| **Error** | The deployment encountered a hard failure. |
| **Deleting** | The deployment is being torn down. |
### Execution States
Pod-level execution states show how far along the indexing process a running pod is.
| State | Meaning |
| --------------- | ------------------------------------------------------------------ |
| **Initiating** | Pod started; sink process is initializing. |
| **Catching up** | Actively processing historical blocks behind the chain head. |
| **Live** | Caught up to the chain head; processing new blocks as they arrive. |
| **Failing** | Pod encountered an error during processing. Check logs. |
{% hint style="info" %}
A `CrashLoopBackOff` banner appears at the top of the detail page when one or more pods are repeatedly crashing. This usually indicates a database connection issue or a schema mismatch. Check pod logs for the root cause.
{% endhint %}
## Editing a Sink
Click **Edit** in the top-right toolbar to open the edit modal. Changes take effect after you save — the sink process restarts automatically.
### Deployment tab
Update the Substreams package source (URL or Substreams.dev ID) and the execution config (start block, stop block, output module, filters, parameters).
### Output tab
Update the database connection details (host, port, credentials, SSL mode). Useful when your database credentials rotate or you migrate to a new host.
### GraphQL tab
Add or remove the read-only [GraphQL layer](/how-to-guides/hosted-services/hosted-sinks/graphql-layer) that serves the sink's database. Adding it requires the database password again, since stored credentials are never handed back out. Removing it stops the API and its console; the sink and database are untouched.
## Stopping and Starting a Sink
Click **Stop** to scale the deployment to zero replicas. The sink process halts and no data is written to your database, but the deployment config is preserved.
To restart, click **Start**. The sink resumes from its last cursor position — no data is re-indexed from scratch unless you explicitly reset (see below).
## Resetting a Sink
To re-index from a specific block, edit the sink and set a new **Start block** with the **Restart from scratch** option enabled. This clears the cursor and drops or truncates the existing data depending on the reset mode chosen.
{% hint style="warning" %}
Resetting is irreversible. All previously indexed data in the target schema will be removed.
{% endhint %}
## Deleting a Sink
Click **Delete** in the toolbar and confirm. The deployment and all associated pods are permanently removed. If the sink has a [GraphQL layer](/how-to-guides/hosted-services/hosted-sinks/graphql-layer), it is removed first. Your database and its data are not affected — only the hosted sink process is deleted.
# GraphQL Layer
{% hint style="warning" %}
**Hosted Sinks is currently in beta.** The service is under active development and changes may occur. To stay up to date with the latest information, join our [Discord Server](https://discord.gg/jZwqxJAvRs) and follow the **#announcements** channel.
{% endhint %}
The **GraphQL layer** serves a read-only GraphQL API over the database your [Hosted Sink](/how-to-guides/hosted-services/hosted-sinks) writes into. It is powered by [Hasura](https://hasura.io/) and lets you query your indexed data over HTTP, and browse it in a console, without standing up an API server of your own.
The layer is a separate deployment that reads the same database as the sink. You can add it or remove it at any time without touching the pipeline: the sink keeps writing exactly as before. In the portal it appears alongside the sink it serves, labeled **GraphQL**.
## What the API exposes
Hasura tracks every table and view in the sink's target schema and generates GraphQL fields for each one. Query fields are prefixed with the database name. The sink's own bookkeeping tables (`_cursor_`, `_blocks_`, `_sink_info_`) are excluded.
As the sink creates tables, the layer picks them up and tracks them. Views and other objects you add to the schema yourself are tracked the same way. The layer never creates or alters tables — it only reads.
The API is **read-only**. Every request is served with a role that has `SELECT` access and nothing else, so no mutation, insert, update, or delete fields are generated. The sink is the only writer to your database.
Both Postgres and ClickHouse sinks are supported.
## Adding the layer
### During sink creation
In the [New Sink](https://thegraph.market/sinks/new) wizard, the **GraphQL API** step comes after **Output selection**. Select **Expose a GraphQL API over this database** and continue.
### For an existing sink
Open the sink's detail page, click **Edit**, and go to the **GraphQL** tab. Select **Expose a GraphQL API over this database**, enter the database password the sink writes with, and click **Save**.
{% hint style="info" %}
The database password is requested again because stored credentials are never handed back out. The layer stages its own copy in the secret store.
{% endhint %}
The layer enters the `Deploying` state while it provisions, then transitions to `Deployed`.
## Using the API
The sink detail page has a **GraphQL** panel with the endpoint, an example request, and a link to the console. The endpoint has no path — append `/v1/graphql`, `/api/rest`, or `/console` depending on what you are calling.
### Authentication
Requests authenticate with one of your organization's API keys, passed in the `X-Api-Key` header. This is the same key used elsewhere on [The Graph Market](https://thegraph.market).
### Example query
```bash
curl https:///v1/graphql \
-H "X-Api-Key: " \
-d '{"query":"{ __typename }"}'
```
Replace `` and `` with the values from the GraphQL panel. The panel's **Copy with key** control copies the command with a working key already filled in.
### RESTified endpoints
A GraphQL query saved as a REST endpoint from the console is served under `/api/rest`, each at its own path, and authenticates the same way.
## The console
The console is a browser UI for exploring the schema and running queries. Open it from the **Explore** link in the GraphQL panel, or by appending `/console` to the endpoint.
The console signs you in with your existing portal session — there is no separate login or device code to confirm. Queries run against the same read-only API. The schema, sources, and permissions cannot be changed from the console; the one write it allows is saving a query as a REST endpoint.
## Removing the layer
Open the sink's detail page, click **Edit**, go to the **GraphQL** tab, clear **Expose a GraphQL API over this database**, and click **Save**.
The API and its console stop answering. Your database and the sink writing to it are untouched.
Deleting a sink removes its GraphQL layer first, so you never need to remove the layer by hand before deleting the sink.
## Troubleshooting
**The endpoint is not shown** — it appears once the layer finishes deploying. Check the layer's status on the sink detail page.
**Queries return an empty schema** — the layer is running but could not reach the database, or the sink has not created any tables yet. The GraphQL panel shows a message when the database connection failed; check that the sink is deployed and writing.
**`401` responses** — confirm the `X-Api-Key` header carries a current API key for the organization that owns the sink.
**A table is missing from the schema** — the layer tracks tables in the sink's target schema only, and skips the `_cursor_`, `_blocks_`, and `_sink_info_` bookkeeping tables. Confirm the table exists in that schema.
# Supabase
This walkthrough connects a Hosted Sink to a [Supabase](https://supabase.com) Postgres database.
## 1. Create a Supabase Project
1. Sign in to [supabase.com](https://supabase.com) and open your organization.
2. Click **New project**, choose a region close to StreamingFast's infrastructure, and set a strong database password.
3. Wait for the project to finish provisioning (roughly 1–2 minutes).
## 2. Get Connection Credentials
In your project, go to **Settings → Database → Connection parameters**.
| Supabase field | Value to copy |
| -------------- | -------------------------------------------- |
| Host | `db..supabase.co` |
| Port | `5432` |
| Database name | `postgres` (default) |
| Username | `postgres` (or a dedicated user you create) |
| Password | The password you set during project creation |
{% hint style="info" %}
Use the **direct connection** host (`db..supabase.co`) rather than the Session or Transaction pooler hosts. The pooler ports (5432/6543 on `aws-0-.pooler.supabase.com`) use PgBouncer, which can cause issues with the sink's prepared statements.
{% endhint %}
## 3. Create a Dedicated Database User (Recommended)
Run the following in the Supabase **SQL Editor** to create a user scoped to your target schema:
```sql
CREATE USER substreams_sink WITH PASSWORD 'a-strong-password';
CREATE SCHEMA IF NOT EXISTS substreams;
GRANT ALL PRIVILEGES ON SCHEMA substreams TO substreams_sink;
GRANT ALL PRIVILEGES ON ALL TABLES IN SCHEMA substreams TO substreams_sink;
ALTER DEFAULT PRIVILEGES IN SCHEMA substreams GRANT ALL ON TABLES TO substreams_sink;
```
Replace `substreams` with your intended schema name.
## 4. Allow External Connections
Supabase Postgres accepts connections from the public internet by default. No additional firewall steps are needed for the Hosted Sink to reach your database.
## 5. Configure the Hosted Sink
In [The Graph Market](https://thegraph.market/sinks/new), create a new sink and fill in the **Output** section:
| Field | Value |
| -------- | ---------------------------------------------- |
| Host | `db..supabase.co` |
| Port | `5432` |
| Database | `postgres` |
| Schema | `substreams` (or the schema you created above) |
| User | `substreams_sink` |
| Password | Password for that user |
| SSL Mode | `require` |
Supabase requires SSL — use `require` at minimum. Use `verify-full` if you want certificate validation.
## 6. Deploy
Complete the remaining sink configuration (package, execution settings) and click **Deploy sink**. The sink will connect to your Supabase database and begin writing data.
## Troubleshooting
**Connection refused / timeout** — Confirm you are using the direct connection host, not the pooler host. Check that port `5432` is not blocked by any additional network policy in your Supabase project (**Settings → Database → Network restrictions**).
**Permission denied** — Ensure the sink user has been granted privileges on the target schema and that `ALTER DEFAULT PRIVILEGES` was applied so future tables are also accessible.
**SSL errors** — Supabase requires SSL. Set SSL Mode to `require` or higher; `disable` will be rejected.
# Neon
This walkthrough connects a Hosted Sink to a [Neon](https://neon.tech) serverless Postgres database.
## 1. Create a Neon Project
1. Sign in to [console.neon.tech](https://console.neon.tech) and click **New project**.
2. Choose a name, Postgres version, and a region close to StreamingFast's infrastructure.
3. Neon creates a default database (`neondb`) and branch (`main`) automatically.
## 2. Get Connection Credentials
In your project, go to the **Dashboard** and open the **Connection Details** panel. Select:
* **Branch**: `main`
* **Database**: your target database (default: `neondb`)
* **Role**: `neondb_owner` or a role you create
The connection string looks like:
```
postgres://:@.neon.tech/neondb?sslmode=require
```
Pull the individual fields from it:
| Field | Example |
| -------- | -------------------------------------------------- |
| Host | `ep-quiet-forest-a1b2c3d4.us-east-2.aws.neon.tech` |
| Port | `5432` |
| Database | `neondb` |
| User | `neondb_owner` |
| Password | shown once — copy it now |
## 3. Create a Dedicated Role and Schema (Recommended)
Open the Neon **SQL Editor** and run:
```sql
CREATE ROLE substreams_sink WITH LOGIN PASSWORD 'a-strong-password';
CREATE SCHEMA IF NOT EXISTS substreams;
GRANT ALL PRIVILEGES ON SCHEMA substreams TO substreams_sink;
GRANT ALL PRIVILEGES ON ALL TABLES IN SCHEMA substreams TO substreams_sink;
ALTER DEFAULT PRIVILEGES IN SCHEMA substreams GRANT ALL ON TABLES TO substreams_sink;
```
Replace `substreams` with your intended schema name.
## 4. Configure the Hosted Sink
In [The Graph Market](https://thegraph.market/sinks/new), create a new sink and fill in the **Output** section:
| Field | Value |
| -------- | ---------------------------------------------- |
| Host | `ep-..aws.neon.tech` |
| Port | `5432` |
| Database | `neondb` (or your database name) |
| Schema | `substreams` (or the schema you created above) |
| User | `substreams_sink` |
| Password | Password for that role |
| SSL Mode | `require` |
{% hint style="warning" %}
Neon endpoints **suspend after a period of inactivity** on the free tier. A Hosted Sink running continuously will keep the endpoint active, but if the sink is stopped for an extended period the first reconnect may be slow. Consider upgrading to a paid Neon plan for production workloads.
{% endhint %}
## 5. Deploy
Complete the remaining sink configuration (package, execution settings) and click **Deploy sink**. The sink will connect to your Neon database and begin writing data.
## Troubleshooting
**Endpoint suspended on first connect** — Neon free-tier endpoints auto-suspend. The sink will retry on reconnect but may log an initial connection error. This is transient; the endpoint wakes within a few seconds.
**SSL required** — Neon requires SSL. Set SSL Mode to `require`; `disable` will be rejected.
**Permission denied on new tables** — Run `ALTER DEFAULT PRIVILEGES IN SCHEMA substreams GRANT ALL ON TABLES TO substreams_sink;` so that tables created by the sink are automatically accessible to the role.
# ClickHouse Cloud
This walkthrough connects a Hosted Sink to a [ClickHouse Cloud](https://clickhouse.com/cloud) managed ClickHouse service.
## 1. Create a ClickHouse Cloud Service
1. Sign in to [clickhouse.cloud](https://clickhouse.cloud) and open your organization.
2. Click **New service**, choose a cloud provider and region close to StreamingFast's infrastructure, and select a service tier. Hosted Sinks are provided from us-central1 in Iowa.
3. Set the **default user** password during creation — save it immediately, it is only shown once.
4. Wait for the service to reach **Running** status (typically 1–3 minutes).
## 2. Get Connection Credentials
In your service, go to **Connect → Native (TCP)**.
| Field | Example |
| -------- | --------------------------------------------- |
| Host | `abc123def456.us-east-1.aws.clickhouse.cloud` |
| Port | `9440` (native TLS) |
| Database | `default` |
| User | `default` |
| Password | Set during service creation |
{% hint style="info" %}
ClickHouse Cloud exposes the native protocol on port **9440** (TLS) rather than the standard `9000`. Enable **Secure (TLS)** in the sink configuration.
{% endhint %}
## 3. Open the IP Access List
By default, ClickHouse Cloud restricts inbound connections. You must allow StreamingFast's infrastructure to reach your service. Hosted Sinks runs in **us-central1 (Iowa)**.
1. In your service, go to **Settings → Security → IP Access List**.
2. Click **Add entry** and add `0.0.0.0/0` to allow connections from any IP. Note, if you require a restricted IP range, please [contact us](mailto:support@streamingfast.io).
3. Save the access list.
## 4. Create a Dedicated User and Database (Recommended)
Connect to your service using the ClickHouse Cloud SQL console (**Connect → SQL console**) and run:
```sql
CREATE DATABASE IF NOT EXISTS substreams;
CREATE USER substreams_sink
IDENTIFIED BY 'a-strong-password';
GRANT SELECT, INSERT, CREATE TABLE, DROP TABLE, ALTER, TRUNCATE
ON substreams.*
TO substreams_sink;
```
Replace `substreams` with your intended database name.
## 5. Configure the Hosted Sink
In [The Graph Market](https://thegraph.market/sinks/new), create a new sink and fill in the **Output** section:
| Field | Value |
| ------------ | -------------------------------------- |
| Host | `..aws.clickhouse.cloud` |
| Port | `9440` |
| Database | `substreams` (or your database name) |
| User | `substreams_sink` |
| Password | Password for that user |
| Secure (TLS) | **Enabled** |
## 6. Deploy
Complete the remaining sink configuration (package, execution settings) and click **Deploy sink**. The sink will connect to your ClickHouse Cloud service and begin writing data.
## Troubleshooting
**Connection refused** — Confirm the IP Access List includes StreamingFast's egress IPs or is set to allow `0.0.0.0/0`. Also confirm port `9440` is selected, not `9000`.
**Authentication failed** — Double-check the user and password. ClickHouse Cloud passwords are case-sensitive. If you reset the default user password in the console, the old credential is immediately invalidated.
**TLS handshake error** — Ensure **Secure (TLS)** is enabled. ClickHouse Cloud's native port `9440` requires TLS; connections without it will fail.
**Database or table not found** — Ensure the sink user has been granted `CREATE TABLE` on the target database so the sink can initialize the schema on first run.
# Remote Feed Hosted Store Guide
Client guide for writing to and reading from a StreamingFast-managed Remote Feed Hosted Store
A **Remote Feed Hosted Store** is a managed, block‑aware key/value store that StreamingFast runs for you. You write key/value entries into it over gRPC, and your Substreams modules — or any gRPC client — read those entries back at a given block height.
This guide is for the **Remote feed** flavor of a Hosted Store: you (or another service) push values in. For a package that reads the chain and populates the store, see the [Substreams Feed Hosted Store Guide](/how-to-guides/hosted-services/hosted-store-substreams-feed).
This guide shows you how to:
1. Understand what a hosted store is and when to use it
2. Create one and get its endpoint
3. Authenticate
4. Write entries into it (`Feed.Set`) and delete them (`Feed.Delete`)
5. Read entries back, either directly (`Store.Get` / `Store.GetFirst`) or from a Substreams module
6. Look up the proto reference
***
## 1. Concepts
A hosted store is a **key → value** map with a few blockchain‑specific properties:
* **Keys** are raw `bytes` — they can be a string, a hash, an address, or any composite key you choose.
* **Values** are a `google.protobuf.Any` — i.e. any protobuf message you define, tagged with its `@type`.
* **Readiness** — a store starts **not ready**. Direct `Get`/`GetFirst` then report the store hasn't reached the requested block yet (even if the keys are already written). A Substreams that queries a not‑ready store **hangs** until you flip it ready with `Feed.SetReady`.
* **Block‑aware reads** — every read targets a specific block number. The response tells you whether the store has ingested up to that block yet (`block_reached = true`). If `block_reached` is `false`, treat the result as not-yet-final rather than as "key not found".
You populate a hosted store by writing entries directly over gRPC with `Feed.Set`, and remove them with `Feed.Delete` (the **remote feed** flow). Data written or deleted this way is treated as **already final**. You can query the same keys directly over gRPC or from a Substreams module — but a Substreams **hangs** if the store is not marked ready (see below), while a direct `Get` returns immediately with `block_reached = false`.
***
## 2. Create a Remote Feed Hosted Store
Stores are provisioned through [**The Graph Market**](https://thegraph.market), under **Hosted Services**:
* — create a new service.
1. Choose **Hosted Store**.
2. Set the feed mode to **Remote feed** (off‑chain writes over gRPC). For a package that populates the store from the chain, use the [Substreams Feed Hosted Store Guide](/how-to-guides/hosted-services/hosted-store-substreams-feed) instead.
3. Give it a **name** and a **Type URL**.
* — list your services and copy the store's deployment ID.
Creating a Remote Feed Hosted Store only requires two fields:
* **Name** — a label for the store.
* **Type URL** — the fully‑qualified protobuf type of the values you'll feed in (e.g. `com.acme.example.v1.TestValue`). The protobuf package and message name are entirely free‑form — pick whatever fits your own project, this is not a StreamingFast‑defined type.
When you create one you get back a **deployment ID** (e.g. `depxado8480c1026b3edb7f`). That ID is used in two places:
* as the **hostname** of the store's gRPC endpoint, and
* as the **store reference** in a Substreams manifest.
### Endpoint convention
Once deployed, the store is reachable at:
```
.hs.streamingfast.io:443
```
Example: `depxado8480c1026b3edb7f.hs.streamingfast.io:443`
* TLS on port **443**, gRPC over HTTP/2.
* Authenticated with an **API key** (see next section).
### Generating client bindings
The store's Protobuf definitions are published on the Buf Schema Registry at [buf.build/streamingfast/substreams-foundational-store](https://buf.build/streamingfast/substreams-foundational-store) — you don't need to vendor the `.proto` files locally. Point `buf generate` at the remote module and pick the plugin for your language, e.g. for Rust with a `buf.gen.yaml`:
```yaml
version: v2
plugins:
- remote: buf.build/community/neoeinstein-prost
out: gen/rust
- remote: buf.build/community/neoeinstein-tonic
out: gen/rust
```
{% hint style="info" %}
**Note**: These plugins generate a gRPC **client**, which `tonic` builds on prost. A Substreams module is different: it generates its types with buffa through `substreams build`. See [Migrating from prost to buffa](/reference-material/migrating-to-buffa).
{% endhint %}
```bash
buf generate buf.build/streamingfast/substreams-foundational-store
```
See the [Buf Generate docs](https://buf.build/docs/generate/overview/) for Go, TypeScript, Python, and other language plugins.
***
## 3. Authentication
Calls to the store carry a StreamingFast **API key** in the gRPC `x-api-key` metadata:
```
x-api-key:
```
An API key is **created automatically** when you create the store, so you don't have to make one yourself beforehand. Manage your keys at .
***
## 4. Write and delete entries
The remote‑feed ingest service is [`sf.substreams.foundational_store.feed.v2.Feed`](https://buf.build/streamingfast/substreams-foundational-store/docs/main:sf.substreams.foundational_store.feed.v2#sf.substreams.foundational_store.feed.v2.Feed). `Set` writes a batch of entries; `Delete` removes a batch of keys. Both are treated as **final** and applied immediately (latest‑value semantics, no fork handling).
### Entry shape
See [`SinkEntries`](https://buf.build/streamingfast/substreams-foundational-store/docs/main:sf.substreams.foundational_store.model.v2#sf.substreams.foundational_store.model.v2.SinkEntries) and [`Entry`](https://buf.build/streamingfast/substreams-foundational-store/docs/main:sf.substreams.foundational_store.model.v2#sf.substreams.foundational_store.model.v2.Entry) on the Buf Schema Registry:
```protobuf
message SinkEntries {
repeated Entry entries = 1;
bool if_not_exist = 2; // if true, skip keys that already exist
}
message Entry {
Key key = 2; // key.bytes — raw bytes
google.protobuf.Any value = 4; // any protobuf message, tagged with @type
}
```
### Calling `Feed.Set`
Send `Set` from the Buf Schema Registry explorer for [`sf.substreams.foundational_store.feed.v2`](https://buf.build/streamingfast/substreams-foundational-store/docs/main:sf.substreams.foundational_store.feed.v2):
1. Open that page and select **Set**.
2. Set the target to `.hs.streamingfast.io:443`.
3. Add metadata `x-api-key: `.
4. Fill the `SinkEntries` request: one or more `Entry` values, each with `key.bytes` and a `google.protobuf.Any` `value`.
Notes:
* `key.bytes` is **base64** in JSON (gRPC bytes encoding).
* `value` is a `google.protobuf.Any`: the `@type` must be the fully‑qualified type URL of your value message, and the remaining fields are that message's fields.
* Use `"if_not_exist": true` at the `entries` level to avoid overwriting existing keys.
### Deleting keys — `Feed.Delete`
`Delete` removes a batch of keys. Missing keys are ignored. Like `Set`, the delete is treated as **final** and applied immediately.
See [`DeleteRequest`](https://buf.build/streamingfast/substreams-foundational-store/docs/main:sf.substreams.foundational_store.feed.v2#sf.substreams.foundational_store.feed.v2.DeleteRequest) on the Buf Schema Registry:
```protobuf
message DeleteRequest {
repeated Key keys = 1; // missing keys are ignored
}
```
Send `Delete` from the same Buf Schema Registry explorer for [`sf.substreams.foundational_store.feed.v2`](https://buf.build/streamingfast/substreams-foundational-store/docs/main:sf.substreams.foundational_store.feed.v2):
1. Open that page and select **Delete**.
2. Set the target to `.hs.streamingfast.io:443`.
3. Add metadata `x-api-key: `.
4. Fill `keys` with one or more `key.bytes` values.
Notes:
* `key.bytes` is **base64** in JSON (gRPC bytes encoding).
* An empty `keys` list is a no-op; missing keys are ignored — the call still succeeds.
* This is a **hard delete**. A later `Get` / `GetFirst` returns `RESPONSE_CODE_NOT_FOUND`. It does not write a tombstone and does not return `RESPONSE_CODE_NOT_FOUND_FINALIZE`.
### Marking the store ready
A new store is **not ready**. Hold reads off while you populate it, then flip the flag with `Feed.SetReady` — same Buf page, select **SetReady**, and send `{ "ready": true }`.
Until you call `SetReady` with `ready = true`:
* Direct `Get`/`GetFirst` return `block_reached = false` — even if the keys are already written.
* A Substreams that queries the store **hangs**. It does not error, skip, or time out; the runtime treats `block_reached = false` as "try again later" and waits until the store is marked ready, then continues.
Call `SetReady` only after the data consumers need is written. If a Substreams appears stuck on the first block after you added a hosted‑store input, the store is almost certainly still not ready.
***
## 5. Read entries
### Option A — query the store directly (`Store.Get`)
The query service is [`sf.substreams.foundational_store.service.v2.Store`](https://buf.build/streamingfast/substreams-foundational-store/docs/main:sf.substreams.foundational_store.service.v2#sf.substreams.foundational_store.service.v2.Store). Reads are performed **at a block** and return one result per requested key, in order. See [`GetRequest`](https://buf.build/streamingfast/substreams-foundational-store/docs/main:sf.substreams.foundational_store.service.v2#sf.substreams.foundational_store.service.v2.GetRequest) and [`GetResponse`](https://buf.build/streamingfast/substreams-foundational-store/docs/main:sf.substreams.foundational_store.service.v2#sf.substreams.foundational_store.service.v2.GetResponse):
```protobuf
message GetRequest {
uint64 block_number = 1; // query at this block
bytes block_hash = 2; // optional, for fork verification
repeated Key keys = 3; // keys to look up
}
message GetResponse {
bool block_reached = 1; // false if the store hasn't reached block_number yet
QueriedEntries entries = 2; // one QueriedEntry per requested key
}
```
Call `Get` and `GetFirst` from the Buf Schema Registry explorer for [`sf.substreams.foundational_store.service.v2`](https://buf.build/streamingfast/substreams-foundational-store/docs/main:sf.substreams.foundational_store.service.v2):
1. Open that page and select **Get** or **GetFirst**.
2. Set the target to `.hs.streamingfast.io:443`.
3. Add metadata `x-api-key: `.
4. Set `block_number` and the `keys` to look up (`key.bytes` is **base64** in JSON).
* **`Get`** returns exact key matches.
* **`GetFirst`** returns, for each requested key, the first key **≥** it (lexicographic order) — useful for range scans / "next key" lookups.
### Response codes
Each `QueriedEntry` carries a `code`:
| Code | Meaning |
| -------------------------------------- | ------------------------------------------------------ |
| `RESPONSE_CODE_FOUND` (1) | Key exists; `entry` holds the value. |
| `RESPONSE_CODE_NOT_FOUND` (2) | Key does not exist at the requested block. |
| `RESPONSE_CODE_NOT_FOUND_FINALIZE` (4) | Key was deleted after finality (historical reference). |
| `RESPONSE_CODE_UNSPECIFIED` (0) | Should not occur. |
`Feed.Delete` is a hard delete: subsequent reads of that key return `NOT_FOUND`, not `NOT_FOUND_FINALIZE`.
Always check `block_reached` first: if it's `false`, the store hasn't ingested the block you asked about yet (or it isn't marked ready), and a `NOT_FOUND` doesn't mean the key is truly absent.
### Option B — read from a Substreams module
This is the most common consumption path: your Substreams module declares the hosted store as an input and queries it per block.
#### 1. Declare it in `substreams.yaml`
Add the store as a module input using `foundational-store: @`:
```yaml
modules:
- name: map_query_test_store
kind: map
initialBlock: 1
inputs:
- source: sf.acme.type.v1.Block
- foundational-store: @v0.1.0
output:
type: proto:com.acme.example.v1.TestValue
```
> **Note:** the `@` suffix (e.g. `@v0.1.0`) is **ignored by the system** — the store is resolved by its deployment ID alone — but it must be present to pass manifest validation.
Add the proto dependency in `buf.yaml` so the hosted store types are available:
```yaml
deps:
- buf.build/streamingfast/substreams
- buf.build/streamingfast/substreams-foundational-store
- buf.build/googleapis/googleapis
```
#### 2. Query from a Substreams
The store is injected into your handler as a `FoundationalStore`. Call `get` with a slice of keys; you get back a `QueriedEntries`.
```rust
use substreams::errors::Error;
use substreams::store::FoundationalStore;
use substreams::pb::sf::substreams::foundational_store::model::v2::ResponseCode;
mod pb;
use pb::com::acme::example::v1::TestValue;
#[substreams::handlers::map]
fn map_query_test_store(
_block: pb::sf::acme::r#type::v1::Block,
store: FoundationalStore,
) -> Result {
let key: &[u8] = b"test-key-1";
let response = store.get(&[key]);
let value = if let Some(entry) = response.entries.first() {
let bytes = entry.entry.value.value.clone();
if entry.code == ResponseCode::Found {
String::from_utf8_lossy(&bytes).into_owned()
} else {
format!("code={}", entry.code)
}
} else {
"NO_ENTRY".to_string()
};
Ok(TestValue { value })
}
```
The read is automatically performed at the block currently being processed, so results stay in sync with the stream.
> **Not ready ⇒ hang.** If the store is not marked ready, `store.get(...)` does not return. The Substreams stalls at that block until someone calls `Feed.SetReady` with `ready = true`. This is intentional: the runtime treats `block_reached = false` as "try again later", not as a miss. Direct `Get`/`GetFirst` still return immediately with `block_reached = false`.
#### 3. Build and run
```bash
substreams build
substreams run substreams.yaml map_query_test_store \
-e
```
(During local development against a dev stack you might use `-e localhost:9088 --insecure --limit-processed-blocks=0`.)
***
## 6. End‑to‑end checklist
1. **Create** a Remote Feed Hosted Store in [The Graph Market](https://thegraph.market) (**Hosted Services** → **Hosted Store** → **Remote feed**) → note the **deployment ID**.
2. **Listen** for a response from the endpoint. The Store is now running.
3. **Authenticate** with an API key (`x-api-key`).
4. **Write** your entries with `Feed.Set` (and `Feed.Delete` to remove keys), then call `Feed.SetReady`. A Substreams that queries the store before that **hangs** until you mark it ready.
5. **Read** them either directly with `Store.Get` / `Store.GetFirst`, or by adding `foundational-store: @` to a Substreams module and calling `store.get(...)`.
***
## 7. Proto reference
The authoritative message and service definitions — `model/v2/model.proto`, `feed/v2/feed.proto`, and `service/v2/service.proto` — are published at [buf.build/streamingfast/substreams-foundational-store](https://buf.build/streamingfast/substreams-foundational-store). Browse them there, or see the [Foundational Store Reference](/reference-material/core-concepts/foundational-store-reference) for the architecture and data model behind them.
***
## Related resources
* [Hosted Services](/how-to-guides/hosted-services) — the managed Sink and Store offerings StreamingFast runs for you.
* [Substreams Feed Hosted Store Guide](/how-to-guides/hosted-services/hosted-store-substreams-feed) — let a Substreams package populate the store from the chain.
* [Foundational Stores](/how-to-guides/composing-substreams/foundational-stores) — chain-specific foundational stores populated by a Substreams package.
* [Consuming a Foundational Store](/tutorials/consuming-foundational-store) — querying a foundational store from a Substreams module, imported as a package.
* [Hosting a Foundational Store](/reference-material/operators/hosting-foundational-stores) — running your own foundational store server instead of using a StreamingFast-managed one.
* [Foundational Store Reference](/reference-material/core-concepts/foundational-store-reference) — architecture and data model shared by both hosted and self-hosted stores.
# Substreams Feed Hosted Store Guide
Client guide for a StreamingFast-managed Hosted Store populated by a Substreams package
A **Substreams Feed Hosted Store** is a managed, block‑aware key/value store that StreamingFast runs for you. A Substreams package reads the chain and writes key/value entries into the store; your other modules — or any gRPC client — read those entries back at a given block height.
This is the **Substreams feed** flavor of a Hosted Store. For off‑chain writes over gRPC instead, see the [Remote Feed Hosted Store Guide](/how-to-guides/hosted-services/hosted-store-remote-feed).
This guide shows you how to:
1. Understand what a Substreams‑fed store is and when to use it
2. Produce `SinkEntries` from a Substreams package
3. Create the store and let StreamingFast populate it
4. Authenticate
5. Read entries back, either from a Substreams module or directly (`Store.Get`)
6. Look up the proto reference
***
## 1. Concepts
A hosted store is a **key → value** map with a few blockchain‑specific properties:
* **Keys** are raw `bytes` — they can be a string, a hash, an address, or any composite key you choose.
* **Values** are a `google.protobuf.Any` — i.e. any protobuf message you define, tagged with its `@type`.
* **Block‑aware reads** — every read targets a specific block number. The response tells you whether the store has ingested up to that block yet (`block_reached = true`). If `block_reached` is `false`, treat the result as not-yet-final rather than as "key not found".
* **Fork‑aware writes** — because a Substreams package is the source, reorgs are handled for you. (Remote‑feed writes are treated as already final; that is not this path.)
StreamingFast runs the Substreams sink against the chain and lands the output in the store. There is no SQL database. You do not call `Feed.Set`, `Feed.Delete`, or `Feed.SetReady`.
While the store is still catching up, a Substreams that queries it **hangs** at that block until `block_reached` becomes true. Direct `Get`/`GetFirst` return immediately with `block_reached = false`.
***
## 2. Produce entries from a package
The output module of the package **must** emit `proto:sf.substreams.foundational_store.model.v2.SinkEntries`. That is the only shape the hosted store will ingest.
See [`SinkEntries`](https://buf.build/streamingfast/substreams-foundational-store/docs/main:sf.substreams.foundational_store.model.v2#sf.substreams.foundational_store.model.v2.SinkEntries) and [`Entry`](https://buf.build/streamingfast/substreams-foundational-store/docs/main:sf.substreams.foundational_store.model.v2#sf.substreams.foundational_store.model.v2.Entry) on the Buf Schema Registry:
```protobuf
message SinkEntries {
repeated Entry entries = 1;
bool if_not_exist = 2; // if true, skip keys that already exist
}
message Entry {
Key key = 2; // key.bytes — raw bytes
google.protobuf.Any value = 4; // any protobuf message, tagged with @type
}
```
### Producer module
```rust
use buffa::{Message, MessageField};
use buffa_types::google::protobuf::Any;
use substreams::errors::Error;
use substreams::pb::sf::substreams::foundational_store::model::v2::{Entry, Key, SinkEntries};
mod pb;
use pb::com::acme::example::v1::TokenMetadata;
#[substreams::handlers::map]
fn map_to_store(events: pb::acme::Events) -> Result {
let mut entries = Vec::new();
for event in events.items {
let value = TokenMetadata {
address: event.address.clone(),
name: event.name,
symbol: event.symbol,
};
let buf = value.encode_to_vec();
entries.push(Entry {
key: MessageField::some(Key {
bytes: event.address,
}),
value: MessageField::some(Any {
type_url: "type.googleapis.com/com.acme.example.v1.TokenMetadata".to_string(),
value: buf.into(),
..Default::default()
}),
});
}
Ok(SinkEntries {
entries,
if_not_exist: false,
})
}
```
Set `if_not_exist: true` when a key should be written only once (for example an account‑initialization mapping). Leave it `false` when later blocks should overwrite the value.
### Manifest
```yaml
modules:
- name: map_to_store
kind: map
inputs:
- map: map_events
output:
type: proto:sf.substreams.foundational_store.model.v2.SinkEntries
```
The package must be reachable over public HTTPS (a GitHub Release, object storage, or the [Substreams Registry](https://substreams.dev)) so the hosted runner can fetch it. Local paths are not accepted.
Worked examples of producer packages:
* [Ethereum — ERC20 Token Metadata](/how-to-guides/composing-substreams/foundational-stores/erc20-token-metadata)
* [Solana — SPL Initialized Account](/how-to-guides/composing-substreams/foundational-stores/spl-initialized-account)
***
## 3. Create a Substreams Feed Hosted Store
Stores are provisioned through [**The Graph Market**](https://thegraph.market), under **Hosted Services**:
* — create a new service.
1. Choose **Hosted Store**.
2. Set the feed mode to **Substreams feed**. Do **not** pick **Remote feed** unless you will push values yourself over gRPC.
3. Fill in the fields below.
* — list your services and copy the store's deployment ID.
| Field | Description |
| ------------------------ | ------------------------------------------------------------------------------------------------------------------------------------------------------------ |
| **Name** | A label for the store. |
| **Package** | Public URL of the `.spkg`, or a Substreams.dev id (e.g. `spl-initialized-account@v0.2.0`). |
| **Type URL** | Fully‑qualified protobuf type of the values the module stores (e.g. `sf.substreams.solana.spl.v1.AccountOwner`). The wizard suggests types from the package. |
| **Network** | Chain id used to resolve the Substreams endpoint (e.g. `solana`, `mainnet`). |
| **Start block** | Block to start processing from. Use `0` for genesis. |
| **Stop block** | Block to stop at. Use `0` to follow the chain head. |
| **Output module** | Module that emits `SinkEntries` (e.g. `map_to_store`). |
| **Filters / Parameters** | Optional execution filters and module parameters. |
When you create one you get back a **deployment ID** (e.g. `depxado8480c1026b3edb7f`). That ID is used in two places:
* as the **hostname** of the store's gRPC endpoint, and
* as the **store reference** in a Substreams manifest.
The store then catches up from the start block. Watch status, lag, and logs on the service detail page the same way you would for a [hosted sink](/how-to-guides/hosted-services/hosted-sinks/manage-your-sink).
### Endpoint convention
Once deployed, the store is reachable at:
```
.hs.streamingfast.io:443
```
Example: `depxado8480c1026b3edb7f.hs.streamingfast.io:443`
* TLS on port **443**, gRPC over HTTP/2.
* Authenticated with an **API key** (see next section).
### Generating client bindings
The store's Protobuf definitions are published on the Buf Schema Registry at [buf.build/streamingfast/substreams-foundational-store](https://buf.build/streamingfast/substreams-foundational-store) — you don't need to vendor the `.proto` files locally. Point `buf generate` at the remote module and pick the plugin for your language, e.g. for Rust with a `buf.gen.yaml`:
```yaml
version: v2
plugins:
- remote: buf.build/community/neoeinstein-prost
out: gen/rust
- remote: buf.build/community/neoeinstein-tonic
out: gen/rust
```
{% hint style="info" %}
**Note**: These plugins generate a gRPC **client**, which `tonic` builds on prost. A Substreams module is different: it generates its types with buffa through `substreams build`. See [Migrating from prost to buffa](/reference-material/migrating-to-buffa).
{% endhint %}
```bash
buf generate buf.build/streamingfast/substreams-foundational-store
```
See the [Buf Generate docs](https://buf.build/docs/generate/overview/) for Go, TypeScript, Python, and other language plugins.
***
## 4. Authentication
Calls to the store carry a StreamingFast **API key** in the gRPC `x-api-key` metadata:
```
x-api-key:
```
An API key is **created automatically** when you create the store, so you don't have to make one yourself beforehand. Manage your keys at .
The examples below use `$SF_API_KEY` for that value.
***
## 5. Read entries
Reading is the same for both feed modes. The usual path is a Substreams module that declares the store as an input. You can also query it directly over gRPC.
### Option A — read from a Substreams module
Add the store as a module input using `foundational-store: @`:
```yaml
modules:
- name: map_with_store
kind: map
inputs:
- source: sf.acme.type.v1.Block
- foundational-store: @v0.1.0
output:
type: proto:com.acme.example.v1.Enriched
```
> **Note:** the `@` suffix (e.g. `@v0.1.0`) is **ignored by the system** — the store is resolved by its deployment ID alone — but it must be present to pass manifest validation.
Add the proto dependency in `buf.yaml` so the hosted store types are available:
```yaml
deps:
- buf.build/streamingfast/substreams
- buf.build/streamingfast/substreams-foundational-store
- buf.build/googleapis/googleapis
```
The store is injected into your handler as a `FoundationalStore`. Call `get` with a slice of keys; you get back a `QueriedEntries`. The read is performed at the block currently being processed, so results stay in sync with the stream.
```rust
use substreams::errors::Error;
use substreams::store::FoundationalStore;
use substreams::pb::sf::substreams::foundational_store::model::v2::ResponseCode;
#[substreams::handlers::map]
fn map_with_store(
_block: pb::sf::acme::r#type::v1::Block,
store: FoundationalStore,
) -> Result {
let key: &[u8] = b"example-key";
let response = store.get(&[key]);
let found = response.entries.iter().any(|e| e.code == ResponseCode::Found as i32);
Ok(pb::com::acme::example::v1::Enriched { found })
}
```
> **Catching up ⇒ hang.** If the store has not yet ingested the block being processed, `store.get(...)` does not return. The Substreams stalls until the hosted store catches up, then continues. This is intentional: the runtime treats `block_reached = false` as "try again later", not as a miss.
### Option B — query the store directly (`Store.Get`)
The query service is [`sf.substreams.foundational_store.service.v2.Store`](https://buf.build/streamingfast/substreams-foundational-store/docs/main:sf.substreams.foundational_store.service.v2#sf.substreams.foundational_store.service.v2.Store). Reads are performed **at a block** and return one result per requested key, in order.
Call `Get` and `GetFirst` from the Buf Schema Registry explorer for [`sf.substreams.foundational_store.service.v2`](https://buf.build/streamingfast/substreams-foundational-store/docs/main:sf.substreams.foundational_store.service.v2):
1. Open that page and select **Get** or **GetFirst**.
2. Set the target to `.hs.streamingfast.io:443`.
3. Add metadata `x-api-key: `.
4. Set `block_number` and the `keys` to look up (`key.bytes` is **base64** in JSON).
* **`Get`** returns exact key matches.
* **`GetFirst`** returns, for each requested key, the first key **≥** it (lexicographic order).
Always check `block_reached` first: if it's `false`, the store hasn't ingested that block yet, and a `NOT_FOUND` doesn't mean the key is truly absent.
Each `QueriedEntry` carries a `code`:
| Code | Meaning |
| -------------------------------------- | ------------------------------------------------------ |
| `RESPONSE_CODE_FOUND` (1) | Key exists; `entry` holds the value. |
| `RESPONSE_CODE_NOT_FOUND` (2) | Key does not exist at the requested block. |
| `RESPONSE_CODE_NOT_FOUND_FINALIZE` (4) | Key was deleted after finality (historical reference). |
| `RESPONSE_CODE_UNSPECIFIED` (0) | Should not occur. |
***
## 6. End‑to‑end checklist
1. **Build** a package whose output module emits `SinkEntries`.
2. **Publish** it to a public URL or the Substreams Registry.
3. **Create** a Substreams Feed Hosted Store in [The Graph Market](https://thegraph.market) (**Hosted Services** → **Hosted Store** → **Substreams feed**) → note the **deployment ID**.
4. **Wait** until the store is catching up or live. A consumer Substreams that queries it before that block **hangs** until the store reaches it.
5. **Read** entries by adding `foundational-store: @` to a module, or with `Store.Get` / `Store.GetFirst` over gRPC.
***
## 7. Proto reference
The authoritative message and service definitions — `model/v2/model.proto` and `service/v2/service.proto` — are published at [buf.build/streamingfast/substreams-foundational-store](https://buf.build/streamingfast/substreams-foundational-store). Browse them there, or see the [Foundational Store Reference](/reference-material/core-concepts/foundational-store-reference) for the architecture and data model behind them.
***
## Related resources
* [Hosted Services](/how-to-guides/hosted-services) — the managed Sink and Store offerings StreamingFast runs for you.
* [Remote Feed Hosted Store Guide](/how-to-guides/hosted-services/hosted-store-remote-feed) — push values into a hosted store over gRPC instead of from a package.
* [Foundational Stores](/how-to-guides/composing-substreams/foundational-stores) — chain-specific packages that populate a store from the chain.
* [Consuming a Foundational Store](/tutorials/consuming-foundational-store) — querying a foundational store from a Substreams module, imported as a package.
* [Hosting a Foundational Store](/reference-material/operators/hosting-foundational-stores) — running your own foundational store server instead of using a StreamingFast-managed one.
* [Foundational Store Reference](/reference-material/core-concepts/foundational-store-reference) — architecture and data model shared by both hosted and self-hosted stores.
# Consuming Substreams
Once you find a package that fits your needs, you can choose how you want to consume the data. Sinks are integrations that allow you to send the extracted data to different destinations, such as a SQL database, or a file.
{% hint style="info" %}
**Tip**: Building a SQL sink? The [substreams-sql agent skill](/how-to-guides/develop-your-own-substreams/general/agent-skills) gives your AI coding assistant expert knowledge on Database Changes Mode (CDC) patterns, Relational Mappings Mode, PostgreSQL, and ClickHouse schema design.
{% endhint %}
{% hint style="info" %}
**Note**: Some of the sinks are officially supported by StreamingFast (i.e. active support is provided), but other sinks are community-driven and support can’t be guaranteed.
{% endhint %}
* [Hosted Sinks](/how-to-guides/hosted-services/hosted-sinks): Let StreamingFast run your sink for you — no infrastructure to manage. See [Hosted Services](/how-to-guides/hosted-services) for the full hosted offering, including Hosted Stores.
* [SQL Database](/how-to-guides/sinks/sql): Send the data to a database.
* [Direct Streaming](/how-to-guides/sinks/stream): Stream data directly from your application.
* [PubSub](/how-to-guides/sinks/pubsub): Send data to a PubSub topic.
* [Community Sinks](https://github.com/streamingfast/substreams/tree/develop/docs/how-to-guides/sinks/community/README.md): Explore quality community maintained sinks.
### Navigating Sink Repos
#### Official
| Name | Support | Maintainer | Source Code |
| ----------- | ------- | ------------- | ------------------------------------------------------------------------------------------------------------------------------------------------------------------------------------------- |
| SQL | O | StreamingFast | [substreams-sink-sql](https://github.com/streamingfast/substreams-sink-sql) |
| Go SDK | O | StreamingFast | [substreams-sink](https://github.com/streamingfast/substreams-sink) |
| Rust SDK | O | StreamingFast | [substreams-sink-rust](https://github.com/streamingfast/substreams-sink-rust) |
| JS SDK | O | StreamingFast | [substreams-js](https://github.com/substreams-js/substreams-js) |
| KV Store | O | StreamingFast | [substreams-sink-kv](https://github.com/streamingfast/substreams-sink-kv) |
| PubSub | O | StreamingFast | [substreams sink pubsub](https://github.com/streamingfast/substreams/tree/develop/sink/pubsub/README.md), [substreams-sink-pubsub](https://github.com/streamingfast/substreams-sink-pubsub) |
| ProtoJSON | O | StreamingFast | [substreams-sink-protojson](https://github.com/streamingfast/substreams/tree/develop/sink/protojson/README.md) |
| Webhook | O | StreamingFast | [substreams-sink-webhook](https://github.com/streamingfast/substreams/tree/develop/sink/webhook/README.md) |
| Noop | O | StreamingFast | [substreams-sink-noop](https://github.com/streamingfast/substreams/tree/develop/sink/noop/README.md) |
| Prometheus | O | Pinax | [substreams-sink-prometheus](https://github.com/pinax-network/substreams-sink-prometheus) |
| Webhook(JS) | O | Pinax | [substreams-sink-webhook](https://github.com/pinax-network/substreams-sink-webhook) |
| CSV | O | Pinax | [substreams-sink-csv](https://github.com/pinax-network/substreams-sink-csv) |
#### Community
| Name | Support | Maintainer | Source Code |
| ---------- | ------- | ---------- | ----------------------------------------------------------------------------------------- |
| MongoDB | C | Community | [substreams-sink-mongodb](https://github.com/streamingfast/substreams-sink-mongodb) |
| Files | C | Community | [substreams-sink-files](https://github.com/streamingfast/substreams-sink-files) |
| KV Store | C | Community | [substreams-sink-kv](https://github.com/streamingfast/substreams-sink-kv) |
| Prometheus | C | Community | [substreams-sink-Prometheus](https://github.com/pinax-network/substreams-sink-prometheus) |
* O = Official Support (by one of the main Substreams providers)
* C = Community Support
# Substreams:SQL
The **Substreams:SQL Sink** allows you to consume the data extracted from the blockchain through a SQL database.
### Requirements
Before you begin, make sure you have:
* A Substreams package (for example, a package that indexes ERC20 tokens).
* A SQL database: Postgres or ClickHouse.
* The [Substreams CLI](/how-to-guides/installing-the-cli) installed on your computer. The SQL sink is built into the `substreams` CLI (`substreams sink postgres` / `substreams sink clickhouse`).
### Mapping Substreams to SQL
The core function of the SQL sink is to translate your Substreams output (Protobuf data) into SQL tables. Choose one of the following methods depending on your needs:
* [Using Relational Mappings Mode](/how-to-guides/sinks/sql/relational-mappings)
* Enables foreign key relationships in your SQL schema.
* Requires adding annotations to your Protobuf messages (e.g., primary and foreign keys).
* Currently insert-only.
* [Using Database Changes Mode](/how-to-guides/sinks/sql/db_out)
* Gives you full control over the output.
* Supports insert, update, and upsert operations.
* Ideal for advanced use cases with evolving or mutable data.
* **NOTE:** In ClickHouse, reorgs are currently supported with delay.
| | Relational Mappings Mode | Database Changes Mode (`db_out`) |
| ----------------------------- | ------------------------ | -------------------------------- |
| SQL relationships | Yes | No |
| Direct Protobuf<>SQL mappings | Yes | No |
| `INSERT` supported | Yes | Yes |
| `UPDATE` supported | No | Yes |
| `UPSERT` supported | No | Yes |
### Installation
The SQL sink is included in the [Substreams CLI](/how-to-guides/installing-the-cli) — there is no separate binary to install. Once `substreams` is installed, the `substreams sink postgres` and `substreams sink clickhouse` commands are available.
# Using Relational Mappings Mode
If you want to use a relational model (e.g., creating one-to-many), you can annotate your Protobuf to indicate the primary and foreign keys in your database.
To map your Protobuf definitions directly to database tables and establish relationships between objects, you need to annotate your Protobuf messages with table names, primary keys, and relationship metadata.
{% hint style="warning" %}
Relational Mappings Mode is currently in beta. Postgres support is stable, but ClickHouse support is still under development. [Reference releases](https://github.com/streamingfast/substreams-sink-sql/releases)
{% endhint %}
```proto
syntax = "proto3";
import "sf/substreams/sink/sql/schema/v1/schema.proto";
message Swap {
option (schema.table) = {
name: "swaps"
child_of: "pools on id"
};
string id = 1;
uint64 date = 2;
}
message Pool {
option (schema.table) = { name: "pools" };
string id = 1 [(schema.field) = { primary_key: true }];
string token_mint0 = 2;
string token_mint1 = 3;
repeated Swap swaps = 4;
}
```
In the example above, two entities are defined: `Swap` and `Pool`, where each Swap belongs to a Pool. As a result, the Pool object includes a list of Swaps, linked by the Pool’s \_id using the child\_of annotation. The SQL sink **will automatically generate the corresponding tables** and relationships based on the annotations in the Protobuf.
For the full list of annotations, type mappings, and ClickHouse-specific options, see the [Proto Annotations Reference](/reference-material/sql/sql/proto-annotations).
## Run the Sink
First, let's spin up a PostgreSQL database using Docker:
```bash
docker run --name postgres-db -e POSTGRES_PASSWORD=password -e POSTGRES_DB=substreams -p 5432:5432 -d postgres:15
```
You can run the sink with the following syntax:
```bash
# Ensure you are authenticated properly https://docs.substreams.dev/how-to-guides/installing-the-cli/authentication
export DSN="postgres://postgres:password@localhost:5432/substreams?sslmode=disable"
substreams sink postgres solana-spl-token@latest --dsn "$DSN"
# Run 'docker rm postgres-db --force' to delete running database or start from scratch
```
### Database Connection (DSN)
The DSN (Data Source Name) defines how to connect to your database. The format varies by database type:
**PostgreSQL:**
```bash
postgres://:@:/?
```
**ClickHouse:**
```bash
# Not encrypted
clickhouse://:@:9000/?
# Encrypted (ClickHouse Cloud)
clickhouse://:@:9440/?secure=true&
```
{% hint style="info" %}
For ClickHouse Cloud, use port `9440` with `secure=true` option. The standard port `9000` is for unencrypted connections.
{% endhint %}
For complete DSN format details and additional database options, see the [DSN Reference](/reference-material/sql/sql/dsn-reference).
## Example: SPL Token
Let’s walk through a real-world example of storing SPL Token instructions in a Postgres database.
Clone the [SPL Token Substreams GitHub repository](https://github.com/streamingfast/substreams-spl-token).
### Inspect the Project
* Observe the `substreams.yaml` file:
```yaml
specVersion: v0.1.0
package:
name: solana-spl-token
version: v0.1.0
url: https://github.com/streamingfast/substreams-spl-token
imports:
solana_common: solana-common@v0.3.0
protobuf:
files:
- sf/solana/v1/spl/type/spl.proto
descriptorSets:
- module: buf.build/streamingfast/substreams-sink-sql
excludePaths:
- google
importPaths:
- ./proto
modules:
- name: map_spl_instructions # 1.
kind: map
initialBlock: 158569587
inputs:
- params: string
- map: solana_common:transactions_by_programid_and_account_without_votes
output:
type: proto:sf.solana.spl.v1.type.SplInstructions
network: solana
params:
map_spl_instructions: "spl_token_address=4vMsoUT2BWatFweudnQM1xedRLfJgJ7hswhcpz4xgBTy|spl_token_decimal=9" # 2.
solana_common:transactions_by_programid_and_account_without_votes: "program:TokenkegQfeZyiNwAJbNbGKPFXCWuBvf9Ss623VQ5DA && account:4vMsoUT2BWatFweudnQM1xedRLfJgJ7hswhcpz4xgBTy"
```
1. The `map_spl_instructions` module maps Solana transactions to the output Protobuf, `SplInstructions`.
2. Configuration of the `map_spl_instructions` module. Here, you define the specific token you want to track and number of decimals to perform operations.
**The sink is able to infer the table names, so it is not necessary to provide a `schema.sql` file.**
* Observe the annotations in Protobuf:
```proto
syntax = "proto3";
import "google/protobuf/descriptor.proto";
import "sf/substreams/sink/sql/schema/v1/schema.proto";
package sf.solana.spl.v1.type;
message SplInstructions {
repeated Instruction instructions = 1;
}
message Instruction {
option (schema.table) = {
name: "instructions"
};
string instruction_id = 1 [(schema.field) = { primary_key: true }];
string transaction_hash = 2;
oneof Item {
Mint mint = 10;
Burn burn = 11;
Transfer transfer = 12;
InitializedAccount initialized_account = 13;
}
}
message Transfer {
option (schema.table) = {
name: "transfers"
child_of: "instructions on instruction_id"
};
string from = 2;
string to = 3;
double amount = 4;
}
message Mint {
option (schema.table) = {
name: "mints"
child_of: "instructions on instruction_id"
};
string to = 2;
double amount = 3;
}
```
1. A root `Instruction` object is defined with table name `instructions`:
```proto
option (schema.table) = {
name: "instructions"
};
```
2. An SPL Token instruction could be one of: `transfer`, `mint`, `burn` or `initialized_account`. A table for each of these possible instruction types will be created.
3. All these objects will have a foreign key relation with the root `instruction`, which is defined by the `child_of` relation. For example:
```proto
message Transfer {
option (schema.table) = {
name: "transfers"
child_of: "instructions on instruction_id"
};
string from = 2;
string to = 3;
double amount = 4;
}
```
### Run the Sink
To run the sink, you will need a Postgres database. You can use a Docker container to spin one up on your computer.
* Define the `DSN` string, which will contain the credentials of the database.
```bash
export DSN="postgres://postgres:password@localhost:5432/substreams?sslmode=disable"
```
* Run the sink using the published package:
```bash
substreams sink postgres https://github.com/streamingfast/substreams-spl-token/releases/download/v0.1.0/solana-spl-token-v0.1.0.spkg --dsn $DSN
```
## Run the Sink Without Annotations
{% hint style="info" %}
For PostgreSQL users, you can run the sink without annotations. The sink will infer the name of the table using the name of the messages that you output.
{% endhint %}
When you run the sink without explicit table annotations, it automatically infers table structures using the following rules:
### Default Table Inference
**1. Single Table from Root Message**
If your output message contains no repeated fields of message types, the entire message becomes a single table:
```proto
message PoolCreated {
string pool_address = 1;
string token0 = 2;
string token1 = 3;
uint64 block_number = 4;
}
```
This creates a table named `pool_created` where each Substreams output message becomes one row.
**2. Multiple Tables from Repeated Fields**
If your output message contains repeated fields of message types, each repeated field becomes a separate table:
```proto
message BlockEvents {
repeated SwapEvent swaps = 1;
repeated MintEvent mints = 2;
repeated BurnEvent burns = 3;
}
message SwapEvent {
string pool = 1;
string amount0 = 2;
string amount1 = 3;
}
message MintEvent {
string pool = 1;
string liquidity = 2;
}
```
This creates three tables: `swaps`, `mints`, and `burns`. All swap events from all processed blocks are collected into the `swaps` table, and so on.
The table names are automatically derived from the field names by converting them to snake\_case. For example, `SwapEvent` becomes `swap_event`, but when used as a repeated field name like `swaps`, it uses the field name directly.
# Using Database Changes Mode
If you require more control over the tables and the data that you want to store into the database, then creating a `db_out` module would be the best option.
You will create a new module, `db_out`, which maps the output of your Substreams to the [DatabaseChanges data model](https://docs.rs/substreams-database-change/latest/substreams_database_change/pb/sf/substreams/sink/database/v1/struct.DatabaseChanges.html) — the format the SQL sink consumes in Database Changes Mode.
## Running the Sink
To index a `db_out` module, you will have to run two different commands: `substreams sink postgres setup` (or `substreams sink clickhouse setup`) to create the necessary tables from a given `schema.sql` file, and `substreams sink postgres` (or `substreams sink clickhouse`) to perform the actual execution.
```bash
substreams sink postgres setup --dsn
```
The `substreams.yaml` file of your package must contain the sink configuration:
```yaml
sink:
module: map_program_data
type: sf.substreams.sink.sql.v1.Service
config:
engine: postgres
schema: schema.sql
```
## Example: Pump.Fun
Consider that you want to dump all the Pump.Fun data decoded with an IDL into your database.
Clone the [Pump Fun Substreams GitHub repository](https://github.com/enoldev/pump-fun-substreams).
### Inpsect the Project
* Observe the `substreams.yaml` file:
```yaml
...
modules:
- name: map_program_data # 1.
kind: map
initialBlock: 298724475
inputs:
- map: solana:blocks_without_votes
output:
type: proto:substreams.v1.program.Data
blockFilter:
module: solana:program_ids_without_votes
query:
string: program:6EF8rrecthR5Dkzon8Nwu78hRvfCKubJ14M5uBEwF6P
- name: db_out # 2.
kind: map
initialBlock: 339837174
inputs:
- map: map_program_data
output:
type: proto:sf.substreams.sink.database.v1.DatabaseChanges
network: solana-mainnet
sink: # 3.
module: map_program_data
type: sf.substreams.sink.sql.v1.Service
config:
engine: postgres
```
1. The `map_program_data` module maps a Solana `Block` to the different instructions and events of the Pump.Fun IDL.
2. The `db_out` module maps the output of `map_program_data` to `DatabaseChanges`, a format that the SQL sink can understand.
3. The `sink` section defines the SQL sink configuration. In this example, the sink will map `db_out` to the tables of the database. **When using a `db_out` module, it is necessary to specify a `schema.sql` file**
### Run the Sink
To run the sink, you will need a Postgres database. You can use a Docker container to spin up one in your computer.
* Define the `DSN` string, which will contain the credentials of the database.
```bash
export DSN=postgres://myuser:mypassword@localhost:5432/mydatabase?sslmode=disable
```
* Configure the sink to create the necessary tables.
```bash
substreams sink postgres setup ./substreams.yaml --dsn $DSN
```
* Run the sink
```bash
substreams sink postgres ./substreams.yaml --dsn $DSN
```
# Migrating from substreams-sink-sql
The standalone `substreams-sink-sql` binary is now part of the `substreams` CLI as `substreams sink postgres` and `substreams sink clickhouse`. Existing databases keep working: the cursor tables and schemas are unchanged, so the new CLI resumes exactly where the standalone binary left off.
## Command mapping
The engine is now part of the command name and must match your DSN scheme. There is no `run` subcommand: the engine command itself runs the sink.
| substreams-sink-sql | substreams CLI |
| --------------------------------------- | --------------------------------------------------------------------------- |
| `run $DSN manifest.yaml 100:200` | `substreams sink postgres manifest.yaml -s 100 -t 200 --dsn $DSN` |
| `from-proto $DSN manifest.yaml` | `substreams sink postgres manifest.yaml --dsn $DSN` (mode is auto-detected) |
| `setup $DSN manifest.yaml` | `substreams sink postgres setup manifest.yaml --dsn $DSN` |
| `generate-csv $DSN manifest.yaml 0:100` | `substreams sink postgres generate-csv manifest.yaml -t 100 --dsn $DSN` |
| `inject-csv $DSN ./csv table 0:100` | `substreams sink postgres inject-csv ./csv table 0:100 --dsn $DSN` |
| `tools --dsn $DSN cursor read` | `substreams sink postgres tools cursor read --dsn $DSN` |
| `create-user ...` | removed |
For ClickHouse targets, replace `postgres` with `clickhouse` in every command. `generate-csv` and `inject-csv` are PostgreSQL-only.
There is no separate `from-proto` command anymore: the engine command (and `setup`) detects the mode from the output module's type. A module producing `sf.substreams.sink.database.v1.DatabaseChanges` runs in Database Changes Mode and uses your `schema.sql`; any other output type runs in Relational Mappings Mode, whose schema is derived from the protobuf definition.
## Flag changes
* The DSN is no longer a positional argument. Pass `--dsn`, or set the `SUBSTREAMS_SINK_DSN` environment variable. `${VAR}` expansion inside the DSN still works.
```bash
# before
substreams-sink-sql run "psql://user:pass@localhost:5432/db?sslmode=disable" manifest.yaml 100:200
# after
substreams sink postgres manifest.yaml -s 100 -t 200 --dsn "psql://user:pass@localhost:5432/db?sslmode=disable"
# or keep the DSN out of the command line entirely
export SUBSTREAMS_SINK_DSN="psql://user:pass@localhost:5432/db?sslmode=disable"
substreams sink postgres manifest.yaml -s 100 -t 200
```
* The block range is no longer a positional argument. Use `-s/--start-block` and `-t/--stop-block`, like `substreams run`. `inject-csv` keeps its positional `:` file range.
* ClickHouse flags lost their prefix and only exist on `substreams sink clickhouse`: `--cluster`, `--cursor-file-path`, `--sink-info-folder`, `--query-retry-count`, `--query-retry-sleep`.
* `--metrics-listen-addr` is replaced by the standard sink flag `--prometheus-addr` (same `localhost:9102` default).
* `--flush-interval` (deprecated alias) is gone; use `--batch-block-flush-interval`.
* The misspelled `--on-module-hash-mistmatch` alias is gone; use `--on-module-hash-mismatch`.
## Operators: Docker image and service arguments
* The Docker image changes from `ghcr.io/streamingfast/substreams-sink-sql` to `ghcr.io/streamingfast/substreams`. Both images use their binary as entrypoint, so only the container arguments change:
* before: `run $DSN /data/manifest.yaml 100:200 --on-module-hash-mismatch=warn`
* after: `sink postgres /data/manifest.yaml -s 100 -t 200 --dsn $DSN --on-module-hash-mismatch=warn`
* Instead of putting the DSN (and its password) in the arguments, you can set the `SUBSTREAMS_SINK_DSN` environment variable on the container.
* Prometheus scraping: `--metrics-listen-addr` is now `--prometheus-addr`, same `localhost:9102` default. Bind it to `0.0.0.0:9102` if you scrape from outside the container.
* pprof no longer listens by default; opt in with `--pprof-listen-addr`.
## Cursor compatibility
* Database Changes Mode stores its cursor in the same `cursors` table, keyed by module hash. Point the new CLI at the same database and it resumes from the stored cursor.
* Relational-mappings mode is also unchanged: `_cursor_` table on PostgreSQL, cursor file on ClickHouse (`--cursor-file-path`, previously `--clickhouse-cursor-file-path`, same `cursor.txt` default).
## Environment variables
`PG_DSN` / `CLICKHOUSE_DSN` were shell conventions from the old README, not read by the binary. The new CLI reads `SUBSTREAMS_SINK_DSN` when `--dsn` is not provided. Authentication is unchanged: `SUBSTREAMS_API_TOKEN`/`SUBSTREAMS_API_KEY` and `.substreams.env` work as with every other `substreams` command.
# Substreams:Stream
The **Substreams:Stream service** allows you to stream blockchain data from your [JavaScript](/how-to-guides/sinks/stream/javascript), [GO](/how-to-guides/sinks/stream/go), [Rust](https://github.com/streamingfast/substreams-sink-rust), or [Python](https://github.com/streamingfast/substreams-sink-examples/tree/master/python) application.
# JavaScript
The [Substreams JavaScript library](https://github.com/substreams-js/substreams-js) enables you to run a Substreams, just like you would through the CLI, but using JavaScript.
The library works both on the client-side and on the server-side, but with some small differences. Clone the [Substreams Sink Examples](https://github.com/streamingfast/substreams-sink-examples) repository contains examples several programming language. Then, move to the `javascript` folder.
Depending on your needs, you can use the `node` directory (which contains an example using server-side NodeJS) or the `web` directory (which contains an example using client-side JavaScript).
### Install the dependencies
The `package.json` contains all the necessary dependencies to run the application.
The NodeJS example uses `@connectrpc/connect-node`, while the Web example uses `@connectrpc/connect-web`.
{% tabs %}
{% tab title="NodeJS" %}
```json
{
"name": "substreams-js-node-example",
"version": "1.0.0",
"description": "",
"main": "index.js",
"dependencies": {
"@substreams/core": "^0.1.19",
"@substreams/manifest": "^0.0.9",
"@connectrpc/connect-node": "1.3.0",
"@connectrpc/connect": "1.3.0"
},
"type": "module"
}
```
{% endtab %}
{% tab title="Web" %}
```json
{
"name": "substreams-js-web-example",
"private": true,
"version": "0.0.0",
"type": "module",
"dependencies": {
"@substreams/core": "^0.1.19",
"@substreams/manifest": "^0.0.9",
"@connectrpc/connect-web": "1.4.0",
"@connectrpc/connect": "1.4.0"
},
"scripts": {
"dev": "vite",
"build": "vite build",
"preview": "vite preview"
},
"devDependencies": {
"vite": "^5.1.6"
}
}
```
{% endtab %}
{% endtabs %}
You can install the dependencies by running:
```bash
npm install
```
### Run the Application
{% tabs %}
{% tab title="NodeJS" %}
```bash
node index.js
```
You will start receiving data!
{% endtab %}
{% tab title="Web" %}
The Web example uses [ViteJS](https://vitejs.dev/) to create a development server that runs the application:
```bash
npm run dev
```
Then, you can navigate to `https://localhost:5173`. You will start receiving data!
{% endtab %}
{% endtabs %}
### Explore the Application
When you consume a Substreams package, a long-live gRPC connection is established, therefore, disconnections will happen and should be taken as *normal*. The Substreams keeps track of latest block you consumed by sending a **cursor** to your application. You **must** persist the cursor, so that in the case of a disconnection, you can restart the application from the latest consumed block.
{% tabs %}
{% tab title="NodeJS" %}
The `index.js` file contains the `main()` function, which runs an infinite loop and takes care of managing the disconnections.
```js
const TOKEN = process.env.SUBSTREAMS_API_TOKEN // Substreams token. By default it takes the SUBSTREAMS_API_TOKEN environment variable of your system
const ENDPOINT = "https://mainnet.eth.streamingfast.io" // Substreams endpoint. In this case, Ethereum mainnet
const SPKG = "https://spkg.io/streamingfast/ethereum-explorer-v0.1.2.spkg" // Substreams package. In this case, taken from the substreams.dev registry
const MODULE = "map_block_meta"
const START_BLOCK = '100000'
const STOP_BLOCK = '+10000'
/*
Entrypoint of the application.
Because of the long-running connection, Substreams will disconnect from time to time.
The application MUST handle disconnections and commit the provided cursor to avoid missing information.
*/
const main = async () => {
const pkg = await fetchPackage() // Download spkg
const registry = createRegistry(pkg);
// Create gRPC connection
const transport = createConnectTransport({
baseUrl: ENDPOINT,
interceptors: [createAuthInterceptor(TOKEN)],
useBinaryFormat: true,
jsonOptions: {
typeRegistry: registry,
},
});
// The infinite loop handles disconnections. Every time an disconnection error is thrown, the loop will automatically reconnect
// and start consuming from the latest committed cursor.
while (true) {
try {
await stream(pkg, registry, transport);
} catch (e) {
if (!isErrorRetryable(e)) {
console.log(`A fatal error occurred: ${e}`)
throw e
}
console.log(`A retryable error occurred (${e}), retrying after backoff`)
console.log(e)
// Add backoff from a an easy to use library
}
}
}
```
{% endtab %}
{% tab title="Web" %}
The `main.js` file contains the `main()` function, which runs an infinite loop and takes care of managing the disconnections.
```js
const TOKEN = "" // Substreams token. Put here your Substreams API token.
const ENDPOINT = "https://mainnet.eth.streamingfast.io" // Substreams endpoint. In this case, Ethereum mainnet
const SPKG = "https://spkg.io/streamingfast/ethereum-explorer-v0.1.2.spkg" // Substreams package. In this case, taken from the substreams.dev registry
const MODULE = "map_block_meta"
const START_BLOCK = '100000'
const STOP_BLOCK = '+10000'
/*
Entrypoint of the application.
Because of the long-running connection, Substreams will disconnect from time to time.
The application MUST handle disconnections and commit the provided cursor to avoid missing information.
*/
const main = async () => {
const pkg = await fetchPackage(); // Download spkg
const registry = createRegistry(pkg);
const transport = createConnectTransport({
baseUrl: ENDPOINT,
interceptors: [createAuthInterceptor(TOKEN)],
useBinaryFormat: true,
jsonOptions: {
typeRegistry: registry,
},
});
// The infinite loop handles disconnections. Every time an disconnection error is thrown, the loop will automatically reconnect
// and start consuming from the latest committed cursor.
while (true) {
try {
await stream(pkg, registry, transport);
} catch (e) {
if (!isErrorRetryable(e)) {
console.log(`A fatal error occurred: ${e}`)
throw e
}
console.log(`A retryable error occurred (${e}), retrying after backoff`)
console.log(e)
}
}
}
```
{% endtab %}
{% endtabs %}
The `stream()` function establishes the actual streaming connection by calling the `streamBlocks` function. The response of the function is a `StatefulResponse` object, which contains a progress message (containing useful information about the Substreams execution. The `handleProgressMessage()` function handles this message) and a response message (containing the message sent from the server. The `handleResponseMessage()` function decodes this message).
```js
const stream = async (pkg, registry, transport) => {
const request = createRequest({
substreamPackage: pkg,
outputModule: MODULE,
productionMode: true,
startBlockNum: START_BLOCK,
stopBlockNum: STOP_BLOCK,
startCursor: getCursor() ?? undefined
});
// Stream the blocks
for await (const statefulResponse of streamBlocks(transport, request)) {
/*
Decode the response and handle the message.
There different types of response messages that you can receive. You can read more about the response message in the docs [here](../../../references/reliability-guarantees.md).
*/
await handleResponseMessage(statefulResponse.response, registry);
/*
Handle the progress message.
Regardless of the response message, the progress message is always sent, and gives you useful information about the execution of the Substreams.
*/
handleProgressMessage(statefulResponse.progress, registry);
}
}
```
There are different kind of response messages that the server can send. The most common are ones `blockScopedData` and `blockUndoSignal`:
* `blockScopedData`: sent by the server whenever a new block is discovered in the blockchain. Contains all the block information that you can decode.
* `blockUndoSignal`: sent every time there is a fork in the blockchain. Because you have probably read incorrect blocks in the `blockScopedData` message, you must rewind back to the latest valid block.
```js
export const handleResponseMessage = async (response, registry) => {
switch(response.message.case) {
case "blockScopedData":
handleBlockScopedDataMessage(response.message.value, registry);
break;
case "blockUndoSignal":
handleBlockUndoSignalMessage(response.message.value);
break;
}
}
```
# Go
The [Substreams Go Sink library](https://github.com/streamingfast/substreams-sink) allows to you to programmatically stream a Substreams using the Go programming language. The library handles reconnections and provides best practices for error handling.
The [Substreams Sink Examples GitHub repository](https://github.com/streamingfast/substreams-sink-examples) contains an example that you can use as the starting point to build your custom sink logic. After cloning the repository, move to the `go` directory.
### Run the Program
This example is built in the form of a CLI by using the `cobra` library. You can run the program by running the following command structure:
```bash
go run . sink
```
In the following command, `go run .` is used to execute the `main.go` file. The `mainnet.eth.streamingfast.io:443 https://spkg.io/streamingfast/substreams-eth-block-meta-v0.4.3.spkg db_out` part of the command are useful parameters passed to the Go program (separated by a whitespace).
In the parameters, you pass the Substreams endpoint, the package, and the module to execute.
```bash
go run . sink mainnet.eth.streamingfast.io:443 https://github.com/streamingfast/substreams-eth-block-meta/releases/download/v0.5.1/substreams-eth-block-meta-v0.5.1.spkg db_out
```
**Inspect the Code**
The example contains code comments, which are very useful to understand and adjust the code to your logic needs. Let's inspect the most important parts of the code:
```go
var expectedOutputModuleType = string(new(pbchanges.DatabaseChanges).ProtoReflect().Descriptor().FullName()) // 1.
// ...code omitted...
func main() {
logging.InstantiateLoggers()
Run(
"sinker",
"Simple Go sinker sinking data to your terminal",
Command(sinkRunE,
"sink []",
"Run the sinker code",
RangeArgs(2, 3),
Flags(func(flags *pflag.FlagSet) {
sink.AddFlagsToSet(flags)
}),
),
OnCommandErrorLogAndExit(zlog),
)
}
```
Create a new sink object from the parameters passed to the program:
```go
func sinkRunE(cmd *cobra.Command, args []string) error {
endpoint := args[0]
manifestPath := args[1]
// Find the output module in the manifest sink.moduleName configuration. If you have no
// such configuration, you can change the value below and set the module name explicitly.
outputModuleName := sink.InferOutputModuleFromPackage
if len(args) == 3 {
outputModuleName = args[2]
}
sinker, err := sink.NewFromViper(
cmd,
// Should be the Protobuf full name of the map's module output, we use
// `substreams-database-changes` imported type. Adjust to your needs.
//
// If your Protobuf is defined in your Substreams manifest, you can use `substream protogen`
// while being in the same folder that contain `buf.gen.yaml` file in the example folder.
expectedOutputModuleType,
endpoint,
manifestPath,
outputModuleName,
// This is the block range, in our case defined as Substreams module's start block and up forever
":",
zlog,
tracer,
)
cli.NoError(err, "unable to create sinker: %s", err)
sinker.OnTerminating(func(err error) {
cli.NoError(err, "unexpected sinker error")
zlog.Info("sink is terminating")
})
// You **must** save the cursor somewhere, saving it to memory while
// make it last until the process is killed, in which on re-start, the
// sinker will resume from start block again. You can simply read from
// a file the string value of the cursor and use `sink.NewCursor(value)`
// to load it.
// Blocking call, will return on sinker termination
sinker.Run(context.Background(), sink.NewBlankCursor(), sink.NewSinkerHandlers(handleBlockScopedData, handleBlockUndoSignal))
return nil
}
```
It is necessary to handle two kind of Substreams response messages:
* `blockScopedData`: sent by the server whenever a new block is discovered in the blockchain. Contains all the block information that you can decode.
* `blockUndoSignal`: sent every time there is a fork in the blockchain. Because you have probably read incorrect blocks in the `blockScopedData` message, you must rewind back to the latest valid block.
When you run the sinker, you pass two different functions to handle these messages:
```go
sinker.Run(context.Background(), sink.NewBlankCursor(), sink.NewSinkerHandlers(handleBlockScopedData, handleBlockUndoSignal))
```
# Substreams:PubSub
`substreams sink pubsub` publishes the output of any module to a [Google Cloud Pub/Sub](https://cloud.google.com/pubsub) topic. A block message is the [webhook sink](https://github.com/streamingfast/substreams/tree/develop/sink/webhook/README.md)'s batch JSON. A module that emits `sf.substreams.sink.pubsub.v1.Publish` is published in the [substreams-sink-pubsub](https://github.com/streamingfast/substreams-sink-pubsub) format described under [Modules that emit Publish](#modules-that-emit-publish).
```bash
substreams sink pubsub --project my-gcp-project my-topic ./my-substreams.spkg map_events -e
```
`` is a topic id, used with `--project`, or a full `projects//topics/` path. Credentials are [application default credentials](https://cloud.google.com/docs/authentication/application-default-credentials). When `PUBSUB_EMULATOR_HOST` is set, the sink publishes to that emulator.
Every block message has attribute `type=batch`:
```json
{
"manifest": {"moduleName": "map_events", "type": "sf.example.v1.Events"},
"blocks": [
{"clock": {"number": 12000000, "id": "0xabc", "timestamp": "2024-01-01T00:00:00Z"}, "data": {}}
]
}
```
`data` is that block's module output as JSON. While Substreams is not live, `--pubsub-batch-max-blocks=N` puts up to N blocks in `blocks`. A live block is published in the same JSON with only that block. `0` publishes one block per message. `--pubsub-batch-max-bytes` caps the body, and `--pubsub-batch-max-wait` bounds how long a batch waits.
Message ordering is enabled. Every message uses the output module's name as its ordering key, so a subscription created with message ordering enabled receives that module's messages in publish order.
`--pubsub-undo` publishes a reorg notification on the same topic (`type=undo`) naming the last valid block. Without it, the cursor still moves back and the blocks that replace the undone ones are published as usual.
The cursor is stored in `--state-file` (`./state.cursor` by default). A payload that could not be published is kept in `.pending`, the reason is written to `--pubsub-termination-log` when that file already exists, and the process exits with status 75 (`--pubsub-on-failure=exit`, the default). The next start publishes that payload before it connects to Substreams. The pending file and the exit status match the webhook sink. `--pubsub-on-failure=skip` drops a block after the last retry and continues. An undo notification is never dropped.
## Getting Started
If you are new to Substreams, start with [Develop Substreams](/how-to-guides/develop-your-own-substreams).
Create a topic in Google Cloud Pub/Sub, then publish any module to it with `substreams sink pubsub`:
```bash
substreams sink pubsub --project -e
```
* `endpoint`: the Substreams endpoint. [Chains & Endpoints](/reference-material/chain-support/chains-and-endpoints) lists them.
* `project_id`: the Google Cloud project ID. Omit `--project` when `` is a full `projects//topics/` path.
* `substreams_manifest`: path to the Substreams manifest or package.
* `substreams_module_name`: the output module. Any module works. Its output is published as the webhook sink's batch JSON. A module that emits `sf.substreams.sink.pubsub.v1.Publish` is published in the substreams-sink-pubsub format. See [Modules that emit Publish](#modules-that-emit-publish).
* `topic_name`: the Pub/Sub topic ID.
## Modules that emit Publish
A module whose output is [`sf.substreams.sink.pubsub.v1.Publish`](https://github.com/streamingfast/substreams-sink-pubsub/blob/develop/proto/sf/substreams/sink/pubsub/v1/pubsub.proto) is published by `substreams sink pubsub` in the [substreams-sink-pubsub](https://github.com/streamingfast/substreams-sink-pubsub) format. Run it with the same command as any other module:
```bash
substreams sink pubsub --project -e
```
Each `Publish.Message` becomes one Pub/Sub message. The bytes and attributes are kept, attribute `Cursor` is the sink cursor, and the ordering key is the zero-padded block number and the message index (`000000012_00000`). A reorg is a message with attributes `LastValidBlock`, `Step=Undo`, and `Cursor`, and no body. That reorg message is published whether or not `--pubsub-undo` is set. `--pubsub-batch-max-blocks` does not apply to this module.
The standalone `substreams-sink-pubsub` binary publishes that same format. Examples of modules that emit `Publish` are in the `examples` directory of that repository.
# ProtoJSON
## Overview
The `substreams sink protojson` tool provides the ability to write data from a Substreams directly to JSONL files, encoded with ProtoJSON encoding.
For example, you could extract all of the ERC20, ERC721, and ERC1155 transfers from the Ethereum blockchain and persist the data to a files-based store.
Most existing Substreams can be used to write data to ProtoJSONL files directly.
## Running
* Example to get USDT transfers into protojson
```
# Extract USDT events to ProtoJSONL of a 200 blocks range, in 100-blocks-chunks
substreams sink protojson substreams_ethereum_usdt@v0.1.0 map_events -o ./transfers --filter=.transfers[] -n 100 -s 20000000 -t +200
```
This will create the following files:
```
transfers/0020000100-0020000200.jsonl
transfers/0020000000-0020000100.jsonl
```
With content like this (compacted):
```json
{
"evtTxHash": "8cd7657e49e207d2eef05776820d6234b5c33482f53c5ec4db5f3220cc029c06",
"evtIndex": 135,
"evtBlockTime": "2024-06-01T22:56:59Z",
"evtBlockNumber": "20000100",
"from": "ZfU/nt+BtrSyp9QMPKVgVNTJO5o=",
"to": "cmjDmMZ/nem5tGPHnroITwvYNo4=",
"value": "421253867"
}
```
* Example to get everything related to USDT into protojson
```
# Extract USDT events to ProtoJSONL of a 200 blocks range, in 100-blocks-chunks
substreams sink protojson substreams_ethereum_usdt@v0.1.0 map_events -o ./usdt_output --filter=. -n 100 -s 20000000 -t +200
```
This will create the following files:
```
usdt_output/0020000100-0020000200.jsonl
usdt_output/0020000000-0020000100.jsonl
```
With content like this (compacted):
```json
{
"transfers": [
{
"evtTxHash": "8cd7657e49e207d2eef05776820d6234b5c33482f53c5ec4db5f3220cc029c06",
"evtIndex": 135,
"evtBlockTime": "2024-06-01T22:56:59Z",
"evtBlockNumber": "20000100",
"from": "ZfU/nt+BtrSyp9QMPKVgVNTJO5o=",
"to": "cmjDmMZ/nem5tGPHnroITwvYNo4=",
"value": "421253867"
},
{ ... },
}
```
# Files
### Purpose
This documentation exists to assist you in understanding and beginning to use the StreamingFast [`substreams-sink-files`](https://github.com/streamingfast/substreams-sink-files) tool. The Substreams module paired with this tutorial is a basic example of the elements required for sinking blockchain data into files-based storage solutions.
### Overview
The `substreams-sink-files` tool provides the ability to pipe data extracted from a blockchain to various types of files-based persistence solutions.
For example, you could extract all of the ERC20, ERC721, and ERC1155 transfers from the Ethereum blockchain and persist the data to a files-based store.
It supports CSV, and Parquet format. (for ProtoJSON, use `substreams sink protojson` command: [ProtoJSON](/how-to-guides/sinks/protojson))
See [substreams-sink-files README](https://github.com/streamingfast/substreams-sink-files) for details
# \[Community Sinks]
# MongoDB
It is possible to send Substreams data to MongoDB. See the GitHub repository for an early version of the MongoDB Substreams Sink:
*
# Key-Value Store
## Purpose
This documentation will assist you in using [`substreams-sink-kv`](https://github.com/streamingfast/substreams-sink-kv) to write data from your existing substreams into a key-value store and serve it back through Connect-Web/GRPC.
## Overview
`substreams-sink-kv` works by reading the output of specially-designed substreams module (usually called `kv_out`) that produces data in a protobuf-encoded structure called `sf.substreams.sink.kv.v1.KVOperations`.
The data is written to a key-value store. Currently supported KV store are Badger, BigTable and TiKV.
A Connect-Web interface makes the data available directly from the `substreams-sink-kv` process. Alternatively, you can consume the data directly from your key-value store.
## Requirements
* An existing substreams (including `substreams.yaml` and Rust code) that you want to instrument for `substreams-sink-kv`.
* A key-value store where you want to send your data (a badger local file can be used for development)
* Knowledge about Substreams development (start [here](/tutorials/intro-to-tutorials))
* Rust installation and compiler
## Installation
* Install [substreams-sink-kv CLI](https://github.com/streamingfast/substreams-sink-kv/releases)
* Install [substreams CLI](/how-to-guides/installing-the-cli)
* Install [grpcurl](https://github.com/fullstorydev/grpcurl/releases) to easily read the data back from the KV store
## Instrumenting your Substreams
### Assumptions
The following instructions will assume that you are instrumenting [substreams-eth-block-meta](https://github.com/streamingfast/substreams-eth-block-meta), which contains:
* A store `store_block_meta_end` defined like [this](https://github.com/streamingfast/substreams-eth-block-meta/blob/v0.4.0/substreams.yaml#L29-L34):
```yaml
# substreams.yaml
...
- name: store_block_meta_end
kind: store
updatePolicy: set
valueType: proto:eth.block_meta.v1.BlockMeta
inputs:
- source: sf.ethereum.type.v2.Block
```
* a `eth.block_meta.v1.BlockMeta` protobuf structure like [this](https://github.com/streamingfast/substreams-eth-block-meta/blob/v0.4.0/proto/block_meta.proto#L7-L12):
```
message BlockMeta {
uint64 number = 1;
bytes hash = 2;
bytes parent_hash = 3;
google.protobuf.Timestamp timestamp = 4;
}
```
> **Note** The [substreams-eth-block-meta](https://github.com/streamingfast/substreams-eth-block-meta) is already instrumented for sink-kv, the proposed changes here are a simplified version of what has been implemented. Please adjust the proposed code to your own substreams.
### Import the Cargo module
{% hint style="info" %}
**Compatibility**: `substreams-sink-kv` 0.2.0 generates its protobuf types with buffa and requires `substreams` 0.8.0 or above. For `substreams` 0.5 to 0.7, pin `substreams-sink-kv = "0.1.3"`, which generates its types with prost. See [Migrating from prost to buffa](/reference-material/migrating-to-buffa).
{% endhint %}
1. Add the `substreams-sink-kv` crate to your `Cargo.toml`:
```toml
# Cargo.toml
[dependencies]
substreams-sink-kv = "0.2"
# ...
```
1. Add `map` module implementation function named `kv_out` to your `src/lib.rs`:
```yaml
# substreams.yaml
...
- name: kv_out
kind: map
inputs:
- store: store_block_meta_end
mode: deltas
output:
type: proto:sf.substreams.sink.kv.v1.KVOperations
```
1. Add a `kv_out` public function to your `src/lib.rs`:
```
// src/lib.rs
#[path = "kv_out.rs"]
mod kv;
use substreams_sink_kv::pb::sf::substreams::sink::kv::v1::KVOperations;
#[substreams::handlers::map]
pub fn kv_out(
deltas: store::Deltas>,
) -> Result {
// Create an empty 'KVOperations' structure
let mut kv_ops: KVOperations = Default::default();
// Call a function that will push key-value operations from the deltas
kv::process_deltas(&mut kv_ops, deltas);
// Here, we could add more operations to the kv_ops
// ...
Ok(kv_ops)
}
```
1. Add the `kv::process_deltas` transformation function referenced in the last snippet:
```
// src/kv_out.rs
use substreams::proto;
use substreams::store::{self, DeltaProto};
use substreams_sink_kv::pb::sf::substreams::sink::kv::v1::KVOperations;
use crate::pb::block_meta::BlockMeta;
pub fn process_deltas(ops: &mut KVOperations, deltas: store::Deltas>) {
use substreams::pb::substreams::store_delta::Operation;
for delta in deltas.deltas {
match delta.operation {
// KV Operations do not distinguish between Create and Update.
Operation::Create | Operation::Update => {
let val = proto::encode(&delta.new_value);
ops.push_new(delta.key, val, delta.ordinal);
}
Operation::Delete => ops.push_delete(&delta.key, delta.ordinal),
x => panic!("unsupported operation {:?}", x),
}
}
}
```
## Test your substreams
1. Compile your changes in your rust code:
```
substreams build
```
1. Run with `substreams` command directly:
```bash
substreams run -e mainnet.eth.streamingfast.io:443 substreams.yaml kv_out --start-block 1000000 --stop-block +1
```
> **Note** To connect to a public StreamingFast substreams endpoint, you will need an authentication token, follow this [guide](/how-to-guides/installing-the-cli/authentication) to obtain one.
1. Run with `substreams-sink-kv`:
```bash
substreams-sink-kv \
run \
"badger3://$(pwd)/badger_data.db" \
mainnet.eth.streamingfast.io:443 \
manifest.yaml \
kv_out
```
You should see output similar to this one:
```bash
2023-01-12T10:08:31.803-0500 INFO (sink-kv) starting prometheus metrics server {"listen_addr": "localhost:9102"}
2023-01-12T10:08:31.803-0500 INFO (sink-kv) sink to kv {"dsn": "badger3:///Users/stepd/repos/substreams-sink-kv/badger_data.db", "endpoint": "mainnet.eth.streamingfast.io:443", "manifest_path": "https://github.com/streamingfast/substreams-eth-block-meta/releases/download/v0.4.0/substreams-eth-block-meta-v0.4.0.spkg", "output_module_name": "kv_out", "block_range": ""}
2023-01-12T10:08:31.803-0500 INFO (sink-kv) starting pprof server {"listen_addr": "localhost:6060"}
2023-01-12T10:08:31.826-0500 INFO (sink-kv) reading substreams manifest {"manifest_path": "https://github.com/streamingfast/substreams-eth-block-meta/releases/download/v0.4.0/substreams-eth-block-meta-v0.4.0.spkg"}
2023-01-12T10:08:32.186-0500 INFO (sink-kv) validating output store {"output_store": "kv_out"}
2023-01-12T10:08:32.186-0500 INFO (sink-kv) resolved block range {"start_block": 0, "stop_block": 0}
2023-01-12T10:08:32.186-0500 INFO (sink-kv) starting to listen on {"addr": "localhost:8000"}
2023-01-12T10:08:32.186-0500 INFO (sink-kv) starting stats service {"runs_each": "2s"}
2023-01-12T10:08:32.186-0500 INFO (sink-kv) no block data buffer provided. since undo steps are possible, using default buffer size {"size": 12}
2023-01-12T10:08:32.186-0500 INFO (sink-kv) starting stats service {"runs_each": "2s"}
2023-01-12T10:08:32.186-0500 INFO (sink-kv) ready, waiting for signal to quit
2023-01-12T10:08:32.186-0500 INFO (sink-kv) launching server {"listen_addr": "localhost:8000"}
2023-01-12T10:08:32.187-0500 INFO (sink-kv) serving plaintext {"listen_addr": "localhost:8000"}
2023-01-12T10:08:32.278-0500 INFO (sink-kv) session init {"trace_id": "a3c59bd7992c433402b70f9541565d2d"}
2023-01-12T10:08:34.186-0500 INFO (sink-kv) substreams sink stats {"db_flush_rate": "10.500 flush/s (21 total)", "data_msg_rate": "0.000 msg/s (0 total)", "progress_msg_rate": "0.000 msg/s (0 total)", "block_rate": "0.000 blocks/s (0 total)", "flushed_entries": 0, "last_block": "None"}
2023-01-12T10:08:34.186-0500 INFO (sink-kv) substreams sink stats {"progress_msg_rate": "16551.500 msg/s (33103 total)", "block_rate": "10941.500 blocks/s (21883 total)", "last_block": "#291883 (66d03f819dde948b297c8d582889246d7ba11a5b947335497f8716a7b608f78e)"}
```
> **Note** This writes the data to a local folder "./badger\_data.db/" in Badger format. You can `rm -rf ./badger_data.db` between your tests to cleanup all existing data.
1. Look at the stored data
You can scan the whole dataset using the 'Scan' command:
```bash
grpcurl --plaintext -d '{"begin": "", "limit":100}' localhost:8000 sf.substreams.sink.kv.v1.Kv/Scan
```
You can look at data by key prefix:
```bash
grpcurl --plaintext -d '{"prefix": "day:first:201511", "limit":31}' localhost:8000 sf.substreams.sink.kv.v1.Kv/GetByPrefix
```
## Consume the key-value data from a web-page using Connect-Web
The [Connect-Web](https://connectrpc.com/docs/web/getting-started/) library allows you to quickly bootstrap a web-based client for your key-value store.
### Requirements
* [NodeJS](https://nodejs.dev/download)
* [npm](https://docs.npmjs.com/downloading-and-installing-node-js-and-npm)
* [buf CLI](https://docs.buf.build/installation)
### Start from our example for `substreams-eth-block-meta`
You can checkout and run our connect-web-example like this:
```bash
git clone git@github.com:streamingfast/substreams-sink-kv
cd substreams-sink-kv/connect-web-example
npm install
npm run dev
```
Then, enter a key in the text box. The app currently only decodes `eth.block_meta.v1.BlockMeta`, so you will likely receive the corresponding value encoded in hex string.
To decode the value of your own data structures, add your `.proto` files under `proto/` and generate Rust bindings like this:
```bash
npm run buf:generate
```
You should see this output:
```
> connect-web-example@0.0.0 buf:generate
> buf generate ../proto/substreams/sink/kv/v1 && buf generate ./proto
```
Then, modify the code from `src/App.tsx` to decode your custom type, from this:
```rust
import { BlockMeta } from "../gen/block_meta_pb";
...
const blkmeta = BlockMeta.fromBinary(response.value);
output = JSON.stringify(blkmeta, (key, value) => {
if (key === "hash") {
return "0x" + bufferToHex(blkmeta.hash);
}
if (key === "parentHash") {
return "0x" + bufferToHex(blkmeta.parentHash);
}
return value;
}, 2);
```
to this:
```rust
import { MyData } from "../gen/my_data_pb";
...
const decoded = MyData.fromBinary(response.value);
output = JSON.stringify(decoded, null, 2);
```
### Bootstrap your own application
If you want to start with an empty application, you can follow [these instructions](https://github.com/streamingfast/substreams-sink-kv/tree/main/connect-web-example/README.md)
## Sending to a production key-value store
Until now, we've used the **badger** database as a store, for simplicity. However, `substreams-sink-kv` also supports **TiKV** and **bigtable**.
* `tikv://pd0,pd1,pd2:2379?prefix=namespace_prefix`
* `bigkv://project.instance/namespace-prefix?createTables=true`
See [kvdb](https://github.com/streamingfast/kvdb) for more details.
## Conclusion and review
The ability to route data extracted from the blockchain by using Substreams is powerful and useful. Key-value stores aren't the only type of sink the data extracted by Substreams can be piped into. Review the core Substreams sinks documentation for [additional information on other types of sinks](/how-to-guides/sinks) and sinking strategies.
# Prometheus
> `substreams-sink-prometheus` is a tool that allows developers to pipe data extracted metrics from a blockchain into a Prometheus time series database.
## 📖 Documentation
###
### Further resources
* [Substreams documentation](/getting-started)
* [Prometheus documentation](https://prometheus.io)
## CLI
[**Use pre-built binaries**](https://github.com/pinax-network/substreams-sink-prometheus/releases)
* [x] MacOS
* [x] Linux
* [x] Windows
**Install** globally via npm
```
$ npm install -g substreams-sink-prometheus
```
**Run**
```
$ substreams-sink-prometheus run [options]
```
> Open the browser at
## 🛠 Feature Roadmap
### [Gauge Metric](https://pkg.go.dev/github.com/prometheus/client_golang/prometheus#Gauge)
* [x] Set
* [x] Inc
* [x] Dec
* [x] Add
* [x] Sub
* [x] SetToCurrentTime
* [x] Remove
* [x] Reset
### [Counter Metric](https://pkg.go.dev/github.com/prometheus/client_golang/prometheus#Counter)
* [x] Inc
* [x] Add
* [x] Remove
* [x] Reset
### [Histogram Metric](https://pkg.go.dev/github.com/prometheus/client_golang/prometheus#Histogram)
* [ ] Observe
* [ ] buckets
* [ ] zero
### [Summary Metric](https://pkg.go.dev/github.com/prometheus/client_golang/prometheus#Summary)
> Summaries calculate percentiles of observed values.
* [ ] Observe
* [ ] percentiles
* [ ] maxAgeSeconds
* [ ] ageBuckets
* [ ] startTimer
### [Registry](https://pkg.go.dev/github.com/prometheus/client_golang/prometheus#Registry)
* [ ] Clear
* [ ] SetDefaultLabels
* [ ] RemoveSingleMetric
## Install
```bash
$ cargo add substreams-sink-prometheus
```
## Quickstart
{% hint style="warning" %}
**Compatibility**: The `substreams-sink-prometheus` crate generates its protobuf types with prost, which does not compile against `substreams` 0.8.0 and above, and its repository is archived. Pin a pre-0.8 row for a module that uses it. See [Migrating from prost to buffa](/reference-material/migrating-to-buffa).
{% endhint %}
**Cargo.toml**
```toml
[dependencies]
substreams = "0.5"
substreams-sink-prometheus = "0.1"
```
**src/lib.rs**
```rust
use std::collections::HashMap;
use substreams::prelude::*;
use substreams::errors::Error;
use substreams_sink_prometheus::{PrometheusOperations, Counter, Gauge};
#[substreams::handlers::map]
fn prom_out(
... some stores ...
) -> Result {
// Initialize Prometheus Operations container
let mut prom_ops: PrometheusOperations = Default::default();
// Counter Metric
// ==============
// Initialize Gauge with a name & labels
let mut counter = Counter::from("counter_name");
// Increments the Counter by 1.
prom_ops.push(counter.inc());
// Adds an arbitrary value to a Counter. (Returns an error if the value is < 0.)
prom_ops.push(counter.add(123.456));
// Labels
// ======
// Create a HashMap of labels
// Labels represents a collection of label name -> value mappings.
let labels1 = HashMap::from([("label1".to_string(), "value1".to_string())]);
let mut labels2 = HashMap::new();
labels2.insert("label2".to_string(), "value2".to_string());
// Gauge Metric
// ============
// Initialize Gauge
let mut gauge = Gauge::from("gauge_name").with(labels1);
// Sets the Gauge to an arbitrary value.
prom_ops.push(gauge.set(88.8));
// Increments the Gauge by 1.
prom_ops.push(gauge.inc());
// Decrements the Gauge by 1.
prom_ops.push(gauge.dec());
// Adds an arbitrary value to a Gauge. (The value can be negative, resulting in a rease of the Gauge.)
prom_ops.push(gauge.add(50.0));
prom_ops.push(gauge.add(-10.0));
// Subtracts arbitrary value from the Gauge. (The value can be negative, resulting in an rease of the Gauge.)
prom_ops.push(gauge.sub(25.0));
prom_ops.push(gauge.sub(-5.0));
// Set Gauge to the current Unix time in seconds.
prom_ops.push(gauge.set_to_current_time());
// Remove metrics for the given label values
prom_ops.push(gauge.remove(labels2));
// Reset gauge values
prom_ops.push(gauge.reset());
Ok(prom_ops)
}
```
# Publishing a Substreams Package
In this guide, you'll learn how to publish a Substreams package to the [Substreams Registry](https://substreams.dev).
### Prerequisites
* You must have the Substreams CLI installed.
* You must have a Substreams package (`.spkg`) that you want to publish.
### Step 1: Run the `substreams publish` Command
1. In a command-line terminal, run `substreams publish .spkg`.
2. If you do not have a token set in your computer, navigate to `https://substreams.dev/me`.
### Step 2: Get a Token in the Substreams Registry
1. In the Substreams Registry, log in with your GitHub account.
2. Create a new token and copy it in a safe location.
### Step 3: Authenticate in the Substreams CLI
1. Back in the Substreams CLI, paste the previously generated token.
2. Lastly, confirm that you want to publish the package.
That's it! You have successfully published a package in the Substreams registry.
# CLI Reference
StreamingFast Substreams command line interface (CLI)
## `substreams` CLI reference overview
The `substreams` command line interface (CLI) is the primary user interface and the main tool for sending requests and receiving data.
The `substreams` CLI exposes many commands to developers enabling a range of features.
{% hint style="info" %}
**Note**: When a package is specified, it is optional. If you do use it, you can use:
* Local `substreams.yaml` configuration files
* Local `.spkg` package files
* Remote `.spkg` package URLs
* Local directory containing a `substreams.yaml` file
* Standard input by using `"-"` as the manifest path
If you choose to not use it, make sure that you are in a directory that contains a substreams.yaml file. Otherwise, you will get a usage error back.
**Stdin Support**: Commands that accept manifest files (`build`, `run`, `gui`, `info`, `graph`, `pack`, `protogen`, `inspect`, `registry publish`, `registry verify`, `service deploy`, `service update`) all support reading the manifest from standard input by specifying `"-"` as the manifest path. This enables dynamic manifest generation and preprocessing workflows.
{% endhint %}
### **`init`**
The `init` command allows you to initialize a Substreams project for several blockchains. It is a conversational-like command: you will be asked several questions and a project with the specified features will be created for you.
The options included in the `init` command will evolve over time, but every blockchain should, at least, contain one option.
```bash
substreams init
```
### **`build`**
The `build` command:
* Generates the necessary Protobufs specified in the `substreams.yaml` file.
* Compiles the Rust code.
* Creates a Substreams package file (`.spkg`).
```bash
substreams build
```
#### Performance optimization
The `build` command uses hash-based caching to avoid regenerating proto files when they haven't changed. This significantly improves build performance by:
* Computing a hash of proto files, exclude paths, and generation settings
* Storing the hash in a `.last_generated_hash` file in the output directory
* Skipping proto generation when the hash matches and generated files exist
* Displaying status messages indicating whether proto generation was skipped or run
```bash
# Example output when proto definitions haven't changed:
Proto definitions unchanged, skipping buf generate (hash: a1b2c3d4e5f6)
# Example output when proto definitions have changed:
Proto definitions changed or no previous generation found, running buf generate (hash: f6e5d4c3b2a1)
```
This optimization is particularly beneficial for:
* Iterative development workflows
* CI/CD pipelines with unchanged proto definitions
* Large projects with extensive proto files
#### Reading manifest from stdin
The `build` command supports reading the manifest from stdin by using `--manifest "-"`. This allows for dynamic manifest generation and processing pipelines.
```bash
cat substreams.yaml | substreams build --manifest "-"
```
**Example with `envsubst`**:
```bash
# Generate manifest dynamically with environment variable substitution
envsubst < substreams.yaml.template | substreams build --manifest "-"
```
{% hint style="info" %}
When using standard input mode (`"-"`), file path resolution within the Substreams manifest is done relative to the current working directory where the command is executed, not relative to the original manifest file location.
{% endhint %}
This approach is useful for:
* Dynamic configuration using environment variables
* Pre-processing manifest files with template tools
* CI/CD pipelines with dynamic manifest generation
### **`run`**
The `run` command connects to a Substreams endpoint and begins processing data. It supports reading manifest from stdin using `"-"`.
{% code title="run command" overflow="wrap" %}
```bash
substreams run -e mainnet.eth.streamingfast.io:443 \
-t +1 \
./substreams.yaml \
module_name
# Or read from stdin:
cat substreams.yaml | substreams run -e mainnet.eth.streamingfast.io:443 -t +1 "-" module_name
```
{% endcode %}
The details of the run command are:
* `-e mainnet.eth.streamingfast.io:443` is the endpoint of the provider running your Substreams.
* `-t +1` or `--stop-block` only requests a single block; the stop block is the manifest's `initialBlock` + 1.
* `substreams.yaml` is the path where you have defined your [Substreams manifest](/reference-material/manifest-and-components/manifests). You can use a `.spkg` or `substreams.yaml` configuration file.
* `module_name` is the module we want to `run`, referring to the module name [defined in the Substreams manifest](https://docs.substreams.dev/reference-material/pages/idKkQS8zf5Sin5BFEUJn#modules-.name).
{% hint style="success" %}
**Tip**: Passing a different `-s` or `--start-block` runs prior modules at a higher speed. Output is provided at the requested start block, keeping snapshots along the way if you want to process it again.
{% endhint %}
#### Headers
The `-H` option of the `run` or `gui` command allows you to dynamically pass headers with the gRPC request. This is useful when overriding default parameters in the Substreams execution.
**X-Substreams-Parallel-Workers Header**
The `X-Substreams-Parallel-Workers` header sets the number of parallel jobs to use in the Substreams execution. By default, 10 jobs are used. Most authentication backends will prevent setting this header to a higher value than the what the auth provides.
```bash
substreams run -e mainnet.eth.streamingfast.io:443 \
-t +1 \
-H "X-Substreams-Parallel-Workers: 20" \
./substreams.yaml \
module_name
```
#### Run example with output
{% code title="substreams run " overflow="wrap" %}
```bash
$ substreams run -e mainnet.eth.streamingfast.io:443 \
https://github.com/Jannis/gravity-substream/releases/download/v0.0.1/gravity-v0.1.0.spkg \
gravatar_updates -o json
```
{% endcode %}
The output of the `gravatar_updates` module starting at block `6200807` will print a message resembling:
{% code title="run output" %}
```bash
{
"updates": [
{
"id": "39",
"owner": "0xaadcc13071fdf9c73cfbb8d97639ea68aa6fd1d2",
"displayName": "alex | OpenSea",
"imageUrl": "https://ucarecdn.com/13a67247-cb89-417a-92d2-50a7d7aa481c/-/crop/382x382/0,0/-/preview/"
}
]
}
...
```
{% endcode %}
{% hint style="info" %}
**Note**: The `-o` or `--output` flag alters the output format.
{% endhint %}
The available output display options are:
* `ui`, a nicely formatted, UI-driven interface, displaying progress information and execution logs.
* `json`, an indented stream of data, **not** displaying progress information or logs, only data output for blocks proceeding the start block.
* `jsonl`, same as `json` showing every individual output on a single line.
### `gui`
The `gui` command pops up a terminal-based graphical user interface. It supports reading manifest from stdin using `"-"`.
Its parameters are very similar to those of `run`, but the `gui` command provides a UI to navigate the results instead of a stream of data.
#### Replay mode
When you run a `gui` session, a file called `replay.log` gets written with the contents of the streamed data that persists after closing the GUI.
You can reload the data without hitting the server again using `--replay`. The data is immediately reloaded in the GUI, ready for more inspection.
#### GUI Cheatsheet
## Cheatsheet
These are the shortcuts that you can use to navigate the GUI. You can always get more information by pressing the `?` key.
| Function | Keys |
| ----------------------------------------------- | ------------------------------ |
| Switch screen (`Request`, `Progress`, `Output`) | `tab` |
| Restart | `r` |
| Quit | `q` |
| Navigate Blocks - Forward | `p` |
| Navigate Blocks - Backwards | `o` |
| Navigate Blocks - Go To | `=` + *block number* + `enter` |
| Navigate Modules - Forward | `i` |
| Navigate Modules - Backwards | `u` |
| Search | `/` + *text* + `enter` |
| Commands information | `?` |
### `pack` **(DEPRECATED)**
**(DEPRECATED: use `build` instead)**
The `pack` command builds a shippable, importable package from a `substreams.yaml` manifest file. It supports reading manifest from stdin using `"-"`.
{% code title="pack command" overflow="wrap" %}
```bash
$ substreams pack ./substreams.yaml
```
{% endcode %}
The output of the `pack` command will print a message resembling:
{% code title="pack output" overflow="wrap" %}
```bash
...
Successfully wrote "your-package-v0.1.0.spkg".
```
{% endcode %}
### `info`
The `info` command prints out the contents of a package for inspection. It works on both local and remote `yaml` or `spkg` configuration files, and supports reading manifest from stdin using `"-"`.
{% code title="info command" overflow="wrap" %}
```bash
$ substreams info ./substreams.yaml
```
{% endcode %}
The output of the `info` command will print a message resembling:
{% code title="info output" overflow="wrap" %}
```bash
Package name: solana_spl_transfers
Version: v0.5.2
Doc: Solana SPL Token Transfers stream
Stream SPL token transfers to the nearest human being.
Modules:
----
Name: spl_transfers
Initial block: 130000000
Kind: map
Output Type: proto:solana.spl.v1.TokenTransfers
Hash: 2b59e4e840f814f4154a688c2935da9c3b61dc61
Name: transfer_store
Initial block: 130000000
Kind: store
Value Type: proto:solana.spl.v1.TokenTransfers
Update Policy: UPDATE_POLICY_SET
Hash: 11fd70768029bebce3741b051c15191d099d2436
```
{% endcode %}
### `graph`
The `graph` command prints out a visual graph of the package in the [mermaid-js format](https://mermaid.js.org/intro/syntax-reference.html). It supports reading manifest from stdin using `"-"`.
{% hint style="success" %}
**Tip**: [Mermaid Live Editor](https://mermaid.live/) is the visual editor used by Substreams.
{% endhint %}
{% code title="graph command" overflow="wrap" %}
````bash
$ substreams graph ./substreams.yaml
[±master ●●]
Mermaid graph:
```mermaid
graph TD;
spl_transfers[map: spl_transfers]
sf.solana.type.v1.Block[source: sf.solana.type.v1.Block] --> spl_transfers
transfer_store[store: transfer_store]
spl_transfers --> transfer_store
```
````
{% endcode %}
The `graph` command will result in a graphic resembling:
{% embed url="" %}
Mermaid generated graph diagram
{% endembed %}
### `inspect`
The `inspect` command reaches deep into the file structure of a `yaml` configuration file or `spkg` package and is used mostly for debugging, or if you're curious. It supports reading manifest from stdin using `"-"`.
{% code title="inspect command" overflow="wrap" %}
```bash
$ substreams inspect ./substreams.yaml | less
```
{% endcode %}
The output of the `inspect` command will print a message resembling:
{% code title="inspect output" overflow="wrap" %}
```bash
proto_files
...
modules {
modules {
name: "my_module_name"
...
```
{% endcode %}
### **`protogen`**
The `protogen` command generates Rust bindings from a package. It supports reading manifest from stdin using `"-"`.
```bash
substreams protogen ./substreams.yaml
# Or from stdin:
cat substreams.yaml | substreams protogen "-"
```
### **`codegen`**
The `codegen` command generates a code for a specific sink taking a Substreams module as input.
* SQL
Generates a SQL-based Substreams project from the Substreams package found in the current folder.
```bash
substreams codegen sql
```
### Help
To view a list of available commands and brief explanations in the `substreams` CLI, run the `substreams` command in a terminal passing the `-h` flag. You can use this help reference at any time.
{% code title="help option" overflow="wrap" %}
```bash
substreams -h
```
{% endcode %}
# Core Concepts
# Architecture & Parallel Execution
Learn about the Substreams architecture
Parallel execution is the process of a Substreams module's code executing multiple segments of blockchain data simultaneously in a forward or backward direction. Substreams modules can be executed in parallel, rapidly producing data for consumption in end-user applications. Parallel execution enables Substreams' highly efficient blockchain data processing capabilities.
Parallel execution occurs when a module's start block is further back in the blockchain's history than the requested start block. For example, if a module starts at block 12,000,000 and a user requests data at block 15,000,000, parallel execution is used. This applies to both the development and production modes of Substreams operation.
Parallel execution addresses the problem of the slow, single, linear execution of a module. Instead of running a module in a linear fashion, one block after the other without leveraging full computing power, N number of workers are executed over a different segment of the chain. It means data can be pushed back to the user N times faster than cases using a single worker.
The server will define an execution schedule and take the module's dependencies into consideration. The server's execution schedule is a list of pairs of (`module, range`), where range contains `N` blocks. This is a configurable value set to 25K blocks, on the server.
The single map\_transfer module will fulfill a request from 0 - 75,000. The server's execution plan returns the results of `[(map_transfer, 0 -> 24,999), (map_transfer, 25,000 -> 49,999), (map_transfer, 50,000 -> 74,999)]`.
The three pairs will be simultaneously executed by the server handling caching of the output of the store. For stores, an additional step will combine the store keys across multiple segments producing a unified and linear view of the store's state.
Assuming a chain has 16,000,000 blocks, which translates to 640 segments of 25K blocks. The server currently has a limited amount of concurrency. In theory, 640 concurrent workers could be spawned. In practice, the number of concurrent workers depends on the capabilities of the service provider. For the production endpoint, StreamingFast sets the concurrency to 15 to ensure fair usage of resources for the free service.
## Production versus development mode for parallel execution
The amount of parallel execution for the two modes is illustrated in the diagram. Production mode results in more parallel processing than development mode for the requested range. In contrast, development mode consists of more linear processing. Another important note is, forward parallel execution only occurs in production mode.
Substreams production versus development mode for parallel execution diagram
## Backward and forward parallel execution steps
The two steps involved during parallel execution are **backward execution and forward execution**.
Backward parallel execution consists of executing in parallel block ranges, from the module's initial block, up to the start block of the request. If the start block of the request matches the module's initial block no backward execution is performed.
Forward parallel execution consists of executing in parallel block ranges from the start block of the request up to the last known final block, also called an irreversible block, or the stop block of the request depending on which is smaller. Forward parallel execution significantly improves the performance of Substreams.
Backward parallel execution will occur in both development and production modes.
Forward parallel execution only occurs in production mode.
# RPC Protocol
Substreams RPC protocol versions and performance optimizations
Substreams uses gRPC for client-server communication. This document describes the available protocol versions and their performance characteristics.
## Protocol Versions
| Version | Service | Description |
| ------- | ------------------------------------ | ----------------------------------------- |
| V2 | `sf.substreams.rpc.v2.Stream/Blocks` | Original protocol, sends modules graph |
| V3 | `sf.substreams.rpc.v3.Stream/Blocks` | Sends full package (spkg) with params |
| V4 | `sf.substreams.rpc.v4.Stream/Blocks` | Batched responses with `BlockScopedDatas` |
### V4 Protocol (Recommended)
V4 is the default protocol starting from v1.18.0. It introduces `BlockScopedDatas`, which batches multiple `BlockScopedData` messages into a single response. This reduces:
* **gRPC round-trips**: Fewer messages means less protocol overhead
* **Message framing cost**: Single frame for multiple blocks
* **Network latency impact**: Particularly beneficial during backfill
The batching is transparent to sink implementations - the client library unpacks `BlockScopedDatas` and delivers individual `BlockScopedData` messages to handlers.
### Protocol Fallback
Clients automatically negotiate the best available protocol:
1. Client attempts V4 connection
2. If server returns `Unimplemented`, client falls back to V3
3. If V3 is also unavailable, client falls back to V2
This ensures compatibility with older servers without configuration changes.
## Compression
### S2 Compression (Default)
S2 is the default compression algorithm, replacing gzip. S2 is part of the Snappy family and provides:
* **\~3-5x faster** compression/decompression than gzip
* **Comparable compression ratios** to gzip level 1-2
* **Lower CPU usage** on both client and server
* **Better suited for streaming** workloads
The client requests S2 compression by default. If the server doesn't support S2, standard gzip is used automatically.
### Supported Compression Algorithms
| Algorithm | Name | Notes |
| --------- | ------ | -------------------------- |
| S2 | `s2` | Default, fastest |
| Gzip | `gzip` | Legacy, widely supported |
| LZ4 | `lz4` | Fast, moderate compression |
| Zstd | `zstd` | High compression ratio |
## Connect vs gRPC Protocol Selection
The server supports both Connect RPC and pure gRPC protocols. Starting from v1.18.0, the server efficiently routes requests based on the `Content-Type` header:
| Content-Type | Protocol | Handler |
| ----------------------------------------------- | -------- | ------------------- |
| `application/grpc`, `application/grpc+proto` | gRPC | Native gRPC handler |
| `application/connect+proto`, `application/json` | Connect | Connect RPC handler |
This routing improves performance by \~15% for pure gRPC clients, which previously had all requests processed through the Connect RPC layer.
{% hint style="info" %}
**Performance tip**: For maximum throughput, use pure gRPC clients when possible. The official Go sink library and Rust client are gRPC-first by default.
{% endhint %}
## VTProtobuf Serialization
Both client and server use [vtprotobuf](https://github.com/planetscale/vtprotobuf) for protobuf marshaling when available. Benefits include:
* **\~2-3x faster** serialization/deserialization
* **Reduced memory allocations**
* **Zero-copy unmarshaling** where possible
VTProtobuf is transparent - messages without vtproto support fall back to standard protobuf automatically.
## CLI Usage
### Force Protocol Version
```bash
# Use V4 (default, with batching)
substreams run ... --protocol-version 4
# Use V3 (single-message responses, full package)
substreams run ... --protocol-version 3
# Use V2 (legacy, modules graph only)
substreams run ... --protocol-version 2
```
## Server Configuration
### Environment Variables
| Variable | Description | Default |
| -------------------------------- | ------------------------------------------------------------------------------- | --------------- |
| `MESSAGE_BUFFER_MAX_DATA_SIZE` | Max data size (bytes) before flushing a `BlockScopedDatas` batch | 10485760 (10MB) |
| `GRPC_SIZE_LOGGER_MESSAGE_LIMIT` | Enable gRPC message size logging for debugging (set to message count threshold) | Disabled |
### Tier1 Configuration
The `OutputBufferSize` configuration controls how many blocks are batched before sending a `BlockScopedDatas` response:
```go
tier1Config := &app.Tier1Config{
// ... other config
OutputBufferSize: 100, // Batch up to 100 blocks
}
```
## Response Messages
### V4 Response Structure
```protobuf
message Response {
oneof message {
SessionInit session = 1;
ModulesProgress progress = 2;
BlockScopedDatas block_scoped_datas = 3; // Batched block data
BlockUndoSignal block_undo_signal = 4;
Error fatal_error = 5;
// Debug messages...
}
}
message BlockScopedDatas {
repeated BlockScopedData items = 1;
}
```
### V2/V3 Response Structure
```protobuf
message Response {
oneof message {
SessionInit session = 1;
ModulesProgress progress = 2;
BlockScopedData block_scoped_data = 3; // Single block data
BlockUndoSignal block_undo_signal = 4;
Error fatal_error = 5;
// Debug messages...
}
}
```
## Performance Considerations
### When V4 Batching Helps Most
* **Historical backfill**: Processing many blocks sequentially benefits from reduced per-message overhead
* **High-throughput chains**: Chains with fast block times produce more messages per second
* **Network-constrained environments**: Fewer round-trips reduce latency impact
### When Batching Has Less Impact
* **Live streaming at chain head**: Single blocks arrive as produced, batching provides minimal benefit
* **Very large module outputs**: If individual blocks produce large outputs, batching may be limited by `MESSAGE_BUFFER_MAX_DATA_SIZE`
## Compatibility Matrix
| Client Version | Server V2 | Server V3 | Server V4 |
| -------------- | -------------- | -------------- | ------------ |
| v1.18.0+ | Yes (fallback) | Yes (fallback) | Yes (native) |
| v1.17.x | Yes | Yes | No |
| v1.16.x | Yes | No | No |
# Foundational Stores
Foundational Store architecture, components, and technical reference
A high-performance, multi-backend key-value storage system designed for [Substreams](https://github.com/streamingfast/substreams) ingestion and serving within the StreamingFast ecosystem. The foundational store provides a unified interface to persist and query time-series blockchain data with fork-awareness and efficient batch processing.
## StreamingFast Ecosystem Integration
The foundational store operates as a critical component in the StreamingFast data processing pipeline:
* **Tier1 (Substreams Frontend)**: Client-facing gRPC service that handles user requests, manages authentication, and orchestrates work distribution to Tier2 execution engines with foundational store endpoint routing
* **Tier2 (Substreams Execution Engine)**: Computational backend service that executes Substreams WASM modules in parallel across blockchain data segments, handling module execution and state management
* **Foundational Store**: Persistent storage layer serving multiple Substreams modules simultaneously
### Deployment Patterns
* **Many-to-Many Architecture**: Multiple Substreams modules can target the same foundational store
* **Multi-Store Deployments**: Multiple foundational stores can run simultaneously, each serving multiple endpoints
* **Flexible Routing**: Tier1 routes requests via configuration
* **Module Examples**: Custom Substreams modules for any blockchain data processing use case
## Architecture
The foundational store consists of three main components:
* **Sink**: Ingests streaming data from Substreams, handles batching, flushing, and fork reorganizations
* **Store**: Provides a unified interface for multiple storage backends (Badger, PostgreSQL) with ForkAware caching layer
* **Server**: Exposes a gRPC API for data retrieval with high-performance querying and block-aware responses
### Key Features
* **Fork-aware storage**: Handles blockchain reorganizations through ForkAware wrapper with in-memory cache and automatic rollback capabilities
* **Multiple backends**: Support for embedded Badger database and PostgreSQL with unified Store interface
* **Block-level versioning**: Every entry tagged with block number for precise historical queries and LIB-based finality
* **Conditional operations**: IfNotExist flag prevents duplicate insertions and ensures data integrity
* **Streaming ingestion**: Continuous processing of Substreams output with cursor-based resumption
* **High-performance serving**: gRPC API with Get/GetFirst operations and block-reached validation
## Quick Start
### Installation
Build from source:
```bash
git clone https://github.com/streamingfast/substreams-foundational-store
cd substreams-foundational-store
go build -o foundational-store ./cmd/foundational-store
```
See [Hosting a Foundational Store](/reference-material/operators/hosting-foundational-stores) for complete setup and configuration instructions.
## Storage Backends
### Badger
High-performance embedded key-value store, ideal for single-node deployments:
```bash
--dsn "badger:///path/to/database"
```
### PostgreSQL
Enterprise-grade relational database for distributed deployments:
```bash
--dsn "postgres://user:password@host:port/database?sslmode=require"
```
See [Hosting a Foundational Store](/reference-material/operators/hosting-foundational-stores) for backend-specific configuration and tuning.
## Configuration
The `foundational-store` binary provides the following commands:
```bash
foundational-store [command]
Available Commands:
completion Generate the autocompletion script for the specified shell
get Get a value from the foundational-store using gRPC
help Help about any command
server Start the gRPC server
```
See [Hosting a Foundational Store](/reference-material/operators/hosting-foundational-stores) for detailed server configuration options and usage examples.
## Data Model
### Entry Structure
Data is stored as key-value pairs with block-level versioning:
```protobuf
// Current v2 API (recommended)
message Entry {
Key key = 2;
google.protobuf.Any value = 4;
}
message Key {
bytes bytes = 1;
}
message QueriedEntry {
ResponseCode code = 1;
Entry entry = 2;
}
message QueriedEntries {
repeated QueriedEntry entries = 2;
}
// Batch operations with conditional insertion
message SinkEntries {
repeated Entry entries = 1;
bool if_not_exist = 2; // Skip insertion if key already exists
}
```
### API Operations
The Foundational Store provides gRPC APIs for data retrieval with block-aware querying. Remote-feed ingest additionally exposes `Feed.Set` to write entries and `Feed.Delete` to hard-delete keys (missing keys are ignored). See the [Remote Feed Hosted Store Guide](/how-to-guides/hosted-services/hosted-store-remote-feed).
See [Consuming a Foundational Store](/tutorials/consuming-foundational-store) for detailed API usage, response handling, and code examples.
### Conditional Operations
The store supports conditional insertion with the `if_not_exist` flag for data integrity during ingestion.
See [Hosting a Foundational Store](/reference-material/operators/hosting-foundational-stores) for details on using `SinkEntries` and conditional operations.
**Note**: v1 API is deprecated. Use v2 API for all new implementations.
### API Version History
* **v2** (current): Improved service interface with `Get` and `GetFirst` operations, enhanced data models
* **v1** (deprecated): Legacy interface with separate `Get` and `GetAll` operations, will be removed in a future version
Migration guide: Replace v1 service calls with v2 equivalents. Update message types to use `sf.substreams.foundational_store.model.v2` and `sf.substreams.foundational_store.service.v2`.
## Fork Handling
The foundational store implements sophisticated fork-awareness through a layered architecture:
### ForkAware Store Layer
1. **In-Memory Cache**: Maintains recent entries in memory with block-level versioning
2. **Automatic Eviction**: `EvictUpToBlock()` removes data >= reorganization point during undo signals
3. **LIB-Based Flushing**: `FlushUpToBlock()` persists finalized entries (≤ Last Irreversible Block) to backend
4. **Read Strategy**: Checks cache first, falls back to persistent backend for historical data
### Block Processing Flow
1. **HandleBlockScopedData**: Processes streaming data, updates cache, flushes finalized blocks
2. **HandleBlockUndoSignal**: Triggers eviction on fork detection, maintains data consistency
3. **Cursor Management**: Persistent state tracking with LIB-based cursor history cleanup
4. **Head Block Tracking**: Real-time block progression for client synchronization validation
## Health Checks
Monitor service health through:
* gRPC reflection for service discovery
* Cursor file updates for ingestion progress
* Prometheus `/metrics` endpoint availability
## Documentation
Comprehensive API documentation is available in the proto files:
* `proto/sf/substreams/foundational-store/service/v2/service.proto` - Current gRPC service API
* `proto/sf/substreams/foundational-store/model/v2/model.proto` - Data model definitions
## Related Resources
* [Hosted Services](/how-to-guides/hosted-services) - Managed sinks and stores StreamingFast runs for you
* [Remote Feed Hosted Store Guide](/how-to-guides/hosted-services/hosted-store-remote-feed) - Write to and read from a StreamingFast-managed hosted store over gRPC, without running your own server
* [Substreams Feed Hosted Store Guide](/how-to-guides/hosted-services/hosted-store-substreams-feed) - Have a Substreams package populate a StreamingFast-managed hosted store from the chain
* [Hosting a Foundational Store](/reference-material/operators/hosting-foundational-stores) - Complete guide for setting up and running a Foundational Store server
* [Consuming a Foundational Store](/tutorials/consuming-foundational-store) - Guide for querying Foundational Stores in Substreams modules
* [Foundational Store Examples](/how-to-guides/composing-substreams/foundational-stores) - Chain-specific foundational store implementations
* [GitHub Repository](https://github.com/streamingfast/substreams-foundational-store) - Source code and issue tracker
* [Substreams](https://github.com/streamingfast/substreams) - Real-time blockchain data processing
* [Firehose](https://github.com/streamingfast/firehose) - Blockchain data extraction protocol
# Module Concepts
Learn the basics about modules
### Modules
In Substreams, manifests and modules are concepts tightly related because they are fundamental to understanding how Substreams works.
In simple terms, a Substreams module is a Rust function that receives an input and returns an output. For example, the following Rust function receives an Ethereum block and returns a custom object containing fields such as block number, hash or parent hash.
```rust
fn get_my_block(blk: Block) -> Result {
Ok(MyBlock {
number: blk.number,
hash: Hex::encode(&blk.hash),
parent_hash: Hex::encode(&blk.header.parent_hash),
})
}
```
And also in simple terms, a Substreams manifest (`substreams.yaml`) is a configuration file (a YAML file) for your Substreams, which defines the different modules (functions) for your Substreams, among other configurations. For example, the following manifest receives a raw Ethereum block as input (`sf.ethereum.type.v2.Block`) and outputs a custom object (`eth.example.MyBlock`).
```yaml
modules:
- name: map_block
kind: map
initialBlock: 12287507
inputs:
- source: sf.ethereum.type.v2.Block
output:
type: proto:eth.example.MyBlock
```
Among other things, the manifest allows you to define:
* How many modules your Substreams uses, along with their corresponding inputs and outputs.
* The schema(s) (i.e. the data model) your Substreams uses.
* How you will consume the data emitted by your Substreams (SQL, Webhooks...).
### Module Chaining
Modules were built with composability in mind, so it is possible to chain them. Given two modules, `module1` and `module2`, you can set the output of `module1` to be the input of `module2`, creating a chain of interconnected Substreams modules. Let's take a look at the following example:
```yaml
modules:
- name: map_events
kind: map
initialBlock: 4634748
inputs:
- source: sf.ethereum.type.v2.Block
output:
type: proto:contract.v1.Events
- name: db_out
kind: map
initialBlock: 4634748
inputs:
- map: map_events
output:
type: proto:sf.substreams.sink.database.v1.DatabaseChanges
```
There are two modules defined: `map_events` and `db_out`.
* The `map_events` module receives a `sf.ethereum.type.v2.Block` object (a raw Ethereum block) as a parameter and outputs a custom `contract.v1.Events` object.
* The `db_out` module receives `map_events`'s output as an input, and outputs another custom object, `sf.substreams.sink.database.v1.DatabaseChanges`.
Technically, modules have one or more inputs, which can be in the form of a `map` or `store`, or a `Block` or `Clock` object received from the blockchain's data source. Every time a new `Block` is processed, all of the modules are executed as a directed acyclic graph (DAG).
### Module Kinds
There are two types of modules: `map` and `store`. `map` modules are used for stateless transformations and `store` modules are used for stateful transformations.
Substreams executes the Rust function associated with the module for every block on the blockchain, but there will be times when you will have to save data between blocks. `store` modules allow you to save in-memory data.
#### `map` modules
`map` modules are used for data extraction, filtering, and transformation. They should be used when direct extraction is needed avoiding the need to reuse them later in the DAG.
To optimize performance, you should use a single `map` module instead of multiple `map` modules to extract single events or functions. It is more efficient to perform the maximum amount of extraction in a single top-level `map` module and then pass the data to other Substreams modules for consumption. This is the recommended, simplest approach for both backend and consumer development experiences.
Functional `map` modules have several important use cases and facts to consider, including:
* Extracting model data from an event or function's inputs.
* Reading data from a block and transforming it into a custom protobuf structure.
* Filtering out events or functions for any given number of contracts.
#### `store` modules
`store` modules are used for the aggregation of values and to persist state that temporarily exists across a block.
{% hint style="warning" %}
**Important:** Stores should not be used for temporary, free-form data persistence.
{% endhint %}
Unbounded `store` modules are discouraged. `store` modules shouldn't be used as an infinite bucket to dump data into.
Notable facts and use cases for working with `store` modules include:
* `store` modules should only be used when reading data from another downstream Substreams module.
* `store` modules cannot be output as a stream, except in development mode.
* `store` modules are used to implement the Dynamic Data Sources pattern from Subgraphs, keeping track of contracts created to filter the next block with that information.
* Downstream of the Substreams output, do not use `store` modules to query anything from them. Instead, use a sink to shape the data for proper querying.
### Defining Modules
Modules are defined as a YAML list under the `modules` section of the manifest. In the following example, a `map_events` module is defined:
```yaml
modules:
- name: map_events
kind: map
initialBlock: 4634748
inputs:
- source: sf.ethereum.type.v2.Block
output:
type: proto:contract.v1.Events
```
Then, you create the corresponding Rust function under the `src/lib.rs` file.
```rust
#[substreams::handlers::map]
fn map_events(blk: eth::Block) -> Result {
...output omitted...
}
```
# Module Caching
Learn how Substreams modules are cached for efficient execution
Module caching is a fundamental feature of Substreams that significantly improves performance by storing the output of module executions. Once a module has been executed for a specific block, its output is cached, and subsequent requests for the same block will read from the cache instead of re-executing the WASM code.
## Overview
Every Substreams module is cached based on a unique identifier called a **module hash**. This hash is computed from the module's WASM code, inputs, outputs, and additional configuration parameters. When you run a module, Substreams uses this hash to determine whether to execute the WASM code or retrieve cached results.
## Cache Key Computation
The cache key (module hash) is computed from:
* Module's WASM bytecode
* Module inputs
* Module outputs
* Additional module metadata
**Important**: Changing the module name or the `.spkg` package name does **not** affect the cache key. The cache is based on the module's actual code and data flow, not its name or the package name.
### Viewing Module Hash
You can view the module hash for any Substreams package using the `substreams info` command:
```bash
substreams info
```
For example:
```bash
substreams info common@latest map_clocks
```
Output:
```
...
Modules:
----
Name: map_clocks
Hash: 7685a04836b6bac7ec654589bf1fe79ec3decbe1
...
```
The module hash is displayed beside the `Hash:` label. This hash uniquely identifies the module's configuration and is used as the cache key.
## How Caching Works
{% hint style="info" %}
**Note:** Module caching occurs only in **production mode**. In **development mode**, Substreams always re-executes the code and does not use or populate the cache. This ensures you're always testing the latest version of your code during development.
{% endhint %}
### First Run
When you run a module for the first time in production mode (or after any changes that affect the module hash):
1. The Substreams engine executes the Rust (WASM) code of your module
2. The module processes each block with its inputs
3. The module emits outputs for each block
4. The output for each block is **written to disk** (cached) based on the module hash
5. The output is also **streamed to you** in real-time
### Subsequent Runs
When you run the same module again (with the same module hash):
1. For each block, Substreams checks if cached data exists for that module hash
2. If cached data is found:
* The Rust (WASM) code is **skipped entirely**
* The cached output is read from disk
* The cached output is streamed to you
3. If no cached data exists for a specific block, the module executes normally for that block
This caching mechanism applies to **all module types**: maps, stores, and indexes.
## Module Types and Caching
Caching applies uniformly across all module types:
* **Maps**: Cached outputs are read instead of executing WASM code
* **Stores**: Cached state is loaded instead of recomputing aggregations
* **Indexes**: Cached index data is reused for filtering
Once a module has been executed for a block range, subsequent requests for the same module (identified by its hash) will retrieve pre-computed results instead of re-executing.
## Stores and Cache Dependencies
Store modules require special consideration when it comes to caching:
### Store Backfilling
**Stores always need to be backfilled** from their initial block to be usable. This makes caching for stores particularly important compared to maps and indexes, as stores accumulate state over time and rebuilding them from scratch can be time-consuming.
### WASM Binary Hash Impact
The module hash is computed from the **WASM binary code**. This has an important implication: **changing a single line of Rust code invalidates the hash of all modules that depend on that code**, since the WASM binary will be different.
This affects store caching significantly. If you have a store module and change any shared Rust code it uses, the store's hash changes, and all cached data becomes invalid. The store will need to be completely re-backfilled.
### Designing for Efficient Store Caching
When designing Substreams with stores that need to be cached efficiently:
**Option 1: Split into Multiple Substreams Packages**
* Create separate `.spkg` files for stable store modules
* Use these packages as inputs to other modules
* Changes to consuming modules won't affect the store's hash
* The store remains cached even when you modify other parts of your system
**Option 2: Split into Different WASM Files**
* Separate frequently-changing code from stable store logic
* Note: This is less reliable if you have shared "common" code, as changes to common code still affect all modules using it
This architectural decision is crucial for projects where store re-computation is expensive and you need to iterate quickly on dependent modules.
## Performance Implications
Module caching has significant effects on performance characteristics:
* **First Run (Production Mode)**: Slower, as it requires full WASM execution for all blocks
* **Subsequent Runs (Production Mode)**: Much faster, as outputs are simply read from cache
* **Development Mode**: Always executes WASM code, never uses cache
* **Input Dependencies**: If your module depends on other modules as inputs, and those dependencies are cached, your module receives cached inputs without those dependencies being re-executed
### Performance Testing Considerations
{% hint style="warning" %}
**Important:** The first run will always be slower than subsequent runs due to cache population. For accurate performance comparisons, ensure you're comparing runs with the same cache state (either both cached or both uncached).
{% endhint %}
When benchmarking or performance testing Substreams:
* **First run performance** reflects actual WASM execution time and processing logic
* **Cached run performance** reflects I/O throughput and network delivery speed
* To measure true execution performance, you need to invalidate the cache by changing the module hash (e.g., making a small change to the Rust code), as there is currently no direct cache-clearing mechanism
* Production deployments benefit from pre-cached data, making the first runs important for cache warming
### Cache Behavior with Module Changes
Any change that affects the module hash will invalidate the cache:
* Modifying the WASM code (Rust implementation)
* Changing module inputs
* Changing module outputs
* Modifying module configuration parameters
When the module hash changes, Substreams treats it as a completely new module and builds a fresh cache.
## Best Practices
### Module Naming
Changing a module's name does not affect its cache. The cache key is based on the module hash (computed from code, inputs, and outputs), not the name. You can safely rename modules without invalidating cached data.
### Composability
Leverage caching by building on existing modules. If you import and use a module that's already cached on the server, your new module can benefit from those cached inputs, significantly reducing processing time.
### Testing
When testing module changes, be aware that cached data from previous versions won't be used for the new version. Each unique module hash has its own cache.
### Cache Warming
For production deployments, consider running modules in advance to populate caches and reduce latency for end users. The first execution of a module (or module chain) will always be slower as it builds the cache.
## Related Concepts
* [Architecture & Parallel Execution](/reference-material/core-concepts/architecture) - Learn how caching interacts with parallel execution
* [Module Concepts](/reference-material/core-concepts/modules) - Understand the different types of modules and how they work
* [Reliability Guarantees](/reference-material/core-concepts/reliability-guarantees) - Learn about determinism and consistency in Substreams
# Reliability Guarantees
When you consume a Substreams package through the CLI (or through any of the different sinks available), you are establishing a gRPC connection with the Substreams provider (i.e. StreamingFast, Pinax...), which streams the data of every block back to your sink.
#### The Response Format
The response returned by the provider is a [Protobuf object](https://github.com/streamingfast/substreams/blob/831093480ab6bf6970e41f74ea9bc0b04410a028/proto/sf/substreams/rpc/v2/service.proto#L53), which contains the blockchain data plus other relevant information:
```protobuf
message Response {
oneof message {
SessionInit session = 1;
ModulesProgress progress = 2;
BlockScopedData block_scoped_data = 3;
BlockUndoSignal block_undo_signal = 4;
Error fatal_error = 5;
InitialSnapshotData debug_snapshot_data = 10;
InitialSnapshotComplete debug_snapshot_complete = 11;
}
}
```
#### Data & Cursor
One of the most important fields of the response is the `BlockScopedData` object, which contains the actual data of the blockchain, along with other useful fields. Specifically, The `output` field holds the binary data emitted by the Substreams.
```protobuf
message BlockScopedData {
MapModuleOutput output = 1;
sf.substreams.v1.Clock clock = 2;
string cursor = 3;
uint64 final_block_height = 4;
repeated MapModuleOutput debug_map_outputs = 10;
repeated StoreModuleOutput debug_store_outputs = 11;
}
```
In a connection, errors might occur; any of the two parties involved may get disconnected because of a network issue. In these cases, it is essential to have a mechanism that allows you to consume the data exactly where you left it before the disconnection. This mechanism is usually called a **cursor**. Essentially, a cursor points to the latest piece of data consumed by the user.
In Substreams, the `cursor` field of the response indicates the latest block consumed by the user. The user **must** persist the cursor, so that in the case of a disconnection, the Substreams provider can start streaming data from the latest consumed block.
For example, the SQL sink establishes a gRPC connection with the Substreams provider, and for every block consumed, it persists the number of the block in a table. If a disconnection occurs, the SQL sink establishes a new connection and starts consuming from the latest persisted block. That's why it is very important to persist the cursor!
#### Forks
Forks are really common in blockchain. Essentially, a fork occurs when the path of the blockchain diverges (i.e. there are two or more different paths available because different nodes involved do not agree on the correct path).
The `BlockUndoSignal` object of the response is used to keep track of forks. In Substreams, you are reading real-time data, so if a fork occurs, you may read blocks from the incorrect path. When the blockchain resolves the fork and eventually chooses a path, you will have to *unread* all the incorrect blocks (i.e. discard all the blocks belonging to the incorrect path of the fork). The `BlockUndoSignal` contains the latest valid block of the blockchain and a cursor:
```protobuf
message BlockUndoSignal {
sf.substreams.v1.BlockRef last_valid_block = 1;
string last_valid_cursor = 2;
}
```
{% hint style="info" %}
If you commit cursors in the BlockUndoSignals, you don’t need to mind about disconnections amid forks. It will bring you back exactly where you left off, even if it was mid-ways through a fork.
{% endhint %}
# FAQ
StreamingFast Substreams frequently asked questions
## **Substreams FAQ overview**
You can find answers to common Substreams questions in the FAQ documentation. If the answer you're looking for is not included, [contact the StreamingFast team](https://discord.gg/mYPcRAzeVN) through Discord to get help.
### **What is Substreams?**
Substreams is an exceptionally powerful processing engine capable of consuming streams of rich blockchain data. Substreams refines and shapes the data for painless digestion by end-user applications, such as decentralized exchanges.
### **Do I need Firehose to use Substreams?**
Developers do not need a dedicated installation of Firehose to use Substreams. StreamingFast provides a public Firehose endpoint made available to developers.
### **Is it possible to use Substreams in my subgraph?**
Not anymore.
### **Is it possible to use Substreams for production deployments?**
Yes. Substreams is [generally available](https://streamingfastio.medium.com/substreams-reach-general-availability-48272f6e942e) and used in production at multiple outlets.
### **What's in the Substreams name?**
Substreams is the name of the engine, and of the product. It is to be capitalized and kept plural. One can speak of an individual *module* or individual *stream* but in general, when speaking about the engine, you would use the word "*Substreams"*.
### **What is the `substreams` CLI?**
The [`substreams` command line interface (CLI)](/reference-material/command-line-interface) is the main tool developers use to use the Substreams engine. The [`substreams` CLI](/reference-material/command-line-interface) provides a range of features, commands, and flags. Additional information for the [`substreams` CLI](/reference-material/command-line-interface) is available in the Substreams documentation.
### **How do I get a Substreams authentication token?**
Authentication tokens are required to use Substreams and connect to the public Firehose endpoint. Full [instructions for obtaining a StreamingFast authentication token](/how-to-guides/installing-the-cli/authentication) are available in the Substreams documentation.
### **My Substreams authentication token isn’t working, what do I do?**
The StreamingFast team is [available on Discord to resolve problems](https://discord.gg/jZwqxJAvRs) related to obtaining or using authentication tokens.
The Substreams documentation also [provides general instructions surrounding authentication](/how-to-guides/installing-the-cli/authentication) tokens.
### **How do I create a Substreams module?**
Developers create their own Substreams implementations in a variety of ways. Check out one of [tutorial](/tutorials/intro-to-tutorials) to start from some pre-made building blocks.
The Substreams documentation [provides a Developer's guide](/how-to-guides/develop-your-own-substreams) to assist you to understand and use Substreams.
### **What is Substreams used for?**
Substreams and Firehose work together to index and process blockchain data. Substreams is used for transforming rich blockchain data and exposing it to the needs of application developers.
### **Is Substreams free?**
Yes, Substreams is an open-source project and there are free (albeit rate-limited) endpoints available.
### **How does a developer reach the information returned from a call to Substreams from a web-based UI?**
Substreams is not meant to be piped to a web UI, it’s a data transformation layer. Some sinks might expose APIs for web browsers, however, it's not the responsibility of Substreams.
### Is it possible to listen for new blocks?
Specifying a stop block value of zero (0), the default enables transparent handoff from historical to real-time blocks.
### **Does StreamingFast have a Discord?**
Yes, [join the StreamingFast Discord](https://discord.gg/jZwqxJAvRs).
### **Is StreamingFast on Twitter?**
Yes, [find StreamingFast on their official Twitter account](https://twitter.com/streamingfastio).
### **Is StreamingFast on YouTube?**
Yes, [find StreamingFast on their official YouTube account](https://www.youtube.com/c/streamingfast).
### **Who is dfuse?**
StreamingFast was originally called dfuse. The company changed its name and is in the process of rebranding.
### What is Sparkle?
Substreams is the successor of [StreamingFast Sparkle](https://github.com/streamingfast/sparkle). Substreams enables greater composability, and provides similar parallelization capabilities. Sparkle is deprecated.
### **Who is StreamingFast?**
StreamingFast is a protocol infrastructure company providing a massively scalable architecture for streaming blockchain data. StreamingFast is one of the core developers working alongside The Graph Foundation.
### Why the `wasm32-unknown-unknown` target?
The first unknown is the system you are compiling on, and the second is the system you are targeting.
“Compile on almost any machine, run on almost any machine.”
Additional information [is available in the Github issue for WASM-bindgen](https://github.com/wasm-bindgen/wasm-bindgen/issues/979).
### Why does the output show "@unknown" instead of "@type" and the decoding failed only showing "@str" and "@bytes"
Check to make sure the module's output type matches the protobuf definition. In some cases, the renamed protobuf package isn't updated in the `substreams.yaml` manifest file's `module.output.type` field, creating an incompatibility.
### Can I retrieve Mempool data with Substreams?
No, it is currently NOT possible to retrieve Mempool data with Substreams.
# Manifest & Components
# Manifests
StreamingFast Substreams manifests reference
This reference documentation **provides a guide for all fields and values** used in a Substreams manifest.
{% hint style="success" %}
**Tip**: When writing and checking your `substreams.yaml` file, it may help to check your manifest against our [JSON schema](https://json-schema.org/) to ensure there are no problems. JSON schemas can be used in [Jetbrains](https://www.jetbrains.com/help/idea/json.html#ws_json_schema_add_custom) and [VSCode](https://marketplace.visualstudio.com/items?itemName=redhat.vscode-yaml). Our manifest schema can be seen [here](https://github.com/streamingfast/substreams/tree/develop/docs/schemas/manifest-schema.json).
{% endhint %}
## Manifests overview
In simple terms, a Substreams manifest (`substreams.yaml`) is a configuration file (a YAML file) for your Substreams. The manifest file is used for defining properties specific to the current Substreams module and identifying the dependencies between the `inputs` and `outputs` of modules. For example, the following manifest receives a raw Ethereum block as input (`sf.ethereum.type.v2.Block`) and outputs a custom object (`eth.example.MyBlock`).
```yaml
modules:
- name: map_block
kind: map
initialBlock: 12287507
inputs:
- source: sf.ethereum.type.v2.Block
output:
type: proto:eth.example.MyBlock
```
Among other things, the manifest allows you to define:
* How many modules your Substreams uses, along with their corresponding inputs and outputs.
* The schema(s) (i.e. the data model) your Substreams uses.
* How you will consume the data emitted by your Substreams (SQL, Webhooks...).
### `specVersion`
Excerpt pulled from the example Substreams manifest.
{% code title="manifest excerpt" %}
```yaml
specVersion: v0.1.0
```
{% endcode %}
Use `v0.1.0` for the `specVersion` field.
### `package`
Excerpt pulled from the example Substreams manifest.
{% code title="manifest excerpt" overflow="wrap" %}
```yaml
package:
name: module_name_for_project
version: v0.5.0
doc: |
Documentation heading for the package.
More detailed documentation for the package.
```
{% endcode %}
#### `package.name`
The `package.name` field is used to identify the package.
The `package.name` field infers the filename when the [`pack`](/reference-material/command-line-interface#pack-deprecated) command is run by using `substreams.yaml` as a flag for the Substreams package.
The content of the `name` field must match the regular expression: `^([a-zA-Z][a-zA-Z0-9_]{0,63})$`. For consistency, use the `snake_case` naming convention.
The regular expression ruleset translates to the following:
* 64 characters maximum
* Separate words by using `_`
* Starts by using `a-z` or `A-Z` and can contain numbers thereafter
#### `package.version`
The `package.version` field identifies the package for the Substreams module.
{% hint style="info" %}
**Note**: The`package.version` **must respect** [Semantic Versioning, version 2.0](https://semver.org/)
{% endhint %}
#### package.url
The `package.url` field identifies and helps users discover the source of the Substreams package.
#### package.doc
The `package.doc` field is the documentation string of the package. The first line is used by the different UIs as a short-form description.
This field should be written in Markdown format.
### `imports`
The `imports` section allows you to import third-party Substreams packages. It adds local references to modules in those packages, and pulls WASM code, Protobuf and modules into the current Package.
Relying on imports rather than copying source code from third-party packages allows you to leverage server-side caches, and lower your costs.
Example:
```yaml
imports:
sol: https://spkg.io/streamingfast/solana-explorer-v0.2.0.spkg
# or:
ethereum: substreams-ethereum-v1.0.0.spkg
token: ../eth-token/substreams.yaml
# or, from the Substreams registry:
erc20: erc20-balances@v1.2.0
uniswap: streamingfast/uniswap-v4@v0.3.0
...
modules:
...
inputs:
- map: sol:map_block_without_votes
# replacing:
# inputs:
# - source: sf.solana.type.v1.Block
```
Note the `:` separator that signifies to use the imported namespace, as defined under `imports`.
The filename can be absolute or relative or a remote path prefixed by `http://` or `https://`. It can also be an IPFS reference.
A registry package is written `@` or, for a package published under an organization, `/@`. The version is required, and `@latest` is refused, so that the same manifest keeps building the same package. When a file or directory named like `/` exists next to the manifest, it is read instead; prefix a path with `./` to make it unambiguous.
### Environment variables
A handful of manifest fields support environment variable expansion using the `$VAR` or `${VAR}` syntax:
* `imports` locations
* `protobuf.importPaths`
* the `foundational-store` module input
This is convenient to author a manifest with a placeholder that is filled in later, for example a hosted-store deployment id:
```yaml
modules:
- name: my_module
inputs:
- foundational-store: $DEPLOYMENT_ID
```
Expansion happens when the manifest is packed or loaded. If a referenced variable is not set in the environment, the operation fails with an error rather than substituting an empty value.
{% hint style="warning" %}
**Caveat**: Environment variable expansion is a convenience that applies only while reading the manifest. The generated `.spkg` always embeds the resolved, hard-coded value — never the `$VAR` reference. Re-packaging in a different environment is what changes the resolved value.
{% endhint %}
### `protobuf`
The `protobuf` section points to the Google Protocol Buffer (protobuf) definitions used by the Rust modules in the Substreams module.
```yaml
protobuf:
files:
- google/protobuf/timestamp.proto
- pcs/v1/pcs.proto
- pcs/v1/database.proto
importPaths:
- ./proto
- ../../external-proto
```
The Substreams packager loads files in any of the listed `importPaths`.
{% hint style="info" %}
**Note**: The `imports` section of the manifest also affects which `.proto` files are used in the final Substreams package.
{% endhint %}
Protobufs and modules are packaged together to help Substreams clients decode the incoming streams. Protobufs are not sent to the Substreams server in network requests.
[Learn more about Google Protocol Buffers](https://protobuf.dev/) in the official documentation provided by Google.
#### `protobuf.descriptorSets`
The `descriptorSets` field allows you to import precompiled Protocol Buffer definitions from the [Buf Schema Registry (BSR)](https://buf.build). This is useful when you want to consume protobuf types from external packages without copying `.proto` files into your project.
Descriptor sets are precompiled binary representations of protobuf schemas that can be directly loaded by Substreams, enabling efficient type resolution and validation.
{% hint style="info" %}
**Note**: Using `descriptorSets` is an alternative to specifying `.proto` files via the `files` and `importPaths` fields. You can use both approaches in the same manifest if needed.
{% endhint %}
**Format 1: Separate version field**
{% code title="substreams.yaml" %}
```yaml
protobuf:
descriptorSets:
- module: buf.build/streamingfast/substreams-sink-sql
version: v0.1.0
```
{% endcode %}
**Format 2: Inline version with @ notation**
{% code title="substreams.yaml" %}
```yaml
protobuf:
descriptorSets:
- module: buf.build/streamingfast/substreams-sink-sql@v0.1.0
```
{% endcode %}
**Available Fields:**
* `module` (required): The full path to the Buf module in the format `buf.build/organization/repository`. Can optionally include the version using `@version` notation.
* `version` (optional): Either a valid semantic version (e.g., `v0.1.0`, `v1.2.3`) or `latest`.
* `symbols` (optional): An array of specific protobuf symbols to import from the descriptor set. If omitted, all types from the descriptor set are available.
* `localPath` (optional): Local filesystem path where the descriptor set should be cached or stored.
**Complete Example with All Fields:**
{% code title="substreams.yaml" %}
```yaml
protobuf:
descriptorSets:
- module: buf.build/streamingfast/substreams-sink-sql
version: v1.0.0
symbols:
- sf.substreams.sink.sql.v1.Service
- sf.substreams.sink.sql.v1.Table
localPath: ./proto-cache/sink-sql.binpb
- module: buf.build/streamingfast/substreams-entity-change@v1.3.0
symbols:
- sf.substreams.entity.v1.EntityChanges
```
{% endcode %}
**Version Validation Rules:**
{% hint style="warning" %}
**Important**: When using inline `@version` notation:
* Versions **must** be valid semantic versions (e.g., `v1.0.0`, `v0.2.5`)
* When using inline `@version` notation:
* Only semantic versions are allowed (e.g., `module@v1.0.0`)
* `@latest` is **not allowed**, use `version: latest` as a separate field or omit the version
* You **cannot** specify the version both inline (with `@`) and as a separate field, choose one format
* To use the latest version, either:
* Omit the version field entirely
* Use `version: latest` as a separate field
{% endhint %}
### `binaries`
The `binaries` field specifies the WASM binary code to use when executing modules.
The `modules[].binary` field uses a default value of `default`.
```yaml
binaries:
default:
type: wasm/rust-v1
file: ./target/wasm32-unknown-unknown/release/my_package.wasm
other:
type: wasm/rust-v1
file: ./snapshot_of_my_package.wasm
```
{% hint style="warning" %}
**Important***:* Defining the `default` binary is required when creating a Substreams manifest.
{% endhint %}
See the [`binary`](#module-binary) field under `modules` to see its use.
#### `binaries[name].type`
The type of code and implied virtual machine for execution. There is **only one virtual machine available** that uses a value of: **`wasm/rust-v1`**.
#### `binaries[name].file`
The `binaries[name].file` field references a locally compiled [WASM module](https://webassembly.github.io/spec/core/syntax/modules.html). Paths for the `binaries[name].file` field are absolute or relative to the manifest's directory. The **standard location** of the compiled WASM module is the **root directory** of the Substreams module.
{% hint style="success" %}
**Tip**: The WASM file referenced by the `binary` field is picked up and packaged into an `.spkg` when invoking the [`pack`](/reference-material/command-line-interface#pack-deprecated) and [`run`](/reference-material/command-line-interface#run) commands through the [`substreams` CLI](/reference-material/command-line-interface).
{% endhint %}
### network
The `network` field specifies the blockchain where the Substreams will be executed.
```yaml
network: solana
```
or
```yaml
network: ethereum
```
### image
The `image` field specifies the icon displayed for the Substreams package, which is used in the [Substreams Registry](https://substreams.dev). The path is relative to the folder where the manifest is.
```yaml
image: ./ethereum-icon.png
```
### sink
The `sink` field specifies the sink you want to use to consume your data (for example, a database).
#### Sink `module`
Specifies the name of the module that emits the data to the sink. For example, `db_out` or `graph_out`.
#### Sink `type`
Specifies the service used to consume the data. For example, `sf.substreams.sink.sql.v1.Service` for databases.
#### Sink `config`
Specifies the configuration specific to every sink. This field is different for every sink.
**Database Config**
```
sink:
module: db_out
type: sf.substreams.sink.sql.v1.Service
config:
schema: "./schema.sql"
engine: clickhouse
postgraphile_frontend:
enabled: false
pgweb_frontend:
enabled: false
dbt_config:
enabled: true
files: "./path/to/folder"
run_interval_seconds: 300
```
* `schema`: SQL file specifying the schema.
* `engine`: `postgres` or `clickhouse`.
* `postgraphile_frontend.enabled`: enables or disables the Postgraphile portal.
* `pgweb_frontend.enabled`: enables or disables the PGWeb portal.
* `dbt_config`: specifies the configuration of dbt engine.
* `enabled`: enables or disabled the dbt engine.
* `files`: path to the dbt models.
* `run_interval_seconds`: execution intervals in seconds.
### `modules`
This example shows one map module, named `events_extractor` and one store module, named `totals` :
{% code title="substreams.yaml" %}
```yaml
- name: events_extractor
kind: map
initialBlock: 5000000
binary: default # Implicit
inputs:
- source: sf.ethereum.type.v2.Block
- store: myimport:prices
output:
type: proto:my.types.v1.Events
doc:
This module extracts events
Use in such and such situations
- name: totals
kind: store
updatePolicy: add
valueType: int64
inputs:
- source: sf.ethereum.type.v2.Block
- map: events_extractor
```
{% endcode %}
#### Module `name`
The identifier for the module, prefixed by a letter, followed by a maximum of 64 characters of `[a-zA-Z0-9_]`. The [same rules applied to the `package.name`](#package.name) field applies to the module `name`, including the convention to use `snake_case` names.
The module `name` is the reference identifier used on the command line for the `substreams` [`run`](/reference-material/command-line-interface#run) command. The module `name` is also used in the [`inputs`](/reference-material/manifest-and-components/inputs) defined in the Substreams manifest.
The module `name` also corresponds to the **name of the Rust function** invoked on the compiled WASM code upon execution. The module `name` is the same `#[substreams::handlers::map]` as defined in the Rust code. Maps and stores both work in the same fashion.
{% hint style="warning" %}
**Important***:* When importing another package, all module names are prefixed by the package's name and a colon. Prefixing ensures there are no name clashes across multiple imported packages and almost any name can be safely used for a module `name`.
{% endhint %}
#### Module `initialBlock`
The initial block for the module is where Substreams begins processing data for a module. The runtime never processes blocks prior to the one for any given module.
If all the inputs have the same `initialBlock`, the field can be omitted and its value is inferred by its dependent [`inputs`](#modules-.inputs).
`initialBlock` becomes **mandatory** **when inputs have different values**.
#### Module `kind`
There are two module types for `modules[].kind`:
* `map`
* `store`
#### Module `updatePolicy`
Specifies the merge strategy for two contiguous partial stores produced by parallelized operations.
The values for `modules[].updatePolicy` are defined using specific rules stating:
* `set`, the last key wins the merge strategy
* `set_if_not_exists`, the first key wins the merge strategy
* `append`, concatenates two keys' values
* `add`, sum the two keys' values
* `min`, min between two keys' values
* `max`, max between two keys' values
* `set_sum`, either `set` the value or `sum` the two keys' values
#### Module `valueType`
{% hint style="success" %}
Tip: The module `updatePolicy` field is only available for modules of `kind: store`.
{% endhint %}
Specifies the data type of all keys in the `store`, and determines what WASM imports are available to the module and are able to write to the `store`.
The values for `modules[].valueTypes` can use various types including:
* `bigfloat`
* `bigint`
* `int64`
* `bytes`
* `string`
* `proto:path.to.custom.protobuf.Model`
{% hint style="success" %}
Tip: The module `valueType` field is only available for modules of `kind: store`.
{% endhint %}
#### Module `binary`
An identifier referring to the [`binaries`](#binaries) section of the Substreams manifest.
The `modules[].binary` field overrides which binary is used from the `binaries` declaration section. This means multiple WASM files can be bundled in the Package.
```yaml
modules:
- name: hello
binary: other
...
```
The default value for `binary` is `default`. Therefore, a `default` binary must be defined under [`binaries`](#binaries).
#### Module `inputs`
{% code title="substreams.yaml" %}
```yaml
inputs:
- params: string
- source: sf.ethereum.type.v2.Block
- store: my_store
mode: deltas
- store: my_store # defaults to mode: get
- map: my_map
```
{% endcode %}
The `inputs` field is a **list of input structures**. One of three keys is required for every object.
The key types for `inputs` include:
* `source`
* `store,` used to define `mode` keys
* `map`
* `params`
You can find more details about inputs in the [Developer Guide's section about Modules](/reference-material/core-concepts/modules).
#### Module `output`
{% code title="substreams.yaml" %}
```yaml
output:
type: proto:eth.erc721.v1.Transfers
```
{% endcode %}
The value for `type` is always prefixed using `proto:` followed by a definition specified in the protobuf definitions, and referenced in the `protobuf` section of the Substreams manifest.
{% hint style="success" %}
**Tip**: The module `output` field is only available for modules of `kind: map`.
{% endhint %}
#### Module `doc`
This field should contain Markdown documentation of the module. Use it to describe how to use the params, or what to expect from the module.
### `params`
The `params` mapping changes the default values for modules' parameterizable inputs.
```yaml
modules:
...
params:
module_name: "default value"
"imported:module": "overridden value"
```
You can override those values with the `-p` parameter of `substreams run`.
When rolling out your consuming code -- in this example, Python -- you can use something like:
{% code overflow="wrap" %}
```python
my_mod = [mod for mod in pkg.modules.modules if mod.name == "store_pools"][0]
my_mod.inputs[0].params.value = "myvalue"
```
{% endcode %}
which would be inserted just before starting the stream.
Params that are defined under `networks` do not need to be repeated here (their value will be overwritten)
### `network`
The `network` field specifies the default network to be used with this Substreams. It will help the client choose an endpoint if necessary, and will be used as the default value when applying the values defined under `networks`.
### `networks`
The `networks` allows specifying per-network `params` and `initialBlock` for each module:
```yaml
networks:
mainnet:
initialBlock:
mod1: 200
lib:mod1: 400
params:
mod2: "addr=0x1234"
sepolia:
[...]
```
You can override values for modules imported from other .spkg.
Every local module specified under `networks` must have a value for **each network**
# Packages
Learn about basics of Substreams packages
There are a lot of developers building Substreams and creating very useful transformations that can be reused by other people. Once a Substreams is developed, you can pack it into a Substreams package and share it with other people!
Essentially, a Substreams package is a ready-to-consume binary file, which contains all the necessary dependencies (manifest, modules, protobufs...). The standard file extension for a Substreams package is `.spkg`.
### The Substreams Registry
In order to facilitate how developers share Substreams packages, the Substreams Registry () was created. In the Registry, developers can discover and push Substreams.
For example, the [ERC20 Balance Changes](https://github.com/streamingfast/substreams-erc20-balance-changes) package is stored at the registry ().
### Using a Package
You can easily run a Substreams package by inputting the `.spkg` file in the CLI:
```bash
substreams gui \
erc20-balance-changes@latest \
map_balance_changes \
-e mainnet.eth.streamingfast.io:443 \
--start-block 1397553 \
```
### Creating a Package
You can create a Substreams package by executing the `substreams pack` command in the CLI. Given a Substreams project, you can create a new package from a manifest (`substreams.yaml`):
```bash
substreams pack ./substreams.yaml
```
#### Package Dependencies
Developers can use modules and protobuf definitions from other Substreams packages when `imports` is defined in the manifest.
{% hint style="warning" %}
**Important**: To avoid potential naming collisions, select unique `.proto` filenames and namespaces specifying fully qualified paths.
{% endhint %}
Local Protobuf filenames take precedence over the imported package's proto files.
# Module Types
StreamingFast Substreams module types
## Module types overview
Substreams uses two types of modules, `map` and `store`.
* `map` modules are functions receiving bytes as input and output. These bytes are encoded protobuf messages.
* `store` modules are stateful, saving and tracking data through the use of key-value stores.
### `store` modules
`store` modules write to key-value stores.
{% hint style="info" %}
**Note**: To ensure successful and proper parallelization can occur, `store` modules are not permitted to read any of their own data or values.
{% endhint %}
Stores declaring their own data types expose methods capable of mutating keys within the `store`.
### Core principle usage of stores
* Do not save keys in stores **unless they are going to be read by a downstream module**. Substreams stores are a way to aggregate data, but they are **not meant to be a storage layer**.
* Do not save all transfers of a chain in a `store` module, rather, output them in a `map` and have a downstream system store them for querying.
There are limitations imposed on store usage. Specifically, each key/value entry must be smaller than 10MiB, while a store cannot exceed 3.5GiB total on StreamingFast-hosted endpoints. Keys being strings, each character in the key accounts for 1 byte of storage space.
{% hint style="info" %}
**Note**: The store size limit is a server-side setting. Self-hosted Substreams nodes default to 1GiB and can override it with the tier1 `--substreams-tier1-store-size-limit` flag.
{% endhint %}
### Important store properties
The two important store properties are `valueType,`and `updatePolicy`.
#### `valueType` property
The `valueType` property instructs the Substreams runtime of the data to be saved in the `stores`.
| Value | Description |
| --------------------------------------------- | --------------------------------------------------------------------------------- |
| `bytes` | A basic list of bytes |
| `string` | A UTF-8 string |
| `proto:fully.qualified.Object` | Decode bytes by using the protobuf definition `fully.qualified.Object` |
| `int64` | A string-serialized integer by using int64 arithmetic operations |
| `float64` | A string-serialized floating point value, used for float64 arithmetic operations |
| `bigint` | A string-serialized integer, supporting precision of any depth |
| `bigfloat` **(DEPRECATED): Use `bigdecimal`** | A string-serialized floating point value, supporting precision up to 100 digits |
| `bigdecimal` | A string-serialized decimal value, supporting precision up to 2^63 decimal places |
#### `updatePolicy` property
The `updatePolicy` property determines what methods are available in the runtime.
The `updatePolicy` also defines the merging strategy for identical keys found in two contiguous stores produced through parallel processing.
| Method | Supported Value Types | Merge strategy\* |
| ------------------- | ---------------------------------------- | ------------------------------------------------------------------------------------------------------------------------------------------------------------------------------------------------------------------------------- |
| `set` | `bytes`, `string`, `proto:...` | The last key wins |
| `set_if_not_exists` | `bytes`, `string`, `proto:...` | The first key wins |
| `add` | `int64`, `bigint`, `bigfloat`, `float64` | Values are summed up |
| `min` | `int64`, `bigint`, `bigfloat`, `float64` | The lowest value is kept |
| `max` | `int64`, `bigint`, `bigfloat`, `float64` | The highest value is kept |
| `set_sum` | `int64`, `bigint`, `bigfloat`, `float64` | This type has two methods: `set` to set the value, or `sum` to add the given value to the current value. |
| `append` | `string`, `bytes` | Both keys are concatenated in order. Appended values are limited to 8Kb. Aggregation pattern examples are available in the [`lib.rs`](https://github.com/streamingfast/substreams-uniswap-v3/blob/develop/src/lib.rs#L760) file |
{% hint style="success" %}
**Tip**: All update policies provide the `delete_prefix` method.
{% endhint %}
The merge strategy is **applied during parallel processing**.
* A module has built two partial stores containing keys for segment A, blocks 0-1000, and segment B, blocks 1000-2000, and is prepared to merge them into a complete store.
* The complete store is represented acting as if the processing was done in a linear fashion, starting at block 0 and proceeding up to block 2000.
{% hint style="warning" %}
**Important**\_**:** \_ To preserve the parallelization capabilities of the system, **Substreams is not permitted to read what it has written or read from a `store` actively being written**.
A downstream module is created to read from a store by using one of its inputs to point to the output of the `store` module.
{% endhint %}
### Ordinals
Ordinals allow a key-value store to have multiple versions of a key within a single block. The `store` APIs contain different methods of `ordinal` or `ord`.
For example, the price for a token can change after transaction B and transaction D, and a downstream module might want to know the value of a key before transaction B **and between B and D***.*
{% hint style="warning" %}
**Important**: Ordinals **must be set every time a key is set** and **you can only set keys in increasing ordinal order**, or by using an ordinal equal to the previous.
{% endhint %}
In situations where a single key for a block is required and ordering in the store is not important, the ordinal uses a value of zero.
### `store` modes
You can consume data in one of two modes when declaring a `store` as an input to a module.
#### `get mode`
The `get mode` function provides the module with a key-value store that is guaranteed to be synchronized up to the block being processed. It's possible to query stores by using the `get_at`, `get_last` and `get_first` methods.
{% hint style="success" %}
**Tip:** Lookups are local, in-memory, and **extremely high-speed**.
{% endhint %}
The definition of `store` method behavior is:
* The `get_last` method is the fastest because it queries the store directly.
* The `get_first` method first goes through the current block's deltas in reverse order, before querying the store, in case the key being queried was mutated in the block.
* The `get_at` method unwinds deltas up to a specific ordinal, ensuring values for keys set midway through a block are still reachable.
**Example:**
Consider that you have a store with the following values:
```rust
let store = StoreUSDPrice {
Block: #1000,
Deltas: [
Ord: 1, Key: "usd", Type: UPDATE, OldValue: 1.45, NewValue: 1.54,
Ord: 2, Key: "usd", Type: DELETE, OldValue: 1.54, NewValue: ,
Ord: 3, Key: "usd", Type: INSERT, OldValue: , NewValue: 1.47,
Ord: 4, Key: "usd", Type: UPDATE, OldValue: 1.47, NewValue: 1.65,
]
}
```
* `store.get_first() == "1.45"`: you get the *OldValue* of the first delta, which is equivalent to `StoreUSDPrice(Block #999).get_last()`.
* `store.get_last() == "1.65"`: you get the *NewValue* of the last delta which is the state at end of Block #1000.
* `store.get_at(1) == "1.54"`: you get the *NewValue* of the delta with *Ord == 1*, or the closest ordinal if *Ord == 1* does not exist.
The `store.get_at(1)` is executed as follows:
* Start with value = get\_last() (1.65)
* Iterate ord 4, value = delta.OldValue (1.47)
* Iterate ord 3, value = delta.OldValue ()
* Iterate ord 2, value = delta.OldValue (1.54)
* Iterate ord 1, ordinal == 1, return delta.NewValue (1.54)
#### `deltas mode`
`deltas` mode provides the module with **all the changes** occurring in the source `store` module. Updates, creates, and deletes of the keys mutated during the block processing become available.
{% hint style="info" %}
**Note:** When a `store` is set as an input to the module, it is read-only and you cannot modify, update or mutate them.
{% endhint %}
{% hint style="info" %}
**Note:** The deltas for a `set_sum` store type are always of type `bytes`, because the values are prepended with either "sum:" or "set:", depending on the method used.
{% endhint %}
# Module Inputs
StreamingFast Substreams module inputs
## `inputs` overview
Modules receive `inputs` of three types:
* `source`
* `map`
* `store`
* `params`
## Input type `source`
An `inputs` of type `source` represents a chain-specific, Firehose-provisioned protobuf object. Learn more about the supported protocols and their corresponding message types in [chains and endpoints](/reference-material/chain-support/chains-and-endpoints).
{% hint style="info" %}
**Note**: The different blockchains reference different `Block` objects. For example, Solana references its `Block` object as `sf.solana.type.v1.Block`. Ethereum-based Substreams modules specify `sf.ethereum.type.v2.Block.`
{% endhint %}
The `source` `inputs` type \_\_ is defined in the Substreams manifest. It is important to specify the correct `Block` object for the chain.
```yaml
modules:
- name: my_mod
inputs:
- source: sf.ethereum.type.v2.Block
```
#### `Clock` object
The `sf.substreams.v1.Clock` object is another source type available on any of the supported chains.
The `sf.substreams.v1.Clock` represents:
* `Block` `number`
* `Block` `ID`
* `Block` `timestamp`
## Input type `params`
An `inputs` of type `params` represents a parameterizable module input. Those parameters can be specified either:
* in the `params` section of the manifest,
* on the command-line (using `substreams run -p` for instance),
* by tweaking the protobuf objects directly when consuming from your favorite language
See the [Manifest's `params` manifest section of the Reference & specs](/reference-material/manifest-and-components/manifests#params) for more details.
## Input type `map`
An input of type `map` represents the output of another `map` module. It defines a parent-child relationship between modules.
The object's type is defined in the [`output.type`](https://docs.substreams.dev/reference-material/manifest-and-components/pages/idKkQS8zf5Sin5BFEUJn#modules-.output) attribute of the `map` module.
{% hint style="warning" %}
**Important**: The graph built by input dependencies is a Directed Acyclic Graph, which means there can be no circular dependencies.
{% endhint %}
Define the `map` input type in the manifest and choose a name for the `map` reflecting the logic contained within it.
{% code title="manifest excerpt" %}
```yaml
inputs:
- map: my_map
```
{% endcode %}
Learn more about `maps` in the [Modules](/reference-material/core-concepts/modules) section.
## Input type `store`
A `store inputs` type represents the state of another `store` used by the Substreams module being created.
The developer defines the `store` `inputs` type in the Substreams manifest and gives the `store` a descriptive name that reflects the logic contained within it, similar to a `map`.
Store modules are set to `get` mode by default:
{% code title="manifest excerpt" %}
```yaml
inputs:
- store: my_store # defaults to mode: get
```
{% endcode %}
Alternatively, set `stores` to `deltas` mode by using:
{% code title="manifest excerpt" %}
```yaml
inputs:
- store: my_delta_store
mode: deltas
```
{% endcode %}
### Store access `mode`
Substreams uses two types of `mode` for modules:
* `get`
* `delta`
### Store constraints
* A `store` can only receive `inputs` as read-only.
* A `store` cannot depend on itself.
### `get` mode
`get` mode provides a key-value store readily queryable and guaranteed to be in sync with the block being processed.
{% hint style="success" %}
**Tip**: `get` `mode` is the default mode for modules.
{% endhint %}
### `delta` mode
`delta` `mode` modules are [protobuf objects](https://buf.build/streamingfast/substreams/docs/main:sf.substreams.v1#sf.substreams.v1.StoreDeltas) containing all the changes occurring in the `store` module available in the same block.
`delta` mode enables you to loop through keys and decode values mutated in the module.
#### `store` `deltas`
The protobuf model for `StoreDeltas` is defined by using:
{% code overflow="wrap" %}
```protobuf
message StoreDeltas {
repeated StoreDelta deltas = 1;
}
message StoreDelta {
enum Operation {
UNSET = 0;
CREATE = 1;
UPDATE = 2;
DELETE = 3;
}
Operation operation = 1;
uint64 ordinal = 2;
string key = 3;
bytes old_value = 4;
bytes new_value = 5;
}
```
{% endcode %}
# Module Outputs
StreamingFast Substreams module outputs
## Output overview
Substreams `map` modules support a single `output`. The `output` must be a protobuf populated by data acquired inside the `map` module. If the module intends to provide a basic `output` type of a single value, such as a `String` or `bool`, a protobuf is still required. The single value needs to be wrapped in a protobuf for use as the `output` value from a `map` module.
{% hint style="info" %}
**Note:** `store` modules **cannot** define an `output`.
{% endhint %}
An `output` object has a `type` attribute defining the `type` of the `output` for the `map` module. The `output` definition is located in the Substreams manifest, within the module definition.
```yaml
output:
type: proto:eth.erc721.v1.Transfers
```
# Module Handlers
StreamingFast Substreams module handlers
## Module handlers overview
To begin creating the custom module handlers, initialize a new Rust project by using the `cargo` `init` command.
```bash
# Creates a empty Rust project suitable for WASM compilation
cargo init --lib
```
Update the generated `Cargo.toml` file by using:
{% code title="Cargo.toml" overflow="wrap" lineNumbers="true" %}
```rust
[package]
name = "substreams-template"
version = "0.1.0"
description = "Substreams template demo project"
edition = "2021"
repository = "https://github.com/streamingfast/substreams-template"
[lib]
name = "substreams"
crate-type = ["cdylib"]
[dependencies]
ethabi = "17"
hex-literal = "0.3.4"
buffa = "0.9.2"
buffa-types = "0.9.2"
# Use latest from https://crates.io/crates/substreams
substreams = "0.8.0"
# Use latest from https://crates.io/crates/substreams-ethereum
substreams-ethereum = "0.12.0"
# Required so ethabi > ethereum-types build correctly under wasm32-unknown-unknown
[target.wasm32-unknown-unknown.dependencies]
getrandom = { version = "0.2", features = ["custom"] }
[build-dependencies]
anyhow = "1"
substreams-ethereum = "0.12.0"
[profile.release]
lto = true
opt-level = 's'
strip = "debuginfo"
```
{% endcode %}
You compile the Rust code into [WebAssembly (WASM)](https://webassembly.org/), a binary instruction format that runs in a virtual machine. The compilation process generates a .so file.
### **`Cargo.toml` configuration file breakdown**
Build the Rust dynamic system library after the `package` by using:
{% code title="Cargo.toml excerpt" %}
```toml
...
[lib]
crate-type = ["cdylib"]
```
{% endcode %}
The next definition in the `Cargo.toml` configuration file is for `dependencies`.
{% hint style="info" %}
**Note**: Module handlers compile down to a WASM module. Explicitly specify the target`asm32-unknown-unknown` by using `[target.wasm32-unknown-unknown.dependencies]`.
{% endhint %}
#### `ethabi`
The [`ethabi` crate ](https://crates.io/crates/ethabi)is used to decode events from the application binary interface (ABI) and is required for `substreams-ethereum` ABI capabilities.
#### `hex-literal`
The [`hex-literal` crate ](https://crates.io/crates/hex-literal)is used to define bytes from hexadecimal string literals at compile time.
#### `buffa`
The [`buffa` crate](https://crates.io/crates/buffa) is the protobuf implementation your generated types are built on, and `buffa-types` provides the well-known types such as `Timestamp` and `Any`. Naming `buffa` in `[dependencies]` is also what tells `substreams build` to generate buffa bindings rather than prost ones. Projects on `substreams` 0.7 and below use `prost` instead; see [Migrating from prost to buffa](/reference-material/migrating-to-buffa).
#### `substreams`
The [`substreams` crate](https://docs.rs/substreams/latest/substreams/) offers all the basic building blocks for the module handlers.
#### `substreams-ethereum`
The [`substreams-ethereum` crate](https://crates.io/crates/substreams-ethereum-core) offers all the Ethereum constructs including blocks, transactions, eth, and useful ABI decoding capabilities.
Because code is being built by WASM output it's necessary to configure Rust to match the correct architecture. Create and add a `rust-toolchain.toml` configuration file at the root of your Substreams directory.
### Rust toolchain
{% code title="rust-toolchain.toml" overflow="wrap" lineNumbers="true" %}
```toml
[toolchain]
channel = "1.65"
components = [ "rustfmt" ]
targets = [ "wasm32-unknown-unknown" ]
```
{% endcode %}
Build the code by using:
```bash
cargo build --target wasm32-unknown-unknown --release
```
### **Rust build target**
When running `cargo build` the target is set to `wasm32-unknown-unknown`, which is important because it specifies the goal is to generate compiled WASM code.
To avoid having to specify the target `wasm32-unknown-unknown` for every `cargo` command, create a `config.toml` configuration file in the `.cargo` directory at the root of the Substreams project. The `config.toml` configuration file allows the target to be set automatically for all `cargo` commands.
The content for the `config.toml` configuration file is:
{% code title=".cargo/config.toml" %}
```toml
[build]
target = "wasm32-unknown-unknown"
```
{% endcode %}
The `config.toml` configuration file updates the default `cargo build` command to `cargo build --target wasm32-unknown-unknown` eliminating the need to specify the target manually every time you build.
### ABI generation
The [`substreams-ethereum` crate](https://crates.io/crates/substreams-ethereum) offers an [`Abigen`](https://docs.rs/substreams-ethereum-abigen/latest/substreams_ethereum_abigen/build/struct.Abigen.html) API to generate Rust types from a smart contract's ABI.
Place the contract's [ABI JSON file](https://github.com/streamingfast/substreams/blob/develop/docs/.gitbook/assets/erc721.json) in the Substreams project in the `abi` directory.
### **Rust build script**
Before building a package, Cargo compiles a build script into an executable if it has not already been built. The build script runs as part of the build process responsible for performing a variety of tasks.
To cause Cargo to compile and run a script before building a package, place a file called `build.rs` in the root of the package.
Create a `build.rs` build script file in the root of the Substreams project by using:
{% code title="build.rs" overflow="wrap" lineNumbers="true" %}
```rust
use anyhow::{Ok, Result};
use substreams_ethereum::Abigen;
fn main() -> Result<(), anyhow::Error> {
Abigen::new("ERC721", "abi/erc721.json")?
.generate()?
.write_to_file("src/abi/erc721.rs")?;
Ok(())
}
```
{% endcode %}
Run the build script to generate the ABI directory and files.
```bash
cargo build --target wasm32-unknown-unknown --release
```
Create a `mod.rs` export file in the ABI directory, which is created by the Rust build process. The `mod.rs` export file is responsible for exporting the generated Rust code.
{% code title="src/abi/mod.rs" lineNumbers="true" %}
```rust
pub mod erc721;
```
{% endcode %}
You're now ready to [write the module handlers](/reference-material/core-concepts/modules).
# Indexes
When you execute your Substreams for the first time, you are reading the data stored in the block files of the Substreams provider.
To improve the performance, the data accessed by the Substreams is cached, so that the second or the third time that you run the Substreams, you can read from the cache, thus saving time and money. This behavior is illustrated in the following diagram.
This data caching is done implicitly every time you run a Substreams for the first time, but Substreams also allows you to explicitly create an additional index on top of your data.
### Indexes
Substreams has recently introduced the concept of *index modules*. An index module is a module that has been pre-cached for some specific data. Let's see it with an example!
Consider that you want to retrieve all the Ethereum events matching a specific address. Usually, in every block, you would iterate through all the logs looking for those where `log.address == ADDRESS`.
With indexing, you could have a pre-cached module with the information of all the event addresses in the block. Instead of reading the full Ethereum block, you can search in the events index (event cache) and avoid decoding the data of those blocks that do not contain events you are interested in.
In the following diagram, you can see three blocks with their corresponding data. Consider that you want to retrieve all the events where `log.address == 0xcd2...`. Without an index, you would have to go through the data of every block, but with an index, you can skip the blocks that do not contain the event that you want.
On the other hand, in an index module, the events of every block are pre-cached in a special store, so when you look for events where `log.address == 0xcd2...`, you can simply search in the index store of the block. If the event is contained within the block, then you decode the data. If not, you skip it.
In the following diagram, `Block 1` and `Block 2` contain an event where `log.address == 0xcd2...`, but `Block 3` does not.
#### Create a Custom Index
Anyone can create an index module. All you need to do is create a Substreams with a module that outputs a list of tags that are contained in each block. For example, let's take a look at the `index_events` module from the [Ethereum Foundational Modules GitHub repository](https://github.com/streamingfast/substreams-foundational-modules/blob/develop/ethereum/common/substreams.yaml#L51).
A possible flow to use an index module to index all the events in a block:
1. You create a module, `all_events`, which receives a `Block` object as an input and outputs an `Events` object, with all the events of the block.
2. You create the actual index module, `index_events`, which receives the `Events` object of the block as an input and outputs a `Keys` object, containing the `address` and `signature` fields of every event you want to track. For every block, this `Keys` object is cached, and then used to verify if a given event is present in the block before decoding the actual data of the block.
3. You create a module that uses the index module (i.e. filters the blocks based on a query before processing them), `filtered_events`, which receives the `index_events` module as an input plus a string with the event addresses that the Substreams must filter. Given this string of addresses, Substreams checks if the event address is contained on a given block before actually decoding the data of the block. You can use logical operators (`and` and `or`) to select what events to search.
This previous flow is just an example of a preferred way to use index modules, but it is totally up to you to decide the structure of your Substreams. For example, instead of having a separate module, `all_events`, which extracts all the events of the block, you can receive the raw `Block` object directly on the `index_events` module.
The definition of the `index_events` module looks like any other Substreams module, but it is a special *kind*, `kind: blockIndex` and outputs a special data model, `sf.substreams.index.v1.Keys`. The `Keys` object contains a list of labels that will be used to identify the content of that block.
```yaml
- name: index_events
kind: blockIndex
inputs:
- map: all_events
output:
type: proto:sf.substreams.index.v1.Keys
```
The `index_events` module is defined by the [following function](https://github.com/streamingfast/substreams-foundational-modules/blob/develop/ethereum/common/src/events.rs#L36):
```rust
#[substreams::handlers::map]
fn index_events(events: Events) -> Result { // 1.
let mut keys = Keys::default();
events.events.into_iter().for_each(|e| { // 2.
if let Some(log) = e.log {
evt_keys(&log).into_iter().for_each(|k| { // 3.
keys.keys.push(k);
});
}
});
Ok(keys)
}
pub fn evt_keys(log: &substreams_ethereum::pb::eth::v2::Log) -> Vec {
let mut keys = Vec::new();
if log.topics.len() > 0 {
let k_log_sign = format!("evt_sig:0x{}", Hex::encode(log.topics.get(0).unwrap()));
keys.push(k_log_sign); // 4.
}
let k_log_address = format!("evt_addr:0x{}", Hex::encode(&log.address));
keys.push(k_log_address); // 5.
keys
}
```
1. Receives all the events of the block as input (note that this `Events` object is coming from the `all_events` module, which extracts all the events from the `Block` object). Outputs a `Keys` object with all the event addresses of the block.
2. Iterate over all the events in the block.
3. For every event, call the `evt_keys` function.
4. Add the `address` of the event to the keys of the block.
5. Add the `signature` of the event to the keys of the block.
The keys of the block, defined by the `Keys` object, are a list of strings defining the parts of the event that you want to use for searching. For example:
```
Block 32443
--------------------------
keys = {'evt_addr:0xa34', 'evt_addr:0xba7', 'evt_addr:0x99a'}
```
If you're looking for an event with address `0xba7`, when Substreams gets to this block, it will know beforehand that the block contains that event. If you're looking for an event with address `0xaa1`, then Substreams knows beforehand it's not contained in the block and can safely skip it.
# Keys in Stores
Using keys in stores
We use store modules to aggregate the data in the underlying key-value storage. It is important to have a system for organizing your keys to be able to efficiently retrieve, filter and free them when needed.
In most cases, you will encode data into your keys into segmented parts, adding a prefix as namespace for example `user` and `` joined together using a separator. Segments in a key are conventionally joined with `:` as a separator.
Here are some examples,
* `Pool:{pool_address}:volumeUSD` - `{pool_address}` pool total traded USD volume
* `Token:{token_addr}:volume` - total `{token_addr}` token volume traded
* `UniswapDayData:{day_id}:volumeUSD` - `{day_id}` daily USD trade volume
* `PoolDayData:{day_id}:{pool_address}:{token_addr}:volumeToken1` - total `{day_id}` daily volume of `{token_addr}` token that went through a `{pool_address}` pool in token1 equivalent
In the example of a counter store below, we increment transaction counters for different metrics that we could use in the downstream modules:
```rust
#[substreams::handlers::store]
pub fn store_total_tx_counts(clock: Clock, events: Events, output: StoreAddBigInt) {
let timestamp_seconds = clock.timestamp.seconds;
let day_id = timestamp_seconds / 86400;
let hour_id = timestamp_seconds / 3600;
let prev_day_id = day_id - 1;
let prev_hour_id = hour_id - 1;
for event in events.pool_events {
let pool_address = &event.pool_address;
let token0_addr = &event.token0;
let token1_addr = &event.token1;
output.add_many(
event.log_ordinal,
&vec![
format!("pool:{pool_address}"),
format!("token:{token0_addr}"),
format!("token:{token1_addr}"),
format!("UniswapDayData:{day_id}"),
format!("PoolDayData:{day_id}:{pool_address}"),
format!("PoolHourData:{hour_id}:{pool_address}"),
format!("TokenDayData:{day_id}:{token0_addr}"),
format!("TokenDayData:{day_id}:{token1_addr}"),
format!("TokenHourData:{hour_id}:{token0_addr}"),
format!("TokenHourData:{hour_id}:{token1_addr}"),
],
&BigInt::from(1 as i32),
);
}
}
```
In the downstream modules consuming this store, you can query the store by key in `get` mode. Or, an even more powerful approach would be to filter needed store deltas by segments. `key` module of the `substreams` crates offers several helper functions. Using these functions you can extract the first/last/nth segment from a key:
```rust
for delta in deltas.into_iter() {
let kind = key::first_segment(delta.get_key());
let address = key::segment_at(delta.get_key(), 1);
// Do something for this kind and address
}
```
`key` module also provides corresponding `try_` methods that don't panic:
* `first_segment` & `try_first_segment`
* `last_segment` & `try_last_segment`
* `segment_at` & `try_segment_at`
For a full example see [Uniswap V3 Substreams](https://github.com/streamingfast/substreams-uniswap-v3/blob/ca90fe3908a76905b43e05f0522e1e9338d88972/src/lib.rs#L1139-L1163)
## Links
* [Key module documentation](https://docs.rs/substreams/latest/substreams/key/index.html)
# Parameterized Modules
Substreams allows you to pass parameters to your modules by specifying them in the manifest.
### Parameterization of a Factory contract
It's quite common for a smart contract to be deployed on different networks or even by different dApps within the same network. Uniswap Factory smart contract is a good example of that.
When running Substreams for a dApp, you need to know the smart contract deployment address and for obvious reasons, this address will be different for each deployment.
Instead of hard-coding the address in the Substreams binary, you can customize it without having to rebuild or even repackage the Substreams package. The consumer can then just provide the address as a parameter.
First, you need to add the `params` field as an input. Note that it's always a string and it's always the first input for the module:
```yaml
modules:
- name: map_pools_created
kind: map
inputs:
- params: string
- source: sf.ethereum.type.v2.Block
output:
type: proto:uniswap.types.v1.Pools
params:
map_params: 1f98431c8ad98523631ae4a59f267346ea31f984
```
You can specify the default value directly in the manifest. In this case, we use `0x1f98431c8ad98523631ae4a59f267346ea31f984` - the deployment address for UniswapV3 contract on Ethereum Mainnet.
Handling the parameter in the module is easy. The module handler receives it as a first input parameter and you can use it to filter transactions instead of the hard-coded value:
```rust
#[substreams::handlers::map]
pub fn map_pools_created(params: String, block: Block) -> Result {
let factory_address = Hex::decode(params).unwrap();
Ok(Pools {
pools: block
.events::(&[&factory_address])
.filter_map(|(event, log)| {
// skipped: extracting pool information from the transaction
Some(Pool {
address,
token0,
token1,
..Default::default()
})
})
.collect(),
})
}
```
To pass the parameter to the module using `substreams` CLI you can use `-p` key:
```bash
substreams gui -e $SUBSTREAMS_ENDPOINT map_pools_created -t +1000 -p map_pools_created="1f98431c8ad98523631ae4a59f267346ea31f984"`
```
#### Documenting parameters
It's always a good idea to document what the params represent and how they are structured, so the consumers of your modules know how to properly parameterize them. You can use `doc` field for the module definition in the manifest.
```yaml
modules:
- name: map_pools_created
kind: map
inputs:
- source: sf.ethereum.type.v2.Block
- params: string
output:
type: proto:uniswap.types.v1.Pools
doc: |
Params contains Uniswap factory smart contract address without `0x` prefix, i.e. 1f98431c8ad98523631ae4a59f267346ea31f984 for Ethereum Mainnet
```
### Reusing module with different parameters
You can reuse the same module with different parameters by duplicating them (with the `use:` keyword) and assigning values in the `params` section of the manifest.
```
imports:
ethereum_common: ethereum_common@v0.3.3
modules:
- name: filtered_logs_one
use: ethereum_common:filtered_logs
- name: filtered_logs_two
use: ethereum_common:filtered_logs
params:
filtered_logs_one: "address=0xa0b86a33e6776e1b1c4b0b8b8b8b8b8b8b8b8b8b" # lowercase is important! this is an exact string match
filtered_logs_two: "address=0x1234567890aaaabcccddeeefffffffffffffffff"
```
While this example could be achieved simply with the parameter `address=0xa0b86a33e6776e1b1c4b0b8b8b8b8b8b8b8b8b8b||address=0x1234567890aaaabcccddeeefffffffffffffffff`, there are some scenarios where you will need this level of flexibility.
### Advanced parameters
Sometimes you may need to use multiple parameters for a module. To pass multiple parameters, you can encode them as a URL-encoded query string, i.e. `param1=value1¶m2=value2`.
Suppose you want to track transfers to/from a certain address exceeding a certain amount of ETH. Your module manifest could look like this:
```yaml
modules:
- name: map_whale_transfers
kind: map
inputs:
- params: string
- source: sf.ethereum.type.v2.Block
output:
type: proto:Transfers
params:
map_params: address=aaa..aaa&amount=100
```
Our module gets a params string with two parameters: `address` and `amount`.
In your module handler, you can decode your parameters using one of the URL decoding crates such as `serde_qs`, `serde_urlencoded` or your own helper functions. Here's an example using `serde_qs`:
```rust
#[derive(Debug, Deserialize)]
struct Params {
address: String,
amount: u64,
}
#[substreams::handlers::map]
pub fn map_whale_transfers(params: String, block: Block) -> Result {
let query: Params = serde_qs::from_str(params.as_str()).unwrap();
log::info!("Tracking transfers for address: {} of more than {} ETH", query.address, query.amount);
// filter transfers by address and amount
}
```
Sometimes parameters can be optional, i.e. you want to track all transfers rather than a specific address. Decoding will look like this in that case:
```rust
#[derive(Debug, Deserialize)]
struct QueryParams {
address: Option,
amount: u64,
}
#[substreams::handlers::map]
pub fn map_whale_transfers(params: String, block: Block) -> Result {
let query: QueryParams = serde_qs::from_str(params.as_str()).unwrap();
if query.address.is_none() {
log::info!("Tracking all of more than {} ETH", query.amount);
}
else {
log::info!("Tracking transfers for address: {} of more than {} ETH", query.address, query.amount);
}
}
```
You can even pass a vector of addresses to track multiple specific whales in our example:
```rust
#[derive(Debug, Deserialize)]
struct QueryParams {
address: Vec,
amount: u64,
}
#[substreams::handlers::map]
pub fn map_whale_transfers(params: String, block: Block) -> Result {
let query: QueryParams = serde_qs::from_str(params.as_str()).unwrap();
log::info!("Tracking transfers for addresses: {:?} of more than {} ETH", query.address, query.amount);
}
```
Depending on the crate you use to decode params string, you can pass them to Substreams CLI like this for example:
```bash
substreams gui map_whale_transfers -p map_whale_transfers="address[]=aaa..aaa&address[]=bbb..bbb&amount=100"
```
### Parameters Per Network
It is also possible to specify parameters per network. For example, consider that you want to specify a specific parameter for Ethereum and a different one for Solana.
The syntax to specify the parameters per network in your manifest uses the top-level `networks` block.
```yaml
...
networks:
:
params:
: “value”
...
```
For example, if you want to specify a parameter for the `my-module` module on Ethereum Mainnet:
```yaml
...
networks:
mainnet:
params:
my-module: “value”
...
```
# Dynamic Data Sources
Dynamic data sources and Substreams
Using Factory contract is a quite common pattern used by dApps, when the main smart contract deploys and manages multiple identical associated contracts, i.e. one smart contract for each Uniswap or Curve swap pool.
When developing traditional subgraphs, you could use [data source templates](https://thegraph.com/docs/en/developing/creating-a-subgraph/#data-source-templates) approach to keep track of such dynamically deployed smart contracts.
Here's how you can achieve that with Substreams.
We'll be using a Uniswap V3 example where the Factory creates and deploys its smart contract for each pool.
You start with a simple map module that emits all pool creation events:
```yaml
- name: map_pools_created
kind: map
inputs:
- source: sf.ethereum.type.v2.Block
output:
type: proto:uniswap.types.v1.Pools
```
```rust
#[substreams::handlers::map]
pub fn map_pools_created(block: Block) -> Result {
Ok(Pools {
pools: block
.events::(&[&UNISWAP_V3_FACTORY])
.filter_map(|(event, log)| {
// skipped: extracting pool information from the transaction
Some(Pool {
address,
token0,
token1,
..Default::default()
})
})
.collect(),
})
}
```
We can now take that map module output and direct these pool creation events into a Substreams key-value store using a store module:
```yaml
- name: store_pools_created
kind: store
updatePolicy: set
valueType: proto:uniswap.types.v1.Pool
inputs:
- map: map_pools_created
```
```rust
#[substreams::handlers::store]
pub fn store_pools_created(pools: Pools, store: StoreSetProto) {
for pool in pools.pools {
let pool_address = &pool.address;
store.set(pool.log_ordinal, format!("pool:{pool_address}"), &pool);
}
}
```
Above we are using `pool:{pool_address}` as a key to store the pool information. Eventually, our store will contain all Uniswap pools. Now, in the downstream modules, we can easily retrieve our pool from the store whenever we need it.
```yaml
- name: map_events
kind: map
inputs:
- source: sf.ethereum.type.v2.Block
- store: store_pools_created
output:
type: proto:uniswap.types.v1.Events
```
```rust
#[substreams::handlers::map]
pub fn map_events(block: Block, pools_store: StoreGetProto) -> Result {
let mut events = Events::default();
for trx in block.transactions() {
for (log, call_view) in trx.logs_with_calls() {
let pool_address = &Hex(&log.address).to_string();
let pool = match pools_store.get_last(format!("pool:{pool_address}")) {
Some(pool) => pool,
None => { continue; }
};
// use the pool information from the store
}
}
Ok(events)
}
```
Here we use `pools_store.get_last()` method to get the pool from the store by its smart contract address. Once we have it, we can use that information to analyze the swap transaction and emit the events.
Alternatively, we could make RPC calls to get the pool details from an RPC node, but that would be extremely inefficient considering that we would need to make RPC calls for millions of such events. Using a store will be much faster.
For a real-life application of this pattern see [Uniswap V3 Substreams](https://github.com/streamingfast/substreams-uniswap-v3)
## Links
* [Substreams Sink Entity Changes](https://github.com/streamingfast/substreams-sink-entity-changes)
---
[Next Page](https://docs.substreams.dev/llms-full.txt/1)